Sunday, 31 January 2010

A thank you card for the Stamp With Us challenge


Our challenge this week over at Stamp With Us is on the theme of:

Thank You

I've used the glorious Greenhouse Garden set for my card. This stamp set is currently helping the people of Haiti. Stampin' Up! are donating £1 from every set sold from now until 28 February to the Red Cross International Response Fund. So you can treat yourself and help out at the same time and you'd be half way to earning a free Sale-a-bration stamp set into the bargain. Email me to place your order.


Recipe
Stamp sets: Greenhouse Garden, Seeing Spots
Cardstock: Barely Banana, Close to Cocoa, Chocolate Chip, Whisper White
Ink: Summer Sun, Chocolate Chip, Close to Cocoa
Punches: Eyelet Edge, 1-3/8" Circle, 1-1/4" Circle, 3/4" Circle
Narrow Grosgrain Ribbon: Very Vanilla
Other: Pretties Kit

The medium flower is stamped in Summer Sun and then the Stamp-a-ma-jig used to position the detail stamp over the top using Chocolate Chip. The same combination is then used for the dinky flower. All flowers are cut out and mounted on punched circles using dimensionals. Half-back pearls from the pretties kit are used for the flower centres. The Cocoa background is stamped using just the detail stamp with Cocoa ink on Cocoa card. As the card already has quite a lot of height from the raised flowers and pearls, I've stuck the circles flat to the border.

Enjoy the rest of your weekend.

Sara xx

Friday, 29 January 2010

A wheely good make and take card for everyone to try


Last week I gave a workshop to another lovely bunch of ladies. They should have got their goodies by now, so I thought I'd share the make and take card we all made on the night. Our hostess had asked if they could see the Stampin' Around wheels and have a go at heat embossing, so I designed the make and take around those requests.


Recipe
Stamp sets: It's Beautiful, Flight of the Butterfly, Whimsical Words
Cardstock: Tempting Turquoise, Taken With Teal, Basic Black, More Mustard
Ink: Versamark, Not Quite Navy
Punches: Scallop Edge, Butterfly
Other: Silver EP, Silver Elastic Cord

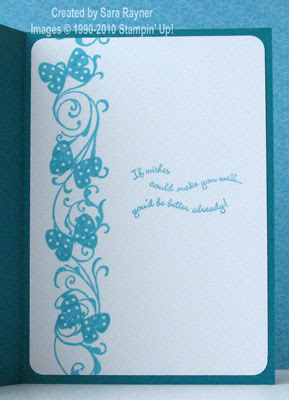
We also stamped an insert using the narrower Baroque Border wheel and added a Curvy Verse.

Fancy hosting your own workshop? You provide the guests and a few refreshments and I do all the work, sound fair? Just email me to book a date.

Have a great weekend.

Sara

Thursday, 28 January 2010

My first christmas card this year uses the Happy Moments Sale-a-bration set


This is a case of my own card from the bloghop on Sunday but I thought I'd show you how this versatile, free, stamp set is ideal for Christmas as well as birthdays.

I also created it for the ILWS January Christmas Card challenge. This is a laid back challenge with no deadline but the idea is to help you create all the Christmas cards you'll need, so you're not in a last minute rush when December rolls around. January's challenge is a colour one, using Black, White and Red. I made four identical versions of this card to start my stock off.


Recipe
Stamp sets: Happy Moments, Season of Joy (sentiment)
Cardstock: Real Red, Basic Black, Whisper White
DSP: Ski Slope (retired)
Ink: Black Stazon, Versamark, Markers, Real Red (envelope)
Punches: Scallop Oval, Large Oval
Narrow Grosgrain Ribbon: Real Red
Other: Black EP, Silver Elastic Cord

You can see that I'm still using up some of my older DSP but you could use the Real Red papers from Merry Moments or Jackpot if you don't have Ski Slope.

Again the present opens up to reveal a little hidden message:


I used the sentiment from the Loads of Love stamp set for the hidden message. I also finished off the inside of the card with a stamped insert.


Recipe (inside)
Stamp set: Baroque Border
Cardstock: Whisper White
Ink: Real Red

Have you started your Christmas cards yet?

Sara xx

Tuesday, 26 January 2010

A cased card for my MILs birthday and her latest stamping results


Did you enjoy our bloghop on Sunday? From the hits to our sites, I'm guessing you did. (Just in case you missed it you can always scroll down to Sunday's post to catch up). There were some fantastic creations and I can't wait for a bit of free time to CASE some of them. I'm just glad that I managed to get mine finished on time and didn't let the others down. It was pretty touch and go at one point. I'd been away in Hastings all week and then on Friday night I was out presenting a workshop (I'll share more of that later in the week), then Saturday morning I was busy finishing my MIL's birthday card before she and my FIL arrived to spend the afternoon with us.

Thankfully I've got my MIL hooked on crafting too and after a delicious fish and chip lunch (we're lucky enough to have an award winning chippy just a short drive away), we spent the afternoon crafting while DH and FIL played on the Wii and watched the football. A happy bunch all round.

The card I made for my MIL is the one I was lucky enough to win as a project kit with instructions, from Elaine's Creative Musings on another recent bloghop.


Recipe
Stamp sets: On a Pedestal, Queue Up (Level 3 hostess set), Whimsical Words (SAB)
Cardstock: Almost Amethyst, Pretty in Pink, Elegant Eggplant, Whisper White
Ink: Elegant Eggplant, Markers
DSP: Tea Party
Taffeta Ribbon: Pretty in Pink
Gingham Ribbon: Light Pink
Narrow Grosgrain Ribbon: Whisper White, Elegant Eggplant
Brads: Soft Subtles, Square Fire

Now my MIL mainly loves 3d items. She isn't so keen on stamping so far because she reckons her stamping never works out properly. I did talk her into giving it another go though on Saturday and she made this card:


Recipe
Stamp sets: Whimsical Wings (level 2 hostess set), Oval All
Cardstock: Close to Cocoa, Ruby Red, Whisper White
Ink: Ruby Red, Markers
Punches: Scallop Oval, Large Oval
Taffeta Ribbon: Chocolate Chip

I'm not sure where she's coming from. I think her stamping is great. Don't you just love her robin? So cute.

Thanks for stopping by.

Sara xx

Sunday, 24 January 2010

Join us on a bloghop featuring the Sale-a-bration stamp sets

Hi and welcome to our Sale-a-bration bloghop.

If you're starting here then grab a cuppa and make yourself comfy cos we've got lots to share with you ;-) There are 15 blogs to visit in this loop and 15 to visit in loop 2. You'll know when you've completed a loop when you end up back where you started.

If you've joined me from Debbi's Taylor-made Cards (aren't her bloghop creations marvelous), then welcome and thanks for stopping by on your way through our bloghop wonderland.

Don't forget that you get one of four exclusive, free, Sale-a-bration stamp sets with every £45 purchase. With no limit on how many you can get, this is the best possible time to treat yourself to that new stamp set you've had your eye on, or simply stock up on the essentials; cardstock, adhesive, inks etc. Just email me to place an order.

You may wish to consider supporting the Haitian Disaster Relief by adding the Greenhouse Garden set to your Sale-a-bration order. From now until 28 February, 2010, £1 from every Greenhouse Garden stamp set will be donated to the American Red Cross International Response Fund. The Red Cross is already well established on Haiti and this money will be used to provide immediate relief and long-term support through supplies, technical assistance and other support to those in need.

Now, on to the crafting ...


Recipe
Stamp sets: Happy Moments, Oval All
Cardstock: Tempting Turquoise, More Mustard, Whisper White
Ink: Black Stazon, Taken with Teal, Markers
DSP: Tea Party
Punches: Scallop Oval, Large Oval
Other: Gold Elastic Cord

For this card I stamped the stack of presents and then folded the card at the base before cutting them out. The elastic cord was wrapped around and then tied shut. This allows the present stack to be opened up for a tiny hidden message.


Next I put together a simple set of cards to showcase the Vintage Labels and show just how easy it is to make quick cards with them. Each frame is matched with a sentiment from the same free Sale-a-bration set and a different jumbo wheel used to create the background.


Recipe
Stamp sets: Vintage Labels, Whimsy, It's Beautiful, Leaves a la Carte
Cardstock: Whisper White, Brocade Blue, Bashful Blue, Regal Rose, Pretty in Pink, Old Olive, Certainly Celery
Ink: Brocade Blue, Bashful Blue, Regal Rose, Pretty in Pink, Old Olive, Certainly Celery
Punches: Scallop Circle, Eyelet Border, Scallop Edge
Striped Grosgrain Ribbon: Bashful Blue, Pretty in Pink, Old Olive

And finally from me, here's a card using the Good Neighbors set:

Recipe
Stamp set: Good Neighbors
Cardstock: Certainly Celery, Always Artichoke, Old Olive
Ink: Old Olive, Versamark, Markers
Wide Grosgrain Ribbon: Old Olive
Narrow Grosgrain Ribbon: Certainly Celery
Punch: Scallop Edge
Other: White EP, Small Circle Metal Edge Tag

I used the Stamp-a-ma-jig to position all the separate elements, houses, roofs, trees and clouds. The background is all stamped in Old Olive on Certainly Celery card. I then used markers (Close to Cocoa, Really Rust and Ruby Red) to stamp onto the Metal Edge Tag (a little fiddly but works as long as you don't nudge the Tag). The sentiment was borrowed from the Vintage Labels set, stamped in Versamark and heat embossed with White embossing powder.

Thanks for visiting and now I'll pass you on to ...

... Victoria over at Blue Jelly Stampin' where you're in for a real treat.

See you again soon I hope.

Sara xx

Thursday, 21 January 2010

A ribbon and rose card and news of Sunday's blog hop


A quick post before I set off travelling back home today. I'll be glad to get back to DH, Bess and all my crafting stash - I'm having serious withdrawal symptoms, had to buy a craft mag yesterday just to get me by, lol.

I only realised a day or so ago that I never got round to sharing the other card that I made for my entry to the ILWS Design Team. The first one was the wedding anniversary card shown here, that was created to fit the challenge of embossing. The second challenge I opted for, was to use five ribbons on a card, they could be all the same or all different. I decided to keep some of them the same so as not to make the card too busy.


Recipe
Stamp sets: A Rose is a Rose, Fresh Cuts (sentiment)
Cardstock: Regal Rose, Pretty in Pink, Whisper White
DSP: Tea Party
Ink: Regal Rose, Pretty in Pink, Certainly Celery, Old Olive, Always Artichoke
Narrow Grosgrain Ribbon: Certainly Celery
Wide Grosgrain Ribbon: Old Olive
Other: Hodge Podge

The roses and leaves were stamped onto Whisper White in co-ordinating colours using my stamp-a-ma-jig to get them aligned. They were then cut out and popped up on dimensionals on the Tea Party DSP. The ribbons were layered up with a Hodgepodge sentiment at the bottom and a lush bow at the top for balance.

Not sure whether you noticed the news on the top right hand side menu but some crafting pals and I are having a blog hop this Sunday especially to showcase all the Sale-a-bration stamps for you. There'll be plenty of inspiration for how to get the most from these free, limited edition stamp sets, so make a note to set aside some "me" time and come back for a good browse.

Off to get my train now.

Sara xx

Tuesday, 19 January 2010

On the road again but time for another card


Hello from Hastings! I went to work yesterday only to find that I was needed urgently to fill in for a colleague, so it was a quick dash home to pack, then hop on a train down country and here I am. It's such an exciting life being an auditor, lol. Bit of a shame that all I get to see of this bit of the country is the inside of the office and the inside of a hotel room (see it's not such a glamorous life after all).

We didn't finish until rather late tonight and I expect another long day tomorrow but I thought I'd steal five minutes or so to share this card that I made on Sunday evening.

For my last SU order I decided to stray from my usual menu of stamps, DSPs and inks and popped the Circle Metal Edge Tags in my basket. Then ... what do you do with them? Well the Flower for All Seasons stamps fit perfectly within them so I decided to make them the focus of this card.


Recipe
Stamp sets: A Flower for all Seasons, Vintage Labels (SAB)
Cardstock: Pink Passion, Pixie Pink
Ink: Black Stazon, Pink Passion, Markers
Punches: Corner Rounder
Gingham Ribbon: Light Pink
Other: Circle Metal Edge Tag

The flower image is stamped directly onto the Metal Tag with Black Stazon and coloured with markers. I used the circle image and the sentiment from the Vintage Labels set and used my Stamp-a-ma-jig to position them. A little gingham bow just finishes the card and balances it out.

Thanks for stopping by.

Sara xx

Sunday, 17 January 2010

A sketch challenge at Stamp With Us and news of the online class


I loved your entries to our last Stamp With Us challenge. The colour inspiration wasn't amongst my favourites ... until now. The results with that colour combo were stunning.

This next fortnight's challenge is a sketch and this is a great one that I'm sure I'll reuse again in the future:
I can't stop using my new (and free!) Sale-a-bration stamps but I've used just one of them as an accent today instead of making it the focal point:


Recipe
Stamp sets: On a Pedestal, Circle of Friendship, Vintage Labels (SAB)
Cardstock: Close to Cocoa, Regal Rose, Pretty in Pink, Whisper White
DSP: Spiced Cider, Tea Party
Ink: Regal Rose, Creamy Caramel, Pretty in Pink, Chocolate Chip, Real Red, Old Olive
Punches: Scallop Circle, 1" Circle
Other: Dazzling Diamonds, Soft Subtles Brads, Circle Fire Rhinestone Brads, Antique Brass Jumbo Eyelets, Mat Pack, Piercing Tool

The cake is "iced" with Dazzling Diamonds. Can you believe, I think this is its first time out since the Christmas cards, lol. I used my stamp-a-ma-jig to make sure the cake sat in the middle of the stand and the cherry sat on the top. The vintage label was stamped and punched with the scallop circle punch. I snipped between each scallop and shaped them for some extra dimension.

If you haven't been over to SWU in a week or so then you may have missed the announcement that the next Stamp With Us online class will start on Sunday 31 January. These classes are jam packed with tutorials and tips from the team and inspiration from both the team and participants alike. I'm looking forward to meeting up with new and existing friends and hope to see you there.

Enjoy the rest of your weekend.

Sara xx

Saturday, 16 January 2010

Bluebird of happiness


Yippee, it's raining! It's washing the snow away. I can't remember the last time I was so glad for rain, lol. It's still a pretty grey day though so I thought I'd add a splash of colour. For today's card I've combined the Whimsical Wings (hostess level 2) with the Whimsical Words (Sale-a-bration). To find out how you could get both sets for free just email me at sarastamper123@gmail.com.

The Happiness Always sentiment made me think of the bluebird of happiness - and so of course my bird had to be blue! Funny where inspiration comes from isn't it?


Recipe
Stamp sets: Whimsical Wings, Whimsical Words
Cardstock: Summer Sun, Taken with Teal, Tempting Turquoise, Whisper White
Ink: Old Olive, Taken with Teal, Tempting Turquoise, Summer Sun, Yoyo Yellow, Chocolate Chip
Other: Bold Brights Brads, Mat Pack, Paper Piercing Tool

I used markers direct to stamp for inking this card. The bird is done in Turquoise with a Teal wing and Chocolate legs and beak. Flowers were coloured with Yoyo Yellow and then again around all edges with Summer Sun to give more depth to the colour. The images were stamped out onto the card using the Stamp-a-ma-jig for placement. I then stamped the bird and flowers again, cut out and raised them on dimensionals.

Have a great weekend.

Sara xx

Thursday, 14 January 2010

A get well card using a Happy Moment


It's about time I stopped complaining about the weather, after all I've got it easy compared with some. The Mum of my crafting pal Heather, is having a tough time at the moment battling one illness after another and is missing being home into the bargain. Heather's asked for some get well cards to cheer her up (details here if you're able to add to them, I'm sure she'll appreciate it). I sent this at the weekend so hopefully she's got it by now and I'm safe to show it on here.

I've made it using the new Happy Moments set but also combined with a few others.


Recipe
Stamp sets: Happy Moments, Flight of the Butterfly, Fun and Fast Notes (sentiment)
Cardstock: Taken With Teal, More Mustard, Whisper White
DSP: Pink Flamingo
Ink: Taken With Teal, Black Stazon, Markers
Punches: Corner Rounder, Scallop Edge, Butterfly

And because I wanted to make the inside pretty to look at too:


Recipe (inside)
Stamp sets: Baroque Border, Flight of the Butterfly, Curvy Verses
Cardstock: Whisper White
Ink: Taken with Teal
Punch: Corner Rounder

Wishing you a speedy recovery Karen.

Sara xx

Tuesday, 12 January 2010

A street full of new stamps for Sale-a-bration


A change from Happy Moments today (well I don't know about you but I'm not feeling quite so happy with all this snow still). Yesterday I worked from home and put in a full day and then went out shovelling snow that had come down all day. Today the roads are a bit clearer and so we've made it into work but traffic congestion made our commute 3 times longer than usual. That's all eating into my crafting time! Not fair! I can't wait for it all to go.

I want to see green grass and blue skies like the ones in today's card. The Good Neighbors set got inked up up for a change of scene, (pun intended). It did cheer me a little last night creating this little street with my new stamp set.

If you want to get your hands on this set, or any of the other three Sale-a-bration sets, then you just need to place a minimum order of £45 - email me at sarastamper123@gmail.com to place your order now.


Recipe
Stamp set: Good Neighbors
Cardstock: Brocade Blue, Bashful Blue, Certainly Celery, Whisper White
Ink: Markers
Narrow Grosgrain Ribbon: More Mustard
Twill Ribbon: Certainly Celery

I used my stamp-a-ma-jig to get my houses and trees in a row and masked one of the clouds to overlap them. A strip of Certainly Celery card was snipped to create the grass.

Thanks for stopping by.

Sara xx

Sunday, 10 January 2010

A Happy Moment with some chocolates


Yes, I've had another Happy Moment. I thought I'd have a go at the fabulous video tutorial that Monica posted for us on In Love With Stamping. I decided to make my bird in a cage a canary and pop chocolates in the pouch, hence the colour scheme.


Recipe
Stamp set: Happy Moments
Cardstock: Chocolate Chip, Whisper White
DSP: Tea & Crumpets
Markers: Chocolate Chip, So Saffron, Summer Sun
Taffeta Ribbon: Chocolate Chip
Punches: Tag, Small Tag, Word Window
Other: Pretties Kit, Gold Brad, Circle Fire Rhinestone Brad, Medium Cellophane Bag, Crop-a-dile, Chocolates

The technique is the same as Monica's tutorial. I coloured the flower with the So Saffron pen. To make my bird stand out better I used Summer Sun rather than So Saffron. I didn't have a small cellophane bag (I always seem to use medium) so I folded my medium bag to fit and trimmed a little from the top.

I love these little sweetie pouches, they're so cute. I can see more on the way :-)

Enjoy the rest of your weekend.

Sara xx

Saturday, 9 January 2010

Happy Moments for me indeed this weekend


Happy Moments is one of the new Sale-a-bration stamp sets that you can get free, see here for details. I'm expecting lots of Happy Moments this weekend - you see I finally got my hands on the bumper order I put in just before new year. The UPS delivery had been rescheduled several times due to the snow and so yesterday we made a special effort and got out and went to collect from them - I just couldn't wait any longer. Now I've lots of new goodies to play with, including all four of the Sale-a-bration sets.

In one of my Happy Moments this morning, I popped over to the Secret Crafter Saturday Challenge to have a go at the sketch challenge they've set for this week:


I inked up one of my new sets and created this:

Recipe
Stamp set: Happy Moments (free SAB set)
Cardstock: Pretty in Pink, Cameo Coral, Whisper White
DSP: Pink Flamingo
Ink: Cameo Coral, SU Markers
Punches: Scallop Oval, Large Oval, Boho Blossoms
Other: Soft Subtles Brads
Non-SU: Die-cut ovals

I stamped the cake, stamped it again onto a Post-it and masked the original. Then selectively inked the top two parcels of the three and stamped them on either side of the cahe before removing the mask. The flowers are the largest and smallest of the Boho Blossoms, snipped between each petal and shaped for dimension.

Off to play again now, I don't care about the snow anymore now I've got my toys.

Have a great weekend.

Sara xx

Thursday, 7 January 2010

Combination challenge for the ILWS Cup Challenge


The final challenge for Saturday Night's In Love With Stamping Cup Challenge was a combination one. We had to include a masking technique and also "recycle" a regular household item into the design.

My brain was a little fried by this time and so I saw the "recycle" theme and didn't really get the "household item" so my choice to recycle a used gift tag missed the point a little, lol. They were really looking for things like clothes peg, safety pin, band-aid plaster ...

Never mind, it's the taking part that matters isn't it? This is what I came up with:


Recipe
Stamp set: Love You Much
Cardstock: Real Red, Basic Black, Whisper White
Ink: Real Red, Versamark
Punch: Heart to Heart
Other: Silver EP
Non-SU: Recycled gift tag

I stamped Love You Much in Versamark and heat embossed with Silver EP. I stamped it again onto a Post-it and cut around it. The mask was put over the original heat embossing and then I stamped the large heart in Real Red on either side before removing the mask. The punched hearts are raised on dimensionals.

So all in all, the Cup Challenge kick started my creative juices, began this year's stock of cards and gave me an excuse to "get together" with both old and new crafting friends. Want to join the fun? The next Cup Challenge will take place in April but to keep you going until then why not check out the Design Team Challenges that will be posted at the beginning of every month starting February (you can access the older ones here) or hop over straight away to the Tutorials.

Hope to see you at the next Cup Challenge.

Sara xx

Wednesday, 6 January 2010

Colour combo challenge for the ILWS Cup Challenge


Hope that you're safe and warm. We finally ended up with about 9.5" snow yesterday but luckily we've only had a few flurries on top of that today, nothing severe. DH and a group of neighbours had just finished clearing a route through the snow on the road when a snowplough/gritter came through the estate. Now at least we can get to the main road. DH has been out and stocked up on shopping and we've defrosted the freezer ready to fill it up again so we're set in case of any more of this annoying white stuff. (Annoying because my SU order that was due today has been rescheduled for delivery, boohoo).

And on with the crafting. Our third challenge for the In Love With Stamping Cup Challenge was a colour combo. And what a colour combo!

We had to use:
  • Regal Rose
  • Cameo Coral
  • Pretty in Pink
  • Apricot Appeal
  • Old Olive
  • Bashful Blue
We could add any neutral (eg. white, vanilla or kraft), any embellishments and any stamps but we had to use the full colour set (or as near as you could get if you don't have SU colours).

Now I remembered seeing a few cards in the Stampin' Up! Idea Book and Catalogue that used a lot of colours and when I looked - it was the same colour set. I decided to CASE the butterfly card (page 88 if you have a copy - want a copy? Email me):


Recipe
Stamp set: Flight of the Butterfly
Cardstock: Kraft, Whisper White, Regal Rose, Cameo Coral, Pretty in Pink, Apricot Appeal, Old Olive, Bashful Blue
Ink: Versamark, Chocolate Chip
Punch: Butterfly
Taffeta Ribbon: Pretty in Pink
Other: Silver Elastic Cord, Clips Assortment

The card in the catalogue has each butterfly stitched on but my sewing machine is still in need of repair. Instead of sewing, I tied each butterfly with the silver elastic cord to create antennae and stuck them to the card with snail or glue dots, depending on whether a wing was lying flat or not.

I don't often CASE cards directly like this, I more often use them as inspiration to take a bit of this card and a bit of that card and combine them. It was quite fun though to just copy outright, it gave my brain a bit of a chance to catch up ready for the last challenge ...

... which I'll show you tomorrow.

Bye for now.

Sara xx

Tuesday, 5 January 2010

Limited supply challenge for the ILWS Cup Challenge


Well I should have kept my big mouth shut - we did get too much snow. Had about 8" of snow so far, it's still falling and we've been warned that there's a heavy fall on the way :-(

By early afternoon it was getting a bit difficult to walk the dog:


DH has since cleared a little path for her but it's getting covered over again pretty quick.

Anyway, onto the crafting - the second challenge for the In Love With Stamping Cup Challenge was a limited supply one.

We were allowed whatever ink, card and paper we wanted but only one stamp set and no embellishments. Punches and piercing tools were allowed but no brads, buttons, flowers or ribbon ... you get the idea.

I turned to my trusted True Friend:


Recipe
Stamp set: True Friend
Cardstock: Certainly Celery, Lavender Lace, So Saffron, Whisper White
Ink: Versamark, Certainly Celery, Lavender Lace, So Saffron
Punches: Eyelet Border, 1-3/4" Circle, 1-3/8" Circle, 1-1/4" Circle
Other: Mat Pack, Paper Piercing Tool

I punched the edge of the card with the eyelet border and added a strip of Lavender Lace to the inside back of the card for contrast. Using Versamark I stamped off around the three plain edges of the card with the frond stamp from the set. Colouring the markers direct to stamp I stamped the main flower and the little circle flower.

Next challenge tomorrow.

Stay safe and warm wherever you are.

Sara xx

Monday, 4 January 2010

I made the ILWS Design Team!! Yip yip yippee!


Boohoo - I went back to work today ... and started my studying again ... but...

Wahay - I made the In Love With Stamping Design Team!!

The forum had a Cup Challenge on Saturday night and the crafting was fun, frantic and fantastic! We worked in teams (great chat and team spirit from everyone - Go Bold Brights!!) and for each challenge we had an hour to complete our card(s), photograph them and upload them to the gallery. There were prizes/kudos for each category winner and for the team with the most entries.

Our first challenge was a sketch:


I decided to start with a very quick card to get something up onto the gallery as soon as I could.


Recipe
Stamp sets: Animal Stories, Fresh Cuts (sentiment)
Cardstock: Creamy Caramel, Close to Cocoa, Ruby Red, Very Vanilla
Ink: Ruby Red, Chocolate Chip
Other: Ruby Red Brads

Then I followed up with a more considered one.


Recipe
Stamp sets: In My Garden, Fresh Cuts (sentiment)
Cardstock: Brilliant Blue, Summer Sun, Brocade Blue, Whisper White
DSP: Pink Flamingo
Ink: Black Stazon, Night of Navy, Markers
Other: Brilliant Blue Brads

I'll post recipes for more of my entries over the next few days.

The standard of crafting on the night was amazingly high (I'm gonna have my work cut out as a DT member) and I came nowhere near winning any category. You can see the winners here.

I did win Elaine's blog candy today though and I get the ingredients and instructions for these beautiful creations here. Thanks Elaine!!

Keeping my fingers crossed that we don't have too much of the snow that's been forecast.

Thanks for stopping by.

Sara xx


Sunday, 3 January 2010

A criss cross thank you card for the SWU colour challenge


What a marvellous set of entries we had for the last Stamp With Us challenge. So many of you created fantastic christmas themed projects and I had a wonderful time browsing them all.

It's time now for another SWU colour challenge and our inspiration this time is this bag:
I'm still busy with "thank you's" and so I've used the colours to create this criss cross thank you card:


Recipe
Stamp sets: Sincere Salutations, One of a Kind
Cardstock: Sahara Sand, Summer Sun (textured), Bravo Burgundy, Whisper White
Ink: Bravo Burgundy, Summer Sun
DSP: To the Nines Speciality, Pink Flamingo
Punches: Corner Rounder, Boho Blossoms, Round Tab, Scallop Circle, 1/2" Circle
Other: Gold Brads

The To the Nines Speciality paper shouldn't really be described as a paper at all. All the SU papers are a substantial weight but this one is even thicker and slightly textured too. I love how the Summer Sun card and paper lifts the colour scheme from being too dismal for this time of year.

The insert pulls out to write a more personal message on:


Looking forward to seeing your versions of the colour challenge. Please do go take a look at the rest of the Design Team creations, they're such an inspiration.

Sara xx