Tuesday 29 June 2010

Stars for a man's card for the Mojo Monday challenge


Oh dear - well there was certainly a lot of shouting at the TV on Sunday. And now that England have gone out I'm still not free and clear of all the football. DH is just as keen to watch all the other games. Ah well, more time for crafting at least.

Last night I had a go at the MojoMonday challenge:


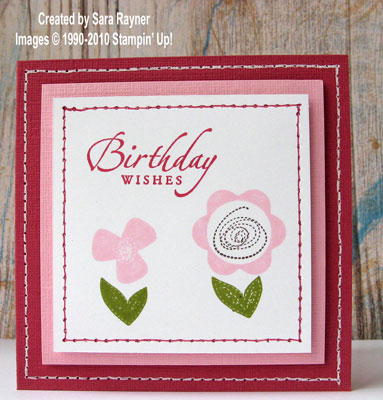
Showing unusual patience for me, lol, I waited until this morning to take a pic so that I wouldn't go smudging the Crystal Effects. I liked the colour combo of Soft Suede and Tempting Turquoise that I used on Sunday so decided to stick with it for my square take on the sketch:


Recipe
Stamp set: In the Stars
Cardstock: Tempting Turquoise, Soft Suede, Whisper White
Ink: Soft Suede, Tempting Turquoise, Stampin' Pastels
DSP: Autumn Meadows
Punch: Large Star
Polka Dot Grosgrain Ribbon: Soft Suede
Other: Dazzling Diamonds, Crystal Effects
Non-SU: Circle die-cuts

I sponged the DSP around the edges with Soft Suede. The stars and the sentiment were stamped with Soft Suede onto Whisper White card and matted onto Soft Suede. They were then chalked with a combination of Taken with Teal and Tempting Turquoise Stampin' Pastels to just soft the white a little. The sentiment star was stamped with Tempting Turquoise onto Whisper White and punched out with the Large Star. I used the narrow nib of the Tombow to draw around the edges of the star and then applied Dazzling Diamonds. When that had dried I then applied a generous layer of Crystal Effects. I think next time I'll try heat setting with Versamark and clear embossing powder first to see if that prevents the ink bleeding - I love the glossy effect but the text is a little too washed out for me here.


Thanks for stopping by.

Sara xx

Sunday 27 June 2010

A beautiful thing in suede and turquoise


Hope you're having a restful Sunday. I'm just enjoying the peace and quiet - birds singing, everything else nice and still ... before the footy begins and DH starts shouting at the tv. I keep telling him they're not paying any attention to what he's saying, but it doesn't stop him. Then again, it never stops me when I know he doesn't pay attention to what I'm saying, lol.

I'm carrying on with my mission to get inking my underused stamps and today I've combined two of them:


Recipe
Stamp sets: En Francais, A Beautiful Thing
Cardstock: Soft Suede, Tempting Turquoise, Very Vanilla
Ink: Soft Suede, Taken With Teal, Tempting Turquoise, Versamark
Punches: Scallop Oval, Large Oval

Using Soft Suede on the En Francais background stamp, I stamped off onto some Very Vanilla card and set aside to use for another project and then stamped again onto Very Vanilla to get the softer colour used here. I tore across and sponged all the edges with more Soft Suede ink. Next I stamped the solid flower from A Beautiful Thing with Versamark onto Tempting Turquoise and using the Stamp-a-ma-jig for positioning, stamped the centre detail with Soft Suede, stamping off first each time to soften the colour again. The small wheel was then stamped between the flowers using Versamark. The edges of the Tempting Turquoise layer were sponged with Taken With Teal ink. These layers were matted direct to the front of the Soft Suede card blank. The sentiment was stamped in Tempting Turquoise on Vary Vanilla and punched with the Large Oval. A Scallop Oval was punched from Soft Suede. Both punched ovals were sponged with Soft Suede and popped up on dimensionals.

Keeping up my new resolution (for now at least) to complete the insert as I make the card, I created a border as well as stamping a sentiment inside:


Recipe (inside)
Stamp sets: Whimsical Words (sentiment), A Beautiful Thing
Cardstock: Very Vanilla
Ink: Soft Suede, Tempting Turquoise

I used the stamp-a-ma-jig to extend the little row of four flowers across the whole width.

Enjoy the rest of your weekend.

Sara xx

Saturday 26 June 2010

A quick reminder of my Summer Reward Programme

Today Jan and I have been at the Hemsworth Craft Fair. A great day with lots of lovely people (if you picked up my flyer and are visiting for the first time then - Hi and welcome).

I've spent the last few nights finishing off my cards ready for the fair (that'll teach me to do all the inserts at the time I make them in future, lol) so no new craft projects today, I'm afraid.

Instead, a quick reminder about my Summer Reward Programme. I only realised today that although I'd posted details of it on my offers page and in my newsletter at the beginning of the month, I hadn't mentioned it on this main page and so you may not know about it yet. But don't worry, it's not too late to get an entry into the June draw:

Summer Reward Programme

During the months of June, July and August, you will have an opportunity to win some fabulous SU! goodies including cardstock in our new colours, designer papers, ribbons and stamp sets. I will increase the number of prizes as the number of entries grows. There will be a mini draw each at the end of June and July and a grand draw at the end of August. Your name will be entered in the draw whenever you attend classes, place orders, or host a workshop.

Attend a stamp class: 1 ticket
Attend the Summer Stamptacular: 2 tickets
Place a £45 order: 1 ticket
Place a £90 order: 2 tickets ... etc with an extra ticket for each extra £45 ordered
Host a workshop (real or virtual): 5 tickets

(Please note that this reward programme is exclusive to bookings/orders made through me and only available in the UK)

Please email me to place an order or book a class/workshop. Or you can pop over to the info on my classes here and book your class securely through Paypal, using the Buy Now buttons.

I'll be back tomorrow with some crafting.

Sara xx

Thursday 24 June 2010

My Dad's Father's Day card using a non-SU stamp (shock, horror)


I nearly forgot to share with you the card that I made for my Dad for Father's Day. Although Father's Day is past, the elements can easily be adapted or reused for any man's card.

Now I admit that since becoming an SU demo I don't often use other stamps - I've been spoiled for the quality and usually have enough to pick from. But I spotted this stamp on my travels some time ago (sorry but can't remember whose it is) and thought it would be ideal for my Dad as he loves to BBQ and it's a stamp and a recipe combined.


Recipe
Stamp sets: Short Order Alphabet (retired)
Plain cardstock: Whisper White
Textured Cardstock: Really Rust, Not Quite Navy
Ink: Black Stazon
Punch: Scallop Circle
Other: Antique Brass Jumbo Eyelets, Antique Brass Brads (Vintage), Twill Tape, Linen Thread
Non-SU: BBQ recipe stamp

I stamped the image using Black Stazon onto Whisper White card and matted it onto Really Rust Textured card. The corners of this Really Rust layer were punched using a single petal of the Scallop Circle and this was then layered onto Not Quite Navy Textured card and Antique Brass Brads added at each corner. This main image was popped up on dimensionals on the card front. For the sentiment I stamped Dad with my alphabet set using Black Stazon on the Twill Tape. The ends of the tape were folded to the centre and the I used my Crop-a-dile to punch holes and set the Jumbo Eyelets. Linen thread was knotted through the eyelets and secured around the back of the Not Quite Navy mat before popping up on dimensionals beneath the main image.


Recipe
Stamp Set: Occasional Greetings
Cardstock: Whisper White
Ink: SU Markers in Really Rust and Not Quite Navy

For the inside I used markers direct to stamp to selectively colour the sentiment.

My Dad doesn't take a lot of interest in my crafting (thinks I must have too much time on my hands, lol - totally forgets how much he likes building things) but he seemed to like this one, at least he looked at it for more than 2 seconds.

Thanks for stopping by.

Sara xx

Tuesday 22 June 2010

A crafty evening with friends from ILWS


On Saturday night I got together with a few friends from the ILWS forum for some crafting chat and a bit of stamping (thanks for your company ladies, I had such a fun evening).

I wasn't sure whether we were doing a card swap. It hadn't been mentioned but I've been caught out before at gatherings of crafters and so to be prepared I spent Saturday afternoon making copies of this:


Recipe
Stamp sets: Studio Sketches, Fresh Cuts (sentiment)
Cardstock: Kraft, Soft Suede
Ink: Soft Suede, Black Stazon, Watercolour Wonder Crayons
Wide Polka-dot Ribbon: Soft Suede
Taffeta Ribbon: Kraft
Other: Cutter Kit, Aqua Painter

I stamped the small fruit bowl in Soft Suede in the bottom right corner of a Kraft card blank. Using Black Stazon I stamped the arrangement of fruit almost halfway down the left side of a layer of Kraft. I coloured the image with Watercolour Wonder Crayons and used the Aqua Painter to blend the colours. The sentiment from the Fresh Cuts set was stamped with Soft Suede above the image. I tore away the bottom right corner of the Kraft layer on a diagonal and placing it against the Soft Suede layer, tore away the same corner of that layer. Using the distressing tool on the Cutter Kit, I distressed the edges of both layers and curled the top right corners. I sponged the edges of the top Kraft layer with Soft Suede and wrapped Soft Suede polka-dot ribbon around the top right corner (with the plain side outward). Kraft taffeta ribbon was pleated onto the Soft Suede ribbon. The Kraft layer was adhered direct to the Soft Suede layer and then both layers were popped up on dimensionals onto the card front.

I made one for each of us and a few extra, just in case we had any last minute joiners:


It was lovely to get back in to a little watercolouring and we spotted a great idea in the US catty for using the crayons, so watch this space. We spent a lot of the evening picking out our faves from their retiring catty and wondering how likely it is they'll make it into our new one in October, lol. I think I'd better start saving my pennies now, in case even a fraction of them make it over.

Sara xx

Sunday 20 June 2010

A chalked background for the Stamp With Us inspiration challenge


A Happy Father's Day to any Dads reading this (please, please, if there are any, will you leave me a comment, it would be great to know there are some fellas reading this blog).

We have a new challenge today over at Stamp With Us and it's this inspiration piece:

Now these are really strong colours so I thought I'd knock them back a little by using Stampin' Pastels for the colour rather than markers or ink.


Recipe
Stamp sets: Baroque Motifs, Oval All
Cardstock: Real Red, Only Orange, Whisper White
Ink: Versamark, Stampin' Pastels
DSP: Bride Specialty
Punches: Scallop Oval, Large Oval
Other: Gold EP, Red Rhinestone Brads (Circle Fire)

I sponged the Only Orange and Pink Passion Pastels onto the Bride DSP using daubers and blew off any excess chalk. You can use any of the colouring tools with this DSP and the embossed background will resist the colour and show the pattern. Using Versamark I stamped the scroll design onto the chalked paper and heat embossed with Gold powder. I also stamped and embossed the little flowers and the sentiment in the same way onto Whisper White card. The flowers were cut out and red rhinestone brads added to the centres. As the prongs of the brad extended beyond the flower I trimmed them down with my Craft and Rubber Scissors before popping the flowers up on dimensionals. The rest is matting and layering.

Please take a look at the wonderful samples prepared by the rest of our design team - I just love the inspiration they provide.

Enjoy the rest of your weekend.

Sara xx

Saturday 19 June 2010

A quick last minute card for Fathers Day


Here's a quick and easy last minute card for Father's Day that uses just one stamp, some black and white card and a coloured ink.


Recipe
Stamp Set: Occasional Greetings
Cardstock: Basic Black, Whisper White
Ink: Basic Gray, Real Red
Other: Craft knife, Stamp-a-ma-jig

I started by stamping the main sentiment on the Whisper White front layer, at an angle, in prime position. I then cut this out using a craft knife and using the stamp-a-ma-jig, stamped the sentiment in rows around the aperture using Basic Gray to give a newsprint look. Using the aperture layer as my template I pencilled where the window should appear on the black card front and cut this out with the craft knife just a fraction smaller than the original (about 1mm on each edge) to create a frame. The Whisper White insert was adhered to the inside back, the window pencilled in place and the stamp-a-ma-jig used to position the stamped sentiment in Real Red. All pencil marks were erased to finish.


Here's the inside - plenty of room to write your personal message to Dad.


Have a great weekend.

Sara xx

Thursday 17 June 2010

Yikes! Where did Father's Day come creeping up from?


I actually started preparing for Father's Day weeks ago and got my Dad a few little gifts ... and then figured it was ages away and I could forget about it again. Big mistake. All of a sudden it's this Sunday and I still haven't made the card. Luckily I had got a few ideas in mind.

I've been wanting to have a go at one of these little origami shirts for ages and honestly, they aren't too difficult. A bone folder does help get the creases crisp though.


Recipe
Stamp set: Occasional Greetings
Cardstock: So Saffron, Elegant Eggplant, Barely Banana
Ink: Elegant Eggplant
DSP: Perfect Plum Patterns
Narrow Grosgrain Ribbon: Elegant Eggplant
Other: Mat Pack, Paper Piercing Tool

For the shirt, I followed the excellent instructions provided by Diane over at Lakeside Stamper for her Father's Day card last year. I used the same dimensions of DSP but left the shirt front whole (as I was covering it with the tie anyway). To make the tie, I tied a knot in a length of narrow grosgrain ribbon and then folded one end over, trimmed it short and stuck it behind the "tie knot" with a glue dot. I then trimmed the other end of the ribbon to a point. The corners of the shirt background were decorated using the paper piercing tool and the mat pack template.

I'll try and fit another one in before Sunday if I can, just in case I'm not the only last minute card maker :-)

Sara xx

Tuesday 15 June 2010

A splash of red for the Mojo Monday challenge


And I'm back crafting. Yay!

It was my first day back at work today following the exams and so I looked forward to getting back home tonight. And then DH wanted to watch the Brazil game - well that's all the motivation I needed to get back crafting lol (apologies to those of you as keen as my hubby - I've just never had any interest in football at all).

I broke myself in gently with this week's Mojo Monday sketch:


And decided to go with one of my favourite colour combos:


Recipe
Stamp sets: Seeing Spots, Garden Dream
Cardstock: Basic Black, Whisper White
Ink: Basic Black, Real Red
DSP: Night & Day Specialty
Punches: Scallop Circle, 1-3/8" Circle, 1-1/4" Circle
Wide Grosgrain Ribbon: Real Red
Other: Real Red Brads (Bold Brights Collection)

I stamped the flowers from the Garden Dreams set by inking direct to stamp with markers and then shading using blender pens. Michelle Poston recently left me a super tip for using an acrylic block for the ink pool for the blender pen. We don't have the SU acrylic blocks here yet but I thought I'd use Michelle's idea and improvise, so I scribbled with the Real Red marker on the stamp-a-ma-jig plastic sheet and then picked up the ink with the blender pen for different intensities of red.

Thanks for stopping by.

Sara xx

Monday 14 June 2010

Back from Brussels to another birthday card

Another quick post from me today as DH and I have just got back from a weekend break in Brussels.

It's been a wonderful short break and much needed after the exams (for both of us). We went by Eurostar so there was no worrying about volcano ash clouds and I was able to bury my nose in a thriller for most of the journey - bliss. Val McDermid's latest Tony Hill book - Fever of the Bone. I always think of Robson Green when I read this character now and you get a bit more back story about his Mum and Dad in this book.

While in Brussels we went to the Atomium and we even took a couple of photos with us in them for a change lol, so that I can scrapbook them. We spent quite a bit of time in the Grand Place enjoying the local beer (well, when in Brussels ...) and people watching. I even spoiled DH by letting him watch some sport (there's this football thing on at the moment?). Of course we also had to buy some chocolates and we got them in the shape of the Mannequin Pis (the little peeing boy statue that Brussels is also famous for).

We got back home this evening to find a belated birthday card from my friend Dawn:


Thanks Dawn - love it, I can just imagine those bags filled with our crafting goodies, heehee.

Ok that's all for now, I promise to have some of my own crafting to show you next time I post :-)

Sara xx

Saturday 12 June 2010

My birthday cards from others

Well Thursday was my birthday and the day started with an exam :( but after that I went out for a champagne afternoon tea with my Mum :)

I don't feel like the exams went too well (how come they never seem to include questions on the areas of the syllabus that I revised best?) but then I never do and so all I can do is hope that I did enough to get a pass so that I can move on to the next ones. The results will be out in late August.

My mojo upped and left straight after the bloghop last week. I actually made a card for the MojoMonday challenge but I'm not happy with it and still not sure whether to post it or not.

For now here are the handcrafted cards that I received for my birthday from others.

First up this is what my patient hubby (he's suffered through all my exam stressing bless him) created all on his own:


He used Taken with Teal because he knows it's my favourite, teamed it with Creamy Caramel and used the I {Heart} Hearts set.

This one's from my MIL. She doesn't believe her stamping is good enough to put on cards and yet she managed some great stamping at the Tart and Tangy class last weekend.


And finally this one's from my downline Jan:


She's used Forest Friends and Oval All (for the sentiment) and her brayering is absolutely fantastic. She's running a class on brayering next weekend if you'd like to book.

That's all for now. Have a great weekend.

Sara xx

Wednesday 9 June 2010

Faux stitching technique - take 2


Today is my second take on the faux stitching technique challenge and I have a gift bag to match yesterday's card.


Recipe
Textured Cardstock: Rose Red, Whisper White
Ink: Rose Red, White Signo Gel Pen
Punches: 1-1/4" Circle, 1-3/4" Circle
Other: Paper Piercing Tool, Mat Pack, Sweet Pea (stitched felt)

For the bag I started with textured Rose Red cardstock 29cm x 13cm. I scored 3cm in from the long edge. Along the other edge I scored at 3cm, 13cm, 16cm and 26cm. With the cardstock in landscape mode and the scoreline at the bottom, I cut along each vertical scoreline from the base to the horizontal scoreline and trimmed away one of the outside squares completely. I punched a 1-1/4" Circle from the Rose Red textured cardstock then centring it in the 1-3/4" Circle punch, punched again. Two of these are needed for the handles of the bag. The front and back of the bag were punched halfway down in the centre with the 1-1/4" Circle punch. Next the front and back of the bag and the handles were faux stitched (scroll down to yesterday's post for details). The handles were attached using Tombow glue. An 8.5cm square of Whisper White textured cardstock was punched in the centre of one edge with the 1-3/4" Circle, to allow for the handle and then faux stitched with Rose Red. Sweet Pea stitched felt flowers were adhered with glue dots and the mat was popped up on dimensionals to the card front before making up the gift bag along the side and the base with sticky strip.

Here are the card and the bag side by side.


Tuesday 8 June 2010

Faux stitching for the ILWS technique challenge


Our technique challenge this month at ILWS is to use stitching, either real or faux.

My sewing machine still isn't fixed and so I decided to go for faux.


Recipe
Stamp sets: My Sweet Pea, Sincere Salutations (sentiment)
Textured Cardstock: Rose Red, Pretty in Pink
Plain Cardstock: Whisper White
Ink: Rose Red, Old Olive, Pretty in Pink, Chocolate Chip, White Signo Gel Pen
Other: Paper Piercing Tool, Mat Pack

My card blank this time is a 10cm square in textured Rose Red. Using the mat pack and paper piercing tool I pierced all around the edges of the card front and joined the dots with a White Signo gel pen. On a 7.5cm square of Whisper White I stamped the sentiment in Rose Red and then the My Sweet Pea flowers in Pretty in Pink and Old Olive, with the flower centre in Chocolate Chip. I pierced again all round the edges of this layer and joined the dots with the fine nib of my Rose Red marker. This stamped layer was popped up on dimensionals onto Pretty in Pink textured card and then again onto the card blank.

Tomorrow, a matching mini gift bag.

Sara xx

Sunday 6 June 2010

Yesterday's Tart and Tangy class - instructions now available by email


Well I had great fun with my ladies yesterday at this class. The bottle hanger went fine, the lollipop card we just had one or two little mishaps but the jackpot card was very challenging (this was definitely advanced class material). We then completed the box for the card but ran out of time and over time and so everyone took away the strawberry card materials to complete at home.

If you couldn't attend my class in person but would like to purchase the class tutorial it's now available using the Buy Now button on the right.

Please note all instructions are in metric and designed for UK standard size card.

Have a wander through our bloghop to see the new products


Hello and welcome to another Stampin' Up! bloghop. Today we're showcasing our latest products, including inks, cardstock, DSP, polka dot ribbons and printed window sheets.

If you're already on your way then you'll have joined me from Pat. Isn't her work lovely. Don't worry if you're starting with me and haven't seen it yet, the link at the end of the post will pass you on to the next person in the loop and so on until you get back to me, at which point you've completed this loop.

They're all gorgeous new products and colours (I also used some of them for the Stamp With Us challenge earlier today - scroll down or click here to see) but I thought I'd focus on the printed window sheets for this bloghop. I know these are one of those items that I've been guilty of buying in the past because they look good but then when I get them, I'm not sure how to use them. So here are a few "ways with window sheets" to hopefully inspire you.


Recipe
Stamp set: Oval All
Cardstock: Old Olive, Rich Razzleberry, Certainly Celery, Pale Plum, Whisper White
Ink: Rich Razzleberry, Versamark
Punches: Scallop Circle, Scallop Oval, Large Oval
Polka Dot Grosgrain Ribbon: Rich Razzleberry
Other: Flower Fantasy Window Sheet, White EP, Crop-a-dile

I started with an Old Olive card blank and cut decreasing size mats in Rich Razzleberry and Certainly Celery. The Rich Razzleberry mat was adhered to the card blank with snail. Two Scallop Circles were punched from Pale Plum, scored and folded in half. A portion of Flower Fantasy sheet was cut to the same size as the Certainly Celery mat and adhered to it with a little snail hidden behind the folded Scallop Circles. Using the Crop-a-dile I punched two of the larger holes evenly in the half-scallops, threaded and tied a double knot with the polka dot ribbon and trimmed the ends to finish. These layers were popped up on dimensionals on the card front. With versamark I stamped the Just for You onto Rich Razzleberry and heat embossed with White EP. This was punched out with the Scallop Oval. With Rich Razzleberry ink I stamped the Fabulous Friend and punched out with the Large Oval. A blender pen was used to pick up ink and shade the flower. The ovals were layered with dimensionals and popped up with more dimensionals on the front of the Window Sheet.


Recipe
Cardstock: Rich Razzleberry
DSP: Cottage Wall
Punch: Scallop Circle
Other: Flower Fantasy Window Sheet

The box base is the origami box from over at Splitcoaststampers here and I started with a 28cm x 28cm square which creates a 10cm x 10cm box base. For the lid I cut a 14cm x 14cm square from the Flower Fantasy Window Sheet, scored at 2cm on every side (this was a little snug so I'd suggest scoring at 1.8cm for a more generous fit). I snipped along one of the short score lines at each corner to create a tab, folded in and adhered with sticky strip. Four Scallop Circles were punched from Rich Razzleberry card and scored into quarters.


Each Circle was snipped from the outside edge to the centre along just one of the score lines. Sticky strip was added to each quarter, one was folded on top of another to create a pyramid and then one was stuck onto each corner of the lid. These decorative corners provide additional reinforcement to the box lid and help hide the sticky strip visible through the acetate.

Here you can see the printed design a little more clearly:


This final card uses a tiny portion of the window sheet to create a simple shaker card.

Recipe
Stamp sets: Frames with A Flourish, Sincere Salutations (sentiment)
Cardstock: Old Olive, Certainly Celery, Rich Razzleberry, Pale Plum, Whisper White
Ink: Rich Razzleberry
DSP: Cottage Wall
Punches: Eyelet Border
Polka Dot Grosgrain Ribbon: Rich Razzleberry
Other: Flower Fantasy Window Sheet

I started again with an Old Olive card blank and matted and layered with Certainly Celery and two different pieces of Cottage Wall DSP. Using Rich Razzleberry I stamped the sentiment onto the DSP layer in the bottom right corner. The join in the DSP was covered over with strips of Rich Razzleberry and Pale Plum punched with the Eyelet Border (save the dots punched out) and wrapped with polka dot ribbon. A flat bow was added to the centre of the ribbon. The floral frame from the Frames with a Flourish stamp set was stamped with Rich Razzleberry on Whisper White, trimmed with a narrow margin and the centre cut out with a craft knife. A small piece of Flower Fantasy Window Sheet was adhered behind it with sticky strip and the narrow outside edge from a sheet of dimensionals added along each edge. The dots leftover from punching the eyelet border (and a few extra) were dropped behind the window and sealed in with a Whisper White backing square before adding a Pale Plum mat and popping up on dimensionals on the card front.

Tip - remaining unprinted areas of the window sheet can be stamped with black or white Stazon to create your own printed sheets (be careful not to skid when you stamp - stamp straight down and be ready for the suction when you lift up again).

Thanks for stopping by. Please become a follower if you like what you've seen.

I'll pass you on now to my friend and downline, Jan. I've seen a sneak peek and she's got some beautiful and bright creations all lined up for you.

Bye for now.

Sara xx

A Rich Razzleberry Get Well card for the Stamp With Us challenge


Hope you're having a great weekend.

It's a busy blogging day today. First up this morning we have another Stamp With Us challenge. Then at 10am we have our Stampin' Up! bloghop, to share lots of great ideas for how to use the new products recently released.

The Stamp With Us challenge this time around is a Get Well theme and I've also used some of the new products for this card as well as for my bloghop creations.


Recipe
Stamp sets: Garden Dream, Curvy Verses
Cardstock: Rich Razzleberry, Pale Plum, Whisper White
Ink: Rich Razzleberry, Pale Plum, Old Olive
DSP: Cottage Wall
Polka Dot Grosgrain Ribbon: Rich Razzleberry

I started with a card blank of Rich Razzleberry and matted and layered with Pale Plum and Cottage Wall DSP. On Whisper White card I stamped the large solid 2-step flower from the Garden Dream stamp set (level 3 hostess set) with Pale Plum and then used the stamp-a-ma-jig to stamp the outline flower over the top with Rich Razzleberry. I trimmed the image with some of the petals extending beyond the frame and matted onto another layer of Rich Razzleberry, trimmed in a similar way. The outline was stamped onto a sticky note, cut out and used to mask the original flowers as I stamped the leaves over the top with Old Olive. The Curvy Verse was stamped in the top right corner with Rich Razzleberry. A separate solid flower was stamped with Rich Razzleberry, cut out and popped up on dimensionals in the lower left corner. The large 2-step flower was stamped again as for the first ones, on a scrap of Whisper White and the centre cut out and added with a dimensional to the already decoupaged flower. Some polka dot ribbon was wrapped around the upper left corner of the image and the layers were popped up on dimensionals on the card front, offset to the left.


Recipe (inside)
Stamp sets: Garden Dream, Sincere Salutations (sentiment)
Cardstock: Whisper White
Ink: Rich Razzleberry, Old Olive

On the inside I used markers direct to stamp for the flower. We don't have a Rich Razzleberry marker yet though (should be available in October) so I picked up the ink with a blender pen and used that for both the outline and shading.

Please pop back for the bloghop at 10am (some links will be posted before then but the full loop should be up and working at that time). Enjoy the rest of your weekend.

Sara xx

Friday 4 June 2010

ILWS colour challenge - take 2


Today is my take 2 of the colour challenge over at In Love With Stamping. Still sticking with the challenge colours of course of: Old Olive, Certainly Celery, Basic Black with optional Whisper White or Very Vanilla.

This time though, I inked up A Beautiful Thing. Can you believe that I've had this stamp set since I started as a demo and I think this may be the first time I've used it. I don't why I've overlooked it for so long but when I started making this card I realised that the 2-step flower matches one of the flower shapes in the Flower Fusion felt flower set so I just had to use those too.


Recipe
Stamp set: A Beautiful Thing
Cardstock: Very Vanilla, Old Olive, Certainly Celery
Ink: Certainly Celery, Old Olive, Craft Whisper White
Punches: Eyelet Border, Scallop Oval, Large Oval
Satin Ribbon: Old Olive
Taffeta Ribbon: Very Vanilla
Other: Flower Fusion, Black Brads (Vintage collection)

I started with a Very Vanilla A6 card blank and stamped the solid flower randomly in Certainly Celery. Using my stamp-a-ma-jig I then went back over and stamped the flower detail in Old Olive. With Craft Whisper White ink I also stamped the flower detail onto the Flower Fusion pieces and left to dry. I stamped the smaller spiral circle in between the large flowers using Certainly Celery. I punched strips of Old Olive and Certainly Celery with the Eyelet Border punch and wrapped the satin and taffeta ribbons around the layers. The Flower Fusion pieces were secured to the strips with Black Brads and the strips adhered to the card front using sticky strip. Finally the sentiment was stamped in Old Olive, matted and layered using the oval punches and popped up on dimensionals in the centre.

A little break from the ILWS challenges for the next few days. I have my Tart and Tangy class tomorrow (I'll let you know how that goes) and then on Sunday we have the latest Stamp With Us Challenge and *drum roll* the New Product Blog Hop at 10am.

Have a great weekend.

Sara xx

Thursday 3 June 2010

Baroque flourishes for the ILWS colour challenge


Our colour challenge this month over at ILWS is to use Old Olive, Certainly Celery, Basic Black with optional Whisper White or Very Vanilla.

I decided to brush off my Baroque stamps for my first go at this challenge.


Recipe
Stamp sets: Baroque Motifs, Baroque Border
Cardstock: Certainly Celery, Old Olive, Very Vanilla
Ink: Old Olive
Punches: Large Oval, Scallop Oval
Other: Black Brads (Vintage collection)

I started with an A6 card blank in Certainly Celery and rolled the Baroque Border in Old Olive across the bottom portion of the card. With the large flourish from the Baroque Motifs and Old Olive ink I stamped in the upper right corner of the card front ensuring that I stamped off the card onto my grid paper underneath. I also marked the edges of the card in pencil on the grid paper before removing the card. Using a temporary glue dot (a Tombow spot left to dry) I positioned my Very Vanilla mat in the centre of my pencil marks and used the stamp a ma jig (lined up with the stamped off image) to stamp the flourish again with Old Olive. The Very Vanilla layer was matted with Old Olive and the combined layers popped up on dimensionals and positioned directly over the full flourish on the card front. The tiny flowers were stamped in Old Olive on Certainly Celery, cut out, centred with a black brad and popped up on dimensionals. Finally the Cherish sentiment was stamped, matted and layered with the oval punches and popped up on dimensionals.

Pop back for my second take on this colour challenge tomorrow.

Sara xx

Wednesday 2 June 2010

A melon butterfly for the ILWS sketch challenge


Our sketch challenge this month over at ILWS is this:


Now my All a Flutter butterfly has been underused but I decided it wasn't large enough to fill the space on its own and so added another element:


Recipe
Stamp sets: All a Flutter, Bloomin' with Beauty
Cardstock: Melon Mambo, Whisper White
Ink: Black Stazon, Melon Mambo, SU Markers, Stampin' Pastels
DSP: Bashful Blue Patterns
Other: Crystal Effects, Blender Pen

I stamped the butterfly with Black Stazon onto Whisper White card. As we don't yet have the Melon Mambo marker, I squeezed my Melon Mambo inkpad together and picked up ink from the lid on a Blender Pen to colour my butterfly. After cutting out and shaping the butterfly I added Crystal Effects over the top. Next, using the stamp-a-ma-jig for positioning, I stamped just the hydrangea head from the Bloomin' with Beauty stamp onto the corner of a Whisper White mat using Black Stazon. The flowers were coloured with Bashful Blue marker and a hint of Tempting Turquoise in the centres and shaded areas. I dusted Bashful Blue chalk around the empty spaces to take the edge off the white. The DSP and flower image were matted and layered and the butterfly popped up on a sliver of dimensional to finish.

Thanks for stopping by. Don't forget to leave me a comment and let me know if you have any underused stamp sets.

Sara xx