Showing posts with label Contempo Christmas. Show all posts

Monday, 20 December 2010

A batch of xmas cards with a bit of bling


We had a fantastic meal out with my parents for their anniversary on Saturday night. The restaurant had a real fire that was so cosy in contrast to the biting cold outside. And the food, the food was heaven. I was so glad we were able to make it even though the journey was a little risky. Little bruv did a great job driving the minibus.

Anyway, on with the crafting. I hope that I'm not spoiling the surprise for anyone with my post today. All my Christmas cards are on their way, but I guess with the weather conditions, there's no guarantee that they've arrived on time. I used two different designs for my batches of cards this year (in addition to the individual cards I've made throughout the year). This is one of them. I think I made around three dozen or so of these in total.


This is styled on an earlier card you can see here.


Recipe
Stamp set: Contempo Christmas, Serene Snowflakes
Cardstock: Cherry Cobbler, Naturals Ivory, Crumb Cake
Ink: Cherry Cobbler, Soft Suede, Versamark, Champagne Mist Shimmer Paint
Punch: Ornament
Other: Heat & Stick Powder, Fine Galaxy Glitter
Tools: Heat Tool, Crimper

The card is made in a similar way to the earlier version but the crimped square was sprayed with a shimmer mist that was made by mixing the Champagne Mist Shimmer Paint with rubbing alcohol in a spray bottle. For the side panels, the small single snowflake from Serene Snowflakes was stamped in Soft Suede onto the Naturals Ivory and the trio of snowflakes was stamped direct with undiluted Shimmer Paint.


For the inside, a mat of Naturals Ivory was stamped with the snowflake again in Soft Suede and with the sentiment from the Contempo Christmas in Cherry Cobbler.

Thanks for stopping by.

Sara xx

Tuesday, 23 November 2010

A naturally Contempo Christmas with a bit of bling


Apologies to anyone who saw this earlier and then wondered where it disappeared to. I had a minor technical issue. I started writing this post and accidentally scheduled it instead of just saving it until I'd finished adding all the information - doh! Confuddled and confused after my exam yesterday, obviously.

... and if you're seeing it for the first time, then welcome and just pretend you didn't read the last bit, lol.

I've been meaning to use my new Crimper for something other than the little "sour cream styled" gift packages for a while and finally managed it with this card:


Recipe
Stamp set: Contempo Christmas
Cardstock: Cherry Cobbler, Naturals Ivory, Crumb Cake
Ink: Cherry Cobbler, Versamark
Punch: Ornament
Other: Heat & Stick Powder, Fine Galaxy Glitter, Gold Elastic Cord
Tools: Heat Tool, Crimper

I started with a 5" square card of Cherry Cobbler and matted it with a layer of Naturals Ivory card that had the edges sponged with Cherry Cobbler ink. A 4-1/2" square of Crumb Cake card had the centre marked (in pencil, by drawing from corner to corner) and all four corners folded into the centre. This diamond was then fed through the crimper, point first and then unfolded and the edges just trimmed to a square again (the crimping makes them bow out a little). This was adhered direct to the front of the card. Squares/diamonds of Cherry Cobbler and Naturals Ivory card (sponged again) were matted in the centre. The bauble was stamped in Versamark onto Cherry Cobbler card, covered in Heat and Stick Powder and heat embossed, covered in Gold Glitter and then gently heated again to set. This was punched out with the ornament punch. A loop of Gold Elastic Cord was added to the top and then the ornament was popped up on dimensionals on the card front. Finally, the sentiment was stamped in Cherry Cobbler ink onto a strip of Naturals Ivory card and the edges sponged in the same ink again. The strip was inserted into the crimper just as far as the text and the crimped a couple of turns at either end, this helped shape the banner which was then popped up on dimensionals.


Recipe (Inside)
Stamp set: Contempo Christmas
Cardstock: Naturals Ivory
Ink: Cherry Cobbler, Crumb Cake

For the inside, an insert of Naturals Ivory card was stamped with the sentiment in Cherry Cobbler ink and then the Christmas tree stamped off the card at either side in Crumb Cake.

I'd ended up using Naturals Ivory for this project just because I'd run rather low on Very Vanilla (I'm sure I've got a pack hiding somewhere) but I'm so glad that I did. It's the first time that I've used this card and it looks fantastic teamed with the Crumb Cake, it gives a much more natural look.

Thanks for stopping by.

Sara xx

Wednesday, 10 November 2010

Card candy swaps


Warning! Today's post is pic heavy.

I just lurve card candy, they're like regular crafting, squeezed into a concentrate, lol. And if I could only bear to part with them they make great presents for crafting friends too!

I took part in one of the ILWS organised swaps at Convention and made 10 lots of this candy:


Recipe

Stamp set: Serene Snowflakes, Four the Holidays (sentiment set)

Cardstock: Baja Breeze, Not Quite Navy, Whisper White, Medium Window Sheet, Vellum Paper

Ink: Not Quite Navy, Stazon White, Baja Breeze, Versamark

DSP: Elegant Soiree

Punches: Scallop Trim Border, Ornament, Butterfly, Scallop Square, 1-3/4” Circle, 1-3/8” Circle, 1” Circle, Star, Tag, Small Tag

Narrow Grosgrain Ribbon: Whisper White

Other: Silver Elastic Cord, Basic Rhinestones, Clear Rhinestone Brads, Dazzling Diamonds, Silver EP, White EP, Silver Brads, Large Silver Brad (Hodge Podge)


And these are all the lovely swaps that I got in return from the super talented ladies in my group (Group 3) (and I got to keep one of my own if you're wondering what happened to the 10th - it's not going spare, heehee).


From Emma using Cottage Garden


From Margaret using For Everything


From Michelle using Artisitic Etchings


From Kirsteen using Tiny Tags


From Rachel using Vintage Vogue


From Val using Growing Green


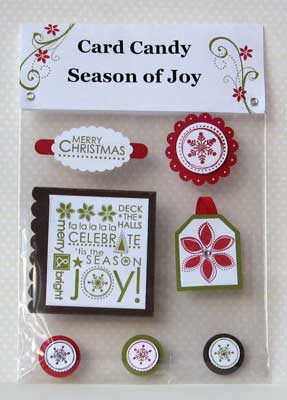
From Marisa using Season of Joy


From Jo using Cottage Garden


From Nicci using Contempo Christmas


And because Joanne and Jan (my upline and downline, together with me at Convention) were so jealous of my candy we've decide to have a little candy swap of our own so please pop back soon to see what we create for that.

Want your own card candy? Book a workshop with me and you and your friends can have a go at making your own. Just email me to find out how.

See you soon.

Sara xx

Friday, 22 October 2010

Fresh colours for christmas


Well that's my course finished and I'm just waiting around now to get my train, so I thought I'd hop online and share a quick card.

This is a very different colour scheme for me for a christmas card but DH approves and I'm hoping that some of you like it too.

The colour combo isn't one I'd have gone for, probably at any time of year, but it was suggested by the new Color Coach tool we have. The Coach has a card for every current colour that all fan out for you to test your own combos and on the back of each card are a few suggested combos. This was just one of them:


Recipe
Stamp sets: Perfect Punches, Contempo Christmas
Cardstock: Pear Pizzaz, Rich Razzleberry. Tempting Turquoise, Whisper White
Ink: Pear Pizzazz, Rich Razzleberry
DSP: Greenhouse Gala
Punches: Scallop Edge, Scallop Circle
Narrow Grosgrain Ribbon: Tempting Turquoise (retired)
Other: Fine Cosmo Glitter

The tree was stamped in Pear Pizzazz ink onto Whisper White card then matted onto layers of Pear Pizzazz, Tempting Turquoise and Rich Razzleberry card. A strip of Rich Razzleberry was punched along the long edges with the Scallop Edge. Tempting Turquoise ribbon was wrapped around this border and a matching bow added with a glue dot. Although the Tempting Turquoise ribbon has retired now, it's very easy to make your own by colouring Whisper White ribbon with a marker, inkpad or reinkers. The A6 portrait card blank of Pear Pizzazz was matted with a layer of Rich Razzleberry card and then a layer of Greenhouse Gala DSP. The border was adhered direct to the lower portion of the card front and the tree layers were popped up on dimensionals towards top left. Finally the christmas sentiment from the Perfect Punches stamp set was stamped in Rich Razzleberry ink onto Whisper White card, punched out with the Scallop Circle and popped up on dimensionals overlapping the corner of the tree layers.

Have a great weekend.

Sara xx

Monday, 18 October 2010

Traditional christmas with a bit of spritz


Well I'm back in Cardiff again and training hard. Management theory this week. Anyone else remember Porter's five forces? Nope? Me neither ... but I'm sure I will before the week's out. At least I hope so.

I thought I'd post this card today before I forget it too. I made it on Saturday morning for my sample board and ending up giving it to a couple of my crafting customers at a workshop in the afternoon! What sort of quick turnaround is that? Lol.

My ladies loved the traditional look with the popped up baubles and want to recreate it at home. They bought the two stamp sets but were worried that they wouldn't remember just how the card was made (they aren't big on using the internet ... yet, who knows though), so of course I had to let them keep it.

I've seen various versions of this card on the internet so I certainly won't claim it as original but I'm not sure who came up with it first. If anyone knows then I'll be happy to give credit.


Recipe
Stamp sets: Lovely as a Tree, Contempo Christmas
Cardstock: Cherry Cobbler, Garden Green, Very Vanilla
Ink: Garden Green, Cherry Cobbler
Punch: Ornament
Other: Gold Elastic Cord, Color Spritzer Tool, Paper Piercing Tool

I used the fir tree from the Lovely as a Tree set and simply stamped it at an angle (in Garden Green ink on Very Vanilla card) to make it look like branches, making sure that the base of the tree was stamped off the card. Next up was the new Spritzer tool. I've been itching to use this and I'm really taken with it - a chance to spatter without the mess, lol. You just put your marker pen (Garden Green in this case) in the tool and squeeze the bulb. It's best to practice on some scrap first to work out how far from the card to spritz, the further away you are, the more even the spatter (but not too far away, lol). As I was using the clear mount stamps I was easily able to stamp the sentiment just where I wanted it. The baubles were stamped in Cherry Cobbler (it's such a deep, rich red) onto Very Vanilla card and punched out with the Ornament. Each one was tied with a bow of Gold Elastic Cord. I then taped Gold Elastic Cord behind each bauble, used the Paper Piercing Tool to pierce a hole at the appropriate point on each branch, threaded the Cord through and taped it in place behind the layer. Dimensionals keep the baubles in place on this card but you could let them swing freely. The card front is layered onto a mat of Garden Green and then onto the Cherry Cobbler A6 portrait card blank.

Here's a closer view of the spritzing.


Now I'm going to skive off the revision for one night. Heading out for a crafty night with my friend Dawn but it'll be nose to the grindstone all the rest of the week.

See you soon.

Sara xx

Sunday, 10 October 2010

Recent make and takes


Hope you're having a lovely weekend. I had a fun afternoon yesterday, crafting with my MIL. We had a go at the same make and takes I did with my hostesses at their recent special event. The virtual hostesses who live at a distance and couldn't get to the event have now received their packs through the post, so I can share these with you now without spoiling any surprise. Why not join my Stampers 6 group (see the Spread the Cost tab at the top or click here) and as a virtual hostess you'll get an invite to the next event.

First up was this little treat holder:


Recipe
Stamp set: Long Fellows
Cardstock: Pacific Point, Bashful Blue, Whisper White
Ink: Pacific Point
Punch: Scallop Edge
(Retired) Gingham Ribbon: Bashful Blue
Other: Crop-a-dile, Blender Pen
Non-SU: Choc bar

We cut and scored a basic open-ended box 13cm x 5cm x 2cm and then decorated it before assembling. We used one of the new Long Fellows stamps which is a set of six different animals that you can earn with a Level 2 workshop (which in fact one of my hostesses did the very next day). The whale was stamped onto Bashful Blue card with Pacific Point ink and then coloured with the same ink using a blender pen. The bottom of the layer was punched with the Scallop Edge and then adhered to a layer of Whisper White card also punched with the Scallop Edge, to create the waves. We use the Crop-a-dile to punch a large hole front and back of the box and then adhered the image and assembled the box. Ribbon was threaded from front to back and the choc bar was used to push the ribbon to the end of the box before tying in a bow.

To get the choc bar out you simply pull the ribbon without untying it.


Next we made a simple Christmas card:


Recipe
Stamp set: Contempo Christmas
Cardstock: Crumb Cake, Cherry Cobbler, Very Vanilla
Ink: Early Espresso
Narrow Taffeta Ribbon: Early Espresso
Other: Fine Galaxy Glitter

The sentiment was stamped onto Very Vanilla card with Early Espresso ink. The new clear mount stamps made placement very easy. Next we tore the top and bottom of the Very Vanilla layer and adhered it direct to a strip of Cherry Cobbler which we also tore along. Both layers were adhered to a Crumb Cake card blank. The bauble was stamped in Early Espresso ink onto Very Vanilla card. At the hostess event we then had to cut this out but yesterday we were able to use the new Ornament punch - so much easier and quicker. The bauble was glittered and then popped up on dimensionals and finished with a bow made from the new Narrow Taffeta Ribbon, adhered with a glue dot.

Yesterday we made a slight variation:


Instead of Early Espresso ink, we used Versamark and Gold EP and MIL had her first go at heat embossing. I think she's hooked, lol.

And she's bought the new Ornament punch - I knew she'd love it.

Enjoy the rest of your weekend and please contact me if you'd like to join the Stampers 6 group.

Sara xx

Saturday, 2 October 2010

Baubles for a blue christmas

Wow! What a busy few days. I only just realised this afternoon, that yesterday was pay day. Completely slipped me by, lol.

... so perhaps I can afford to put in another order now? Heehee.

My lovely hostesses and I had a fab fun time last night at my special event for them, they seemed to like the gifts I'd made for them (I'll show you those soon - after I've posted them on to the hostesses that couldn't attend). Then this morning we had a great workshop - my hostess just squeezed in a Level 2 stamp set. A quiet afternoon though, so if you'd like to come along tomorrow afternoon and keep me company, it's Open House from 2pm-5pm. Just email me for directions.

Now I have another new set to show you that I used for the sketch challenge over at In Love With Stamping. Our challenge is this:


And this is my take on it:


Recipe
Stamp set: Contempo Christmas
Cardstock: Marina Mist, Bashful Blue, Pacific Point, Whisper White
Ink: Marina Mist
Satin Ribbon: Whisper White
Taffeta Ribbon: Whisper White
Narrow Taffeta Ribbon: Marina Mist
Other: Fine Cosmo Glitter

The two outer most baubles and the sentiment were stamped direct to the Bashful Blue card layer with Marina Mist ink. This layer was matted onto Pacific Point card. Whisper White Satin and Taffeta ribbons were added along the top before popping the layers up on dimensionals onto the Marina Mist A6 portrait card blank. For the centre bauble I stamped with Marina Mist ink onto Whisper White card and cut out (or punch out with new Extra Large Ornament). This bauble was decorated with the Light Blue glitter from the Fine Cosmo set and a dinky bow of the new narrow taffeta ribbon in Marina Mist, before popping up on dimensionals on the card front.

Both yesterday's and today's cards were made using clear-mount stamps. I find them so easy for positioning, but then I also like the solid feel of the wood mount stamps. I'm not sure which I like best - so glad that we now have the choice on so many sets.

Don't forget - just email me if you'd like to stop by tomorrow.

Sara xx