Showing posts with label Season of Joy. Show all posts

Monday, 6 December 2010

Silver snowflakes for Sketch Saturday


Brrr! It's cold out there isn't it? So lovely to be tucked up warm and cosy in front of the fire. Better still, I had a bit of time for crafting yesterday and had everything to hand, so I had a go at this sketch challenge from over at Sketch Saturday:


I went with one of my favourite colour combos and used a new wheel that I hadn't had chance to play with yet because of all my travels. Just had to wait then for today to have enough light to photograph it :-)


Recipe
Stamp sets: Lovely as a Tree, Season of Joy, Music Notes
Cardstock: Real Red, Basic Black, Whisper White
Ink: Basic Black, Versamark
Punches: Scallop Oval, Large Oval, Boho Blossoms
Other: Silver EP, Basic Rhinestones
Non-SU: Silver Cardstock, Die cuts

The card base is a 5" square of Real Red, matted with Basic Black and more Real Red. I wheeled the Music Notes across Whisper White card using Basic Black ink, three times and trimmed to strips to fit the card front. The tree, snowflakes and sentiment were stamped in Versamark onto Basic Black card and heat embossed with Silver EP. The tree was die cut and matted onto silver card, also die cut, then popped up on dimensionals on the left of the card front. After punching the sentiment out with the Large Oval it was matted direct to a Scallop Oval of silver card and popped up on dimensionals in the top right corner. The snowflakes (the centre of the snowflake in a circle stamp from Season of Joy) were punched out with the middle flower of the Boho Blossoms punch, popped up on dimensionals and finished with a tiny Rhinestone in the centre of each.

Keep warm.

Sara xx

Sunday, 5 December 2010

An easel card for the colour challenge at ILWS


Our colour challenge this month over at In Love With Stamping is to use:

Tempting Turquoise, Real Red and Old Olive

I opted to keep my Tempting Turquoise as an accent for this card:


Recipe
Stamp set: Season of Joy
Cardstock: Real Red, Old Olive, Very Vanilla
Ink: Real Red, Old Olive, Versamarker
Simply Scrappin' Kit: Christmas Jingle
Punch: 1-1/4" Circle, Boho Blossoms
Other: Heat and Stick Powder, Fine Cosmo Glitter, Silver Elastic Cord

The card blank is an A6 portrait easel card (so a normal portrait card with a fold line scored halfway down the card front). A layer of DSP from the Simply Scrappin' Kit was adhered to a layer of Old Olive and a 1-1/4" Circle punched from the upper right hand corner. The snowflake from the Season of Joy stamp set was coloured direct to stamp with the Versamarker, stamped onto Very Vanilla card, covered with Heat and Stick powder and heat embossed. Turquoise glitter from the Fine Cosmo set was added to the sticky image and heated gently to set. This was punched out with the largest flower from the Boho Blossoms. A second flower was punched from Very Vanilla card and a thread of Silver Elastic Cord was sandwiched between the two with a dimensional. An Old Olive Scallop Circle sticker from the Kit had a 1-1/4" Circle punched from the centre and was then adhered over the aperture to secure the snowflake in place. The whole front panel was adhered direct to the bottom half of the card front. The tree was stamped in Old Olive ink onto Very Vanilla card and cut out. The flourishes were traced with the fine nozzle of the Tombow glue and Turquoise glitter added. The tree was popped up on the card front with dimensionals. A Very Vanilla insert was added to the inside and the sentiment stamped in Real Red ink in the bottom right corner. A stopper bar for the easel card was made by adding a strip of card ribbon from the Kit, popped up on dimensionals.

Enjoy the rest of your weekend.

Sara xx

Wednesday, 1 December 2010

A no layers card for the ILWS technique challenge


Our technique challenge this month over at In Love With Stamping is to create a no layers card. I did find this one quite a toughie because I always have layers and the more time I have for crafting a card the more layers there are likely to be. It's always good to push outside your comfort zone though and I decided that as I couldn't have layers I'd try adding a bit of texture instead:


Recipe
Stamp set: Season of Joy
Cardstock: Crumb Cake
Ink: Craft White
Other: Basic Rhinestones

The tree and sentiment were stamped onto the Crumb Cake A6 landscape card blank in Craft White ink (I tend to get a more intense white with the Craft than the Stazon). The edges of the card were also brushed with the Craft White inkpad and the card left overnight to dry (or you could use a heat tool to set). I then used my Paper Cutter and bone folder to add the score lines (marking in pencil on the reverse where they needed to start and finish and then erasing afterwards). A Basic Rhinestone was added to the tree just because I like a bit of bling.

I also did a version using Old Olive ink (everything else was the same) but I prefer the white.


Which version do you prefer?

Sara xx

Wednesday, 10 November 2010

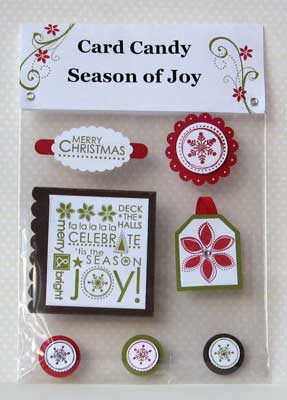
Card candy swaps


Warning! Today's post is pic heavy.

I just lurve card candy, they're like regular crafting, squeezed into a concentrate, lol. And if I could only bear to part with them they make great presents for crafting friends too!

I took part in one of the ILWS organised swaps at Convention and made 10 lots of this candy:


Recipe

Stamp set: Serene Snowflakes, Four the Holidays (sentiment set)

Cardstock: Baja Breeze, Not Quite Navy, Whisper White, Medium Window Sheet, Vellum Paper

Ink: Not Quite Navy, Stazon White, Baja Breeze, Versamark

DSP: Elegant Soiree

Punches: Scallop Trim Border, Ornament, Butterfly, Scallop Square, 1-3/4” Circle, 1-3/8” Circle, 1” Circle, Star, Tag, Small Tag

Narrow Grosgrain Ribbon: Whisper White

Other: Silver Elastic Cord, Basic Rhinestones, Clear Rhinestone Brads, Dazzling Diamonds, Silver EP, White EP, Silver Brads, Large Silver Brad (Hodge Podge)


And these are all the lovely swaps that I got in return from the super talented ladies in my group (Group 3) (and I got to keep one of my own if you're wondering what happened to the 10th - it's not going spare, heehee).


From Emma using Cottage Garden


From Margaret using For Everything


From Michelle using Artisitic Etchings


From Kirsteen using Tiny Tags


From Rachel using Vintage Vogue


From Val using Growing Green


From Marisa using Season of Joy


From Jo using Cottage Garden


From Nicci using Contempo Christmas


And because Joanne and Jan (my upline and downline, together with me at Convention) were so jealous of my candy we've decide to have a little candy swap of our own so please pop back soon to see what we create for that.

Want your own card candy? Book a workshop with me and you and your friends can have a go at making your own. Just email me to find out how.

See you soon.

Sara xx

Sunday, 13 December 2009

Cringle Mingle card candy and a nite light holder


Yesterday was my Cringle Mingle for my downlines and hostesses and as I'd been in Plymouth all week I was still rushing around at the last minute trying to finish things up as they were walking in the door. I therefore didn't get any pix of what I'd prepared for them (sorry about that). Each guest got a sheet of card candy, a little box of chocolates and a package of snowman soup. Luckily I'd made extra card candy for hostess gifts in the new year so I can at least show you that, lol. I got the idea for this from some of the demos that went to convention and did a card candy swap.


Recipe
Stamp sets: Darling Dots (hostess level 1), Fun and Fast Notes (for sentiments)
Cardstock: Close to Cocoa, Creamy Caramel, Ruby Red, Whisper White
Ink: Chocolate Chip, Close to Cocoa, Creamy Caramel, Ruby Red, Old Olive
Punches: Eyelet Border, Scallop Circle, 1-3/8" Circle, 1-1/4" Circle, Word Window, Large Star, Tag, Small Tag
Other: Gold Elastic Cord, Buttons, Gold Brads, Fine Galaxy Glitter

We had an open crafting session with everyone doing their own thing but one project that we did all have a go at together, was to make a nite light holder, following this tutorial over at ILWS. Here's mine.


Recipe
Stamp sets: Season of Joy, Scandinavian Season
Cardstock: Old Olive, Vellum
DSP: Holiday Treasures (retired)
Ink: Old Olive, Versamark
Punch: Eyelet Border
Other: White EP, Battery Tea Light

The battery operated tea light ensures that I won't burn the house down.


Now back to christmas card duty ...

Sara xx

Monday, 7 December 2009

A successful shopping trip and another challenge fulfilled


Yesterday's shopping trip went quite well. I found a lovely glass dish for one of my relatives (I doubt that she visits my blog but I'll still not say which one just to be on the safe side). It's in the shape of a leaf and so DH suggested filling it with a selection of nuts and a nutcracker. I thought he did great with that brainwave. The dish wasn't packaged in any way and so I'll need to make a box to give it in. Oh what a chore, lol.

When I got back home I managed to sneak in a little bit of crafting and I've played along with the Secret Crafter Saturday Challenge which was on the theme of a matching set (which you may have noticed by now, I love to do anyway). Here's what I came up with:


A pyramid card and a matching french fries box.


Recipe
Stamp sets: Season of Joy, Polka Dot
Cardstock: Not Quite Navy, Sage Shadow, Whisper White
Ink: Versamark, Sage Shadow
Other: Clear EP, White EP, Filigree Brad, Circle Ice Rhinestone Brad

I used the Polka Dot background stamp with Versamark to stamp two sides of the pyramid and heat embossed with White EP. You can't tell from the photos but the trees are glossy. To get this effect I first added Versamark to the stamp, followed immediately by Sage Shadow ink, before stamping out both layers of ink together onto Whisper White card and heat embossing with Clear EP. A Filigree Brad with a Rhinestone Brad centre, top off the tree.


Recipe
Stamp sets: Season of Joy, Polka Dot, Spotlight on Christmas
Cardstock: Not Quite Navy, Sage Shadow, Whisper White
Ink: Versamark, Sage Shadow, Not Quite Navy, White Stazon
Punch: Word Window
Narrow Grosgrain Ribbon: Very Vanilla
Other: Clear EP, White EP, Small Flat Cellophane Bag
Non-SU: French Fries die cut

The french fries box was made in a similar way to the card with the addition of the Christmas sentiment, selectively inked from the Spotlight on Christmas oval stamp. This was punched out with the Word Window and trimmed to make a mini banner. I stamped a Small Cellophane bag with the snowflake from the Season of Joy set, in White Stazon, before filling with choccies and tying with ribbon.

Thanks for stopping by.

Sara xx

Friday, 4 December 2009

A silver and not quite navy bauble card


Dreamboats and petticoats was a great night out on Wednesday. If you like the music of Roy Orbison and that era (ie. fairly early Roy) then you'll probably enjoy this show. The guy that played Bobby, the male lead, was quite a slight guy but what a voice!

We took Bess to the vets last night for the first shot of her vaccine. This is to desensitise her for her allergies to fleas, cats, dust mites and grass. She'll need a shot every two weeks to start, then extending to three and then four. The vet showed us how to inject her, so that in future we may be able to give her the vaccine at home. We'll go back for the next shot just so the vet can see that we do it right. Her allergy hasn't flared up for a good 6 weeks now (as the grass pollen isn't a problem at this time of year) but hopefully the vaccine will keep her rash free for quite some time even when the weather turns better in the Spring. Fingers crossed.

Anyhow, onto today's card:

Recipe
Stamp sets: Tree Trimmings, Season of Joy
Cardstock: Not Quite Navy, Whisper White
DSP: Ski Slope (retired)
Ink: Not Quite Navy, Versamark
Punches: Corner Rounder, Large Oval
Other: Stampin' Pastels, Silver EP, Earth Elements Brad, Silver Elastic Cord
Non-SU: Nestabilities

I cut the large oval aperture using my Nesties and punched the sentiment aperture with my large oval punch. The background card was sponged with Not Quite Navy and Night of Navy chalk. This bauble is popped up on a dimensional but you could leave it free swinging.

Have a great weekend everyone and don't forget to enter for my blog candy.

Sara xx

Sunday, 29 November 2009

Challenge no. 3 - Secret Crafter

Last one today. This one is for the Secret Crafter Saturday Challenge which is on the theme of:

Christmas Trees

Again I've stuck to the same stamp set and colours that I used earlier:


Recipe
Stamp set: Season of Joy
Cardstock: Old Olive, Chocolate Chip, Real Red, Very Vanilla
DSP: Christmas Jingle Simply Scrappin' Kit
Ink: Old Olive, Chocolate Chip, Real Red
Punches: Eyelet Edge, Scallop Oval, Large Oval
Narrow Grosgrain Ribbon: Real Red
Other: Fine Galaxy Glitter
Non-SU: Nestabilities

An easel card for my last one today and I used the Fine Galaxy Glitter to trim my tree and finish my poinsettias.

Sorry for the poor colours on today's cards. It's been dismal weather today and I still haven't figured out the best way to shoot indoors. I'll keep trying.

Please remember to stop back on Tuesday for my blogoversary candy.

Sara xx

Challenge no. 2 - Sweet Stampin

For my second challenge today I went over to the Colour Challenge at Sweet Stampin.

These are the colours to use (which I'm using for all my cards today):


This is the card I made with them:


Recipe
Stamp set: Season of Joy
Cardstock: Old Olive, Chocolate Chip, Real Red, Very Vanilla
DSP: I Wish Simply Scrappin' Kit (retired)
Ink: Old Olive, Chocolate Chip, Real Red
Punches: Eyelet Edge, Scallop Oval, Large Oval
Non-SU: Nestabilities

I edged the inside of the card with Real Red to show off the lacy edge.

See you later.

Sara xx

A crafting day to complete some challenges - sketch saturday

There's no new challenge today over at Stamp With Us, instead there's an extra week to complete last week's challenge and enter the DT call.

I'm using my time today to enter some other challenges and stock up some more christmas cards. For each challenge I'll stick to the same colours and the same stamp set.

My first stop is Sketch Saturday and this is the sketch:


I've turned it on it's side:


Recipe
Stamp Set: Season of Joy
Cardstock: Old Olive, Chocolate Chip, Real Red, Very Vanilla
DSP: I Wish Simply Scrappin' Kit (retired)
Ink: Old Olive, Chocolate Chip, Real Red
Punches: Scallop Edge, Corner Rounder, 1/4" Circle

I'll post the others as I get them done.

Guess I may have to fit in a little housework in between ;-)

Hope you're having a good weekend.

Sara xx

Sunday, 22 November 2009

Stamp with us DT call and news of other changes


First, today's Stamp With Us challenge. This week it's a recipe:
  • 3 brads
  • 2 patterned papers
  • 1 stamp
What - only 1 stamp! I figured I'd better make it count so I went for the Deck the Halls one from Season of Joy.


Recipe
Stamp set: Season of Joy
Cardstock: Old Olive, Real Red, Whisper White
DSP: Old Olive Patterns
Ink: Old Olive, Real Red, Craft White
Brads: Rich Regals
Punches: Scallop Edge, 1/2" Circle
Other: Mat pack, Piercing tool, Crop-a-dile

The 2 patterned papers were used to create the background panels. After stamping the full stamp in Old Olive, I stamped the little flowers again in Real Red and used my 3 brads to attach them to the main panel. I stamped the central portion of the stamp onto Old Olive card using Craft White and then cut out the accents and popped them up on dimensionals. The red mat was punched, pierced and finally embossed using my Crop-a-dile to create the spots in each scallop.

And now for some news ...

As you may have already spotted, the lovely Steph has unfortunately had to drop out of the DT and this means we have a spot open. If you'd like to join me and the others on the Stamp With Us Design Team then you need to enter this challenge and put DT after your name when you upload your entry via Mr Linky. The winner will be announced on Sunday 6 December so you have extended time for this.

Which brings me to the next change over at Stamp With Us. The challenges are going fortnightly. This gives the DT and you, more time to join in. Of course, if you have enough time, you could always enter twice!

And finally, on changes, we will be dropping the Recipe challenge after the DT call. Instead we will rotate the Sketch, Theme and Colour challenges every 6 weeks. The recipe challenge seems to have been the hardest for everyone and so following the vote with your feet, we're getting rid.

Please go check out the designs by the rest of the Design Team and I look forward to seeing all your entries, whether for the DT call or not.

A quick update now on classes. Yesterday's Creative Christmas class was a real giggle. Thanks ladies - I had a blast. Unfortunately we got so engrossed that I forgot to take pix to show here. It's funny though how no-one reminded me after I had mentioned it ... lol (I think they may be a bit camera shy).

We made four different colour versions of the Silent Night card here and we also made an easel card, a triangle box and a tri-shutter card. One of the ladies hadn't crafted before but she completed the whole lot with totally professional results. I think I've got another crafting convert!

Next classes will be in the new year. I'll post dates soon but email me if you have a preference over dates or what you'd like to try and I'll see if I can work it into the schedule.

Enjoy the rest of your weekend.

Sara xx

Thursday, 19 November 2009

Gold and silver trees suitable for mens christmas cards


At the craft fair on Saturday I sold all but two of my christmas cards and now I've realised that I've got a whole bunch more that I need to make to give to friends and family next month, lol. For today's post I've made two similar christmas cards, one silver, one gold. I think that they'll make good men's cards. What do you think? Are they too blingy for men?

Recipe
Stamp set: Scandinavian Season
Cardstock: Basic Black, Tempting Turquoise
Ink: Versamark
Other: Silver EP, Silver Brads, Silver Elastic Cord, Fine Cosmo Glitter, Circle Ice Rhinestone Brad

The tree is stamped with Versamark and heat embossed with silver powder. I used the 2-way glue pen to pick out part of the design and covered with the Turquoise glitter from the Fine Cosmo set. Silver elastic cord was wrapped around the lower portion of the mat for added interest and to balance the layout.


Recipe
Stamp sets: Scandinavian Wheel, Season of Joy
Cardstock: Whisper White
Ink: Not Quite Navy

To provide some white space to write the card, I added an insert to the back page.


Recipe
Stamp set: Scandinavian Season
Cardstock: Basic Black
Ink: Versamark
Other: Gold EP, Gold Brads, Gold Elastic Cord
Punch: Corner Rounder
Non-SU: Gold Mirri Card

The only variation here in addition to the colours is that I left off any glitter and rounded all the corners.


Recipe
Stamp sets: Scandinavian Wheel, Season of Joy
Cardstock: Whisper White
Ink: Versamark
Other: Gold EP
Punch: Corner Rounder

Well, that's another two down but quite a ways to go yet. Are you bored with all the Christmas cards? Let me know if you'd like to see something different for a change.

Sara xx

Tuesday, 17 November 2009

Tree gifts or table favours for Christmas


I only had time to make a few of these for the craft fair on Saturday and they all got snapped up early on but I think I need to make a few more to set out as table favours at our own Christmas dinner. Each of these holds 3 wrapped chocolates.


The design for them is from a tutorial over at Splitcoaststampers.


Recipe
Stamp sets: Season of Joy, Tree Trimmings
Cardstock: Old Olive, Real Red, Whisper White
Ink: Real Red, Craft White
DSP: Ski Slope (retired)
Punches: 5-petal flower, 1/2" Circle, Tag, Small Tag, Crop-a-dile
Other: Gold Elastic Cord

The only stamp I used from the Season of Joy set was the very dinky flower for the centre of my punched ones. I used the new Craft White ink to stamp the little bauble on the tag. I recommend cleaning your stamp as soon as you've used it, otherwise I found that my inkpad went a little pink when I stamped again. The Small Tag punched from Whisper White is on the reverse of the tag to allow for a message or place name if using as table favours.

Thanks for stopping by.

Sara xx

Friday, 13 November 2009

A red easel card and matching gift bag and Bess in her high vis coat


I've been meaning to make one of these easel cards for ages and now that I've got around to it I'm loving them. They're so easy to do but they have that bit of a wow factor. I'm still stockpiling for the craft fair tomorrow and so I made a matching gift bag to go with the card again.


Can you see the little tag on the bag? Guess what I got free with my last order? I spent two lots of £45 from the gift giving guide and so I got both of the Tag punches free. Details are here or at the top of the right hand menu just under the blinkie and the offer is on right through to 29 December 2009. It certainly makes short work of little gift tags.


Recipe
Stamp sets: Season of Joy, Spotlight on Christmas, A Tree for all Seasons
Cardstock: Real Red, Very Vanilla
Ink: Real Red
DSP: I Wish Scrappin' Kit (retired)
Punches: Scallop Circle, 1-3/8" Circle, 1-1/4" Circle, 1/2" Circle, Scallop Oval, Large Oval, Eyelet Border

I cut an A4 sheet of card in half lengthways to get a piece that measured 29.7cm x 10.5cm. I then scored the card at 14.9cm and 22.3cm. The card front is only stuck down to the bottom quarter panel and a raised sentiment has been placed approximately halfway down the inside of the card to act as a stopper to stand the front against.


Recipe
Stamp sets: Spotlight on Christmas
Cardstock: Real Red, Very Vanilla (plain), Very Vanilla (textured)
Ink: Real Red
DSP: I Wish Scrappin' Kit (retired)
Punches: Eyelet Border, 5-petal flower, Tag, Small Tag, Round Tab
Narrow Grosgrain Ribbon: Real Red
Other: Gold Brads, Pewter Eyelets, Gold Elastic Cord

The instructions for the bag are from Splitcoaststampers here. I used textured Vanilla card for the trim around the base, the flowers and the Tab fastening, for the luxury feel it adds. I used plain Vanilla card for the front and back of the tag, so that the stamped image would show clearly and to make it easier to write on.

We're just about to go and pick up Bess from the vets so I just thought I'd leave you with a pic of her in her high visibility coat that I make her wear when we go for a walk on these dark mornings. Isn't she cute?


Have a great weekend.

Sara xx

Wednesday, 11 November 2009

Another christmas duo and an impending op for Bess, ssh don't tell her


Finally ... a brighter day and so chance to take some pics of the card and bag I made on Sunday. I still have some of last year's christmas scrappin' kit left (they go a long way - excellent value) so I'm using those up before I do any more with the new Christmas Jingle kit. I missed my regular dose of Stamp With Us challenge on last week (the DT had a week off for the SU convention) and so I'm also entering these for the ongoing Christmas theme challenge - normal service is resumed this Sunday.

This duo is bound for the Christmas Fair at Felkirk on Saturday, so if you're in the area then please stop by and say "Hi" to JJ and I.

Hubby and I started our christmas shopping last night and picked up a few family gifts. I'm hoping that getting started a bit earlier might mean that I get to be a bit more imaginative with some of the wrapping. Please, please don't rub things in by telling me that you're all shopped up and wrapped already, lol.

While we were shopping we also got a high visibility coat for Bess (our Staffie) to keep her safe when I walk her on these dark mornings. She looks soooo cute in it. I'll try to get a pic to show you. Ssh, don't tell her, but she's being taken to be spayed on Friday so she may not be speaking to us this weekend.

Anyway, onto the recipes.


Recipe
Stamp set: Scandinavian Season, Season of Joy
Cardstock: Old Olive, Real Red, Whisper White
DSP: I Wish Simply Scrappin' kit (retired)
Ink: Versamark, Real Red
Punch: Corner Rounder, Scallop Oval, Large Oval
Wide Grosgrain Ribbon: Old Olive
Other: Gold EP, Gold Brad, Fine Cosmo glitter (celery)
Non-SU: Die Cut mats

Recipe
Stamp sets: Punches 3 (hostess), Polka Dot Punches (retired)
Cardstock: Old Olive, Real Red, Whisper White
DSP: I Wish Simply Scrappin' kit (retired)
Ink: Old Olive, Real Red
Punches: Round Tab, Square Scallop, Eyelet Border, 5-petal
Narrow Grosgrain Ribbon: Real Red
Other: Gold Brads, Gold Eyelets, Gold Elastic Cord

If you have any tips on nursing Bess after her op then please drop me a comment.

Thanks

Sara xx