Saturday 30 October 2010

A little black magic for Halloween


No, it's not really a Halloween card but I thought the black magic technique made quite a good tie in to the occasion, especially as I don't have any more Halloween items to show you at the moment. Must add making up the trick or treat bags to my ever expanding to do list today.

This is based on a card that I made for swaps when my upline and downline came round a few weeks ago. As I was dashing around at the last minute (no change there then lol) I made their cards but didn't get around to finishing mine until this morning. Mine's slightly different as I didn't think about the clear embossing until later.
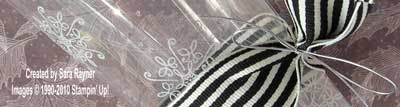
Recipe
Stamp set: Ornate Flowers
Cardstock: Basic Black, Rose Red, Regal Rose
Ink: Whisper White Craft, Versamark, Watercolour Pencils
Punches: Scallop Trim Corner, Scallop Trim Border
Other: Clear EP

The A6 portrait card blank of Basic Black was stamped with thistle stamp in Versamark and then heat embossed with Clear EP.The frondy flower was stamped in Whisper White Craft ink on Basic Black card and left to dry (or you can use your heat tool to dry if you can't wait). This provides a base which you can then colour on with the Watercolour Pencils - and have them show up. If you colour direct to the Basic Black card, you'll hardly see it. I used two different shades of the two colours to provide a more 3d effect. You simply colour over the white image with your pencils (this is the black magic technique). This image was matted direct to Regal Rose card and then popped up on dimensionals on another mat of Rose Red card (3-13/16" x 2-7/8") that had been punched with the Scallop Trim Corner and Border punches. The whole was popped up on dimensionals on the card front.

Enjoy your weekend and have a Happy Halloween tomorrow.

Sara xx

Thursday 28 October 2010

Sparkly gems for my sparkly gems


Today's card is one that we made for a make and take at a recent workshop. Make and takes aren't always this involved, but this is a group that have had a lot of workshops with me and I wanted to do them something a little special for a christmas project. To make it even more special, we used the gorgeous gems that are now available in packs with 50 small, 50 medium, 50 large and 3 strips - either rhinestones or pearls.


Recipe
Stamp set: Delightful Decorations
Cardstock: Bashful Blue, Whisper White, Pacific Point
Ink: Bashful Blue, Marina Mist, Pacific Point
Punches: Scallop Edge, Ornament, Modern Label, 3/4" Circle
Other: Basic Rhinestones

The card blank is A6 landscape in Bashful Blue. A panel of Whisper White was background stamped with two small stamps from the set in Bashful Blue and Marina Mist inks. This was matted onto a narrow strip of Pacific Point card at the top and another narrow strip of Pacific Point card, punched with the Scallop Edge, at the bottom. This was adhered direct to the card front. The Joy ornament was stamped twice in Marina Mist onto Whisper White card and punched with the Ornament. These were adhered direct to the stamped panel at either end. The snowflake ornament was stamped three times in Pacific Point ink onto Whisper White card and punched again with the Ornament. These were each folded down the centre and adhered half, to half, to half to create a 3d bauble and popped up on dimensionals in the centre of the panel. The small sentiment from the set was stamped in Pacific Point ink onto Whisper White card, punched with the 3/4" Circle and popped up on Pacific Point card punched with the Modern Label. These layers were popped up on dimensionals on the card front, centre bottom. Finally medium rhinestones were added to the Joy ornaments and a small rhinestone to the sentiment.

All the ladies managed their own beautiful copies of this quite easily - you truly are my sparkly gems girls!

Sara xx

Wednesday 27 October 2010

Last minute spot in my Stampers 6 Club

Hi all

I just wanted to let you know that there's an opportunity to grab a last minute spot in my Stampers 6 Club. A lady who was interested, can't go ahead with her place after all and we're just about to run our first virtual workshop. The details for the Club are here.

The main points are that the Club runs for 6 months and members agree to place a minimum order of £25 per month plus p&p. In return you'll get a minimum level 1 stamp set, £15 worth of free spend in the catalogue and other benefits besides.

If you're interested please email as soon as possible as I'll need your order this weekend.

Sara xx

Tuesday 26 October 2010

Shabby tres chic with love


Another "shabby" card for you today. I would never have dreamed of tearing my card and distressing it like this a year ago and yet I really enjoy these techniques and love the different look you get. I guess it's good to step outside your comfort zone now and again. What do you think?


Recipe
Stamp set: Artistic Etchings
Cardstock: Cajun Craze, Early Espresso, Baja Breeze, Very Vanilla
Ink: Early Espresso, Crumb Cake, Baja Breeze, Old Olive
DSP: Tangerine Tango
Striped Grosgrain Ribbon: Old Olive
Other: Early Espresso Brads, Cutter Kit, Colour Spritzer Tool

I started with an A6 portrait card blank of Cajun Craze and matted it with layers of Tangerine Tango DSP (sponged lightly around the edges with Cajun Craze ink) and Early Espresso cardstock. The medallion stamp was inked with Baja Breeze, stamped off once onto scrap and then stamped onto Very Vanilla card for a more faded look. Using Early Espresso ink the Eiffel Tower was stamped to one side of the medallion and then the sentiment stamped over in Old Olive. This front layer was torn across the bottom, distressed around the edges with the Cutter Kit and Early Espresso ink then spritzed with Early Espresso and Crumb Cake markers. I'm loving this new colour spritzer tool (and can't wait for my distressing essentials kit to arrive later this week, heehee)! The whole layer was adhered to a layer of Baha Breeze that was also torn across the bottom and distressed around the edges. Early Espresso brads were added bottom left and a fold of striped ribbon behind the layers bottom right before popping up on dimensionals on the card front.

Thanks for stopping by.

Sara xx

Sunday 24 October 2010

Long fellows cut short


Hope you're having a good weekend. It's lovely to be back home though a little frantic for me now, getting all my swaps ready for convention! Hard to believe that in a fortnight it'll be all over. In case you don't know what this convention is that I'm whittering on about, Stampin' Up! hold an annual 2 day event for demos - a chance to learn new crafting techniques, be inspired by other demos, swap, swap, swap and craft, craft, craft. (If you want to come along next year then join my team). I can't wait for it to roll around but I've still got so much to prepare that it's a good thing that there's still a week or so to go.

Anyway a quick little card for you today. Although the Long Fellows stamps seem ideal for long, thin images, there's no reason you can't cut them down to size for other types of layout.


Recipe
Stamp set: Long Fellows (Level 2 hostess set)
Cardstock: Crumb Cake, Wild Wasabi, Soft Suede, Pacific Point, Cajun Craze, Pumpkin Pie, Old Olive, Whisper White
Ink: Wild Wasabi, Soft Suede, Pacific Point, Cajun Craze, Pumpkin Pie, Old Olive,
Punches: Scallop Square, 1-1/4" Circle, 1" Circle

The card blank is an A6 portrait in Crumb Cake. I punched a Scallop Square from each of the other colours and then stamped each of the Long Fellows animals (apart from the elephant) in the corresponding colour ink onto Whisper White card. For those that looked a little too plain just stamped (the alligator and the whale) I added a little more shading around the edges using a blender pen. The birthday wishes greeting was selectively stamped by colouring direct the the (tortoise) stamp with a marker. The animals and the sentiment were punched out with the 1" Circle and adhered direct to Crumb Cake circles punched with the 1-1/4" Circle. The Circles were popped up on dimensionals on top of their Scallop Squares and then popped up on the card front.

Enjoy the rest of your weekend.

Sara xx

Friday 22 October 2010

Fresh colours for christmas


Well that's my course finished and I'm just waiting around now to get my train, so I thought I'd hop online and share a quick card.

This is a very different colour scheme for me for a christmas card but DH approves and I'm hoping that some of you like it too.

The colour combo isn't one I'd have gone for, probably at any time of year, but it was suggested by the new Color Coach tool we have. The Coach has a card for every current colour that all fan out for you to test your own combos and on the back of each card are a few suggested combos. This was just one of them:


Recipe
Stamp sets: Perfect Punches, Contempo Christmas
Cardstock: Pear Pizzaz, Rich Razzleberry. Tempting Turquoise, Whisper White
Ink: Pear Pizzazz, Rich Razzleberry
DSP: Greenhouse Gala
Punches: Scallop Edge, Scallop Circle
Narrow Grosgrain Ribbon: Tempting Turquoise (retired)
Other: Fine Cosmo Glitter

The tree was stamped in Pear Pizzazz ink onto Whisper White card then matted onto layers of Pear Pizzazz, Tempting Turquoise and Rich Razzleberry card. A strip of Rich Razzleberry was punched along the long edges with the Scallop Edge. Tempting Turquoise ribbon was wrapped around this border and a matching bow added with a glue dot. Although the Tempting Turquoise ribbon has retired now, it's very easy to make your own by colouring Whisper White ribbon with a marker, inkpad or reinkers. The A6 portrait card blank of Pear Pizzazz was matted with a layer of Rich Razzleberry card and then a layer of Greenhouse Gala DSP. The border was adhered direct to the lower portion of the card front and the tree layers were popped up on dimensionals towards top left. Finally the christmas sentiment from the Perfect Punches stamp set was stamped in Rich Razzleberry ink onto Whisper White card, punched out with the Scallop Circle and popped up on dimensionals overlapping the corner of the tree layers.

Have a great weekend.

Sara xx

Wednesday 20 October 2010

Beautiful pearl accents for an ornate flower


Monday night I had a lovely crafty evening with my friend Dawn. (Dawn, thanks for the fab lasagne and the marvellous company and hospitality of you and your family *waves*).

Last night it was hard at work catching up with my study and it's more of the same tonight, though first, a call home to catch up with DH and Bess.

When I do manage a bit of downtime between the study I'm busy working on swaps for convention. For now then, I thought I'd share a card from our workshop at the weekend.

Speaking of workshops, we had some good news yesterday. We are now able to take debit and credit card payments. I know how often I've been asked for that and it's great that SU have listened - now it's finally live. You can provide your details for either a one-off order, or for me to keep on file (stored securely) to pay for future orders too.

Anyhow, I demonstrated this card to show how versatile this stamp set is, how easy it is to colour direct to stamp and just how gorgeous these diddy pearls are:


Recipe
Stamp set: Ornate Flowers
Cardstock: Peach Parfait, Soft Suede, Very Vanilla
Ink: Versamark, SU Markers (Peach Parfait, Pear Pizzazz)
DSP: Sunny Garden
Punches: Scallop Trim Corner, Scallop Trim Border
Other: Basic Pearls

I folded the front of the A6 Peach Parfait card blank back on itself to create a zig-zag front and added a panel of the lush Sunny Garden DSP direct to it. The back inside edge of the card was stamped repeatedly in a vertical line with the ornament stamp in Versamark for a subtle watermark effect. Using markers, I coloured direct to the stamp (keeping the marker fairly flat so as not to damage the nib) and stamped out onto Very Vanilla card. This main image was adhered direct to a mat of Peach Parfait. A mat of Soft Suede was cut to precise dimensions (3-13/16" x 2-7/8") to create the scallop trim rectangle using the two punches. The first two layers were popped up on dimensionals on this scallop trim mat and again onto the card front. Finally the teeny tiny self adhesive pearls were added between each scallop.

Hope you like it as much as my ladies did.

Sara xx

Monday 18 October 2010

Traditional christmas with a bit of spritz


Well I'm back in Cardiff again and training hard. Management theory this week. Anyone else remember Porter's five forces? Nope? Me neither ... but I'm sure I will before the week's out. At least I hope so.

I thought I'd post this card today before I forget it too. I made it on Saturday morning for my sample board and ending up giving it to a couple of my crafting customers at a workshop in the afternoon! What sort of quick turnaround is that? Lol.

My ladies loved the traditional look with the popped up baubles and want to recreate it at home. They bought the two stamp sets but were worried that they wouldn't remember just how the card was made (they aren't big on using the internet ... yet, who knows though), so of course I had to let them keep it.

I've seen various versions of this card on the internet so I certainly won't claim it as original but I'm not sure who came up with it first. If anyone knows then I'll be happy to give credit.


Recipe
Stamp sets: Lovely as a Tree, Contempo Christmas
Cardstock: Cherry Cobbler, Garden Green, Very Vanilla
Ink: Garden Green, Cherry Cobbler
Punch: Ornament
Other: Gold Elastic Cord, Color Spritzer Tool, Paper Piercing Tool

I used the fir tree from the Lovely as a Tree set and simply stamped it at an angle (in Garden Green ink on Very Vanilla card) to make it look like branches, making sure that the base of the tree was stamped off the card. Next up was the new Spritzer tool. I've been itching to use this and I'm really taken with it - a chance to spatter without the mess, lol. You just put your marker pen (Garden Green in this case) in the tool and squeeze the bulb. It's best to practice on some scrap first to work out how far from the card to spritz, the further away you are, the more even the spatter (but not too far away, lol). As I was using the clear mount stamps I was easily able to stamp the sentiment just where I wanted it. The baubles were stamped in Cherry Cobbler (it's such a deep, rich red) onto Very Vanilla card and punched out with the Ornament. Each one was tied with a bow of Gold Elastic Cord. I then taped Gold Elastic Cord behind each bauble, used the Paper Piercing Tool to pierce a hole at the appropriate point on each branch, threaded the Cord through and taped it in place behind the layer. Dimensionals keep the baubles in place on this card but you could let them swing freely. The card front is layered onto a mat of Garden Green and then onto the Cherry Cobbler A6 portrait card blank.

Here's a closer view of the spritzing.


Now I'm going to skive off the revision for one night. Heading out for a crafty night with my friend Dawn but it'll be nose to the grindstone all the rest of the week.

See you soon.

Sara xx

Saturday 16 October 2010

Artistic etchings in new colours


I had a good fun night on Thursday with my downline Jan and my upline Joanne. We gossiped plenty about Convention next month and what to expect. It's the first one for Jan and I, we couldn't make it last year and we're so excited - with good reason from everything that Joanne's told us. We had some lovely swaps between us, which I'm can't share yet because some of them are being swapped today and others may also be for convention so I don't want to spoil any surprises. I've now also got my hands on samples of all the main DSPs, the coloured brads and the buttons, so I'm busy putting my sample book together to take to workshops, so that you can all see everything for real - they're so much better than just on the page.

Today's card is one that I've made using the Artistic Etchings in the clear mount version. The clear mount really does make it a doddle to place your stamps quickly and easily.


Recipe
Stamp sets: Artistic Etchings, En Francais
Cardstock: River Rock, Marina Mist, Very Vanilla, Cherry Cobbler
Ink: Not Quite Navy, Soft Suede, Cherry Cobbler
Punch: 1-3/4" Circle
Narrow Taffeta Ribbon: Marina Mist
Other: Linen Thread

I stamped the Eiffel Tower in Not Quite Navy ink onto a layer of River Rock card. By stamping again onto a sticky note and cutting it out I created a mask for the image. I placed it over the original before stamping again on the same layer with the En Francais background stamp in Soft Suede ink and then removing the mask. These two stamp sets are just made for each other. This stamped layer was matted direct to a layer of Marina Mist. A bow of Marina Mist Narrow Taffeta Ribbon was wrapped around the top left corner before adhering the layers direct to an A6 portrait card blank of River Rock. I stamped the pendant in Not Quite Navy ink onto a scrap of Marina Mist and punched it out with the 1-3/4" Circle. This was popped up on dimensionals in the top right corner. The Amour sentiment was stamped in Cherry Cobbler ink on Very Vanilla card and cut out following the shape of the word. It was then adhered direct to a scrap of Cherry Cobbler Card and cut again following the shape, before popping up on dimensionals in the centre of the circle. Finally the key was stamped in Not Quite Navy ink on River Rock card, cut out, tied with Linen Thread to the ribbon and fixed in place with dimensionals cut in half.

I think this would work quite well as an anniversary card. What do you think?

I'm off to Cardiff once again tomorrow. More training in preparation for my exams in November, but also meeting up with a crafty friend while I'm there so it's not all bad. And I've got a few cards ready to share with you next week so please pop by. Off now to finish getting ready for this afternoon's workshop.

Have a great weekend.

Sara xx

Thursday 14 October 2010

Loooong cats and dogs for a plain and simple card


Last night DH and I went to see Hamlet at the Crucible theatre in Sheffield. I wasn't altogether looking forward to it, more DH's choice than mine, I prefer Shakespeare's comedies to his tragedies and it's a looong play.

But I was glad I went. It was excellent (as long as you're ok with Shakespeare generally). There was a stellar cast; John Sims (Life on Mars), John Nettles (Midsomer Murders), Barbara Flynn (Cranford, Beiderbecke Affair), Hugo Ross (The Palace) and great supporting actors too. We had front row seats, which for the Crucible means really up close to the actors.

Anyway, onto another looong item. Our new Long Fellows stamp set, which is a Level 2 hostess set that you can get for free by holding a workshop. Here I've wrapped the animals around the card.


Recipe
Stamp set: Long Fellows
Cardstock: Crumb Cake, Very Vanilla
Ink: Crumb Cake, Black Stazon, Watercolour Wonder Crayons
Punches: Scallop Oval, Word Window

I cut and folded the Crumb Cake (renamed from Kraft) to create an A6 gatefold card blank and then folded it back out flat to stamp on the cat and the dog in Black Stazon. I inked the stamps up carefully to leave off the sentiment underneath each (or you could use a mask - I got these in clear mount so it's easy to see through for masking). Using an aquapainter and my Watercolour Wonder Crayons I coloured the two of them in. I stamped the Thanks sentiment from the Perfect Punches in Crumb Cake (now also available in inks) onto Very Vanilla card and punched out with the Scallop Oval. As I didn't want this to be a thank you card I then stamped the sentiment underneath the dog (selectively inking direct to stamp again) in Basic Black onto Very Vanilla card and punched this out with the Word Window. The new sentiment was then adhered directly over the thank you and the topper popped up on a dimensional on the left front of the card. I finished the inside by selectively stamping the sentiment from the cat stamp, "hope your day is purrfect!".


Off now to get ready for tonight's crafting treat. My upline and my downline are coming round. Lots of crafting and a chance to swap DSPs so that we each have a piece of all the new ones for our sample books. I'm guessing that we'll also be making plans for the Stampin' Up! convention on 5 November (if you'd like to know more then just email me).

Sara xx

Tuesday 12 October 2010

Hostess gifts for my lovely ladies


This was the table set to greet my hostesses at their recent event:


As well as a copy of the catty and the make and takes I'd also made a few gifts for each of them to take away. There was a little treat folder based on the same design as I'd made here but using a different colour combo and using the rock n roll technique rather than embossing:


Recipe
Stamp sets: Ornate Flowers, Perfect Punches
Cardstock: Marina Mist, Whisper White
Ink: Marina Mist, Certainly Celery
Punch: Scallop Oval
Narrow Grosgrain Ribbon: Certainly Celery
Narrow Taffeta Ribbon: Marina Mist

The card was cut a little longer than usual and folded to create little pockets for their treats:


Should just keep them going while they sit and browse the catty.

And then they each had a notebook and pen for making notes as we went along that evening.


Recipe
Stamp set: Ornate Flowers
Ink: White Stazon
DSP: Greenhouse Gala
Non-SU: Notebook, Pen

The notebook was stamped direct with Stazon. I used White Stazon on the darker colour notepads and Black on the lighter/brighter ones. The pens were prettied up by inserting a rolled piece of DSP into the barrel.

It was funny to see how they made notes on scraps of paper so that they didn't "spoil" their new notepads, heehee.

We had a great evening and my virtual hostesses that live further afield still didn't miss out as I mailed their gifts to them.

There's still time to join my Stampers 6 group (see the Spread the Cost tab at the top or click here for details) if you'd like to be one of my pampered hostesses next time around.

Thanks for stopping by.

Sara xx

Sunday 10 October 2010

Recent make and takes


Hope you're having a lovely weekend. I had a fun afternoon yesterday, crafting with my MIL. We had a go at the same make and takes I did with my hostesses at their recent special event. The virtual hostesses who live at a distance and couldn't get to the event have now received their packs through the post, so I can share these with you now without spoiling any surprise. Why not join my Stampers 6 group (see the Spread the Cost tab at the top or click here) and as a virtual hostess you'll get an invite to the next event.

First up was this little treat holder:


Recipe
Stamp set: Long Fellows
Cardstock: Pacific Point, Bashful Blue, Whisper White
Ink: Pacific Point
Punch: Scallop Edge
(Retired) Gingham Ribbon: Bashful Blue
Other: Crop-a-dile, Blender Pen
Non-SU: Choc bar

We cut and scored a basic open-ended box 13cm x 5cm x 2cm and then decorated it before assembling. We used one of the new Long Fellows stamps which is a set of six different animals that you can earn with a Level 2 workshop (which in fact one of my hostesses did the very next day). The whale was stamped onto Bashful Blue card with Pacific Point ink and then coloured with the same ink using a blender pen. The bottom of the layer was punched with the Scallop Edge and then adhered to a layer of Whisper White card also punched with the Scallop Edge, to create the waves. We use the Crop-a-dile to punch a large hole front and back of the box and then adhered the image and assembled the box. Ribbon was threaded from front to back and the choc bar was used to push the ribbon to the end of the box before tying in a bow.

To get the choc bar out you simply pull the ribbon without untying it.


Next we made a simple Christmas card:


Recipe
Stamp set: Contempo Christmas
Cardstock: Crumb Cake, Cherry Cobbler, Very Vanilla
Ink: Early Espresso
Narrow Taffeta Ribbon: Early Espresso
Other: Fine Galaxy Glitter

The sentiment was stamped onto Very Vanilla card with Early Espresso ink. The new clear mount stamps made placement very easy. Next we tore the top and bottom of the Very Vanilla layer and adhered it direct to a strip of Cherry Cobbler which we also tore along. Both layers were adhered to a Crumb Cake card blank. The bauble was stamped in Early Espresso ink onto Very Vanilla card. At the hostess event we then had to cut this out but yesterday we were able to use the new Ornament punch - so much easier and quicker. The bauble was glittered and then popped up on dimensionals and finished with a bow made from the new Narrow Taffeta Ribbon, adhered with a glue dot.

Yesterday we made a slight variation:


Instead of Early Espresso ink, we used Versamark and Gold EP and MIL had her first go at heat embossing. I think she's hooked, lol.

And she's bought the new Ornament punch - I knew she'd love it.

Enjoy the rest of your weekend and please contact me if you'd like to join the Stampers 6 group.

Sara xx

Friday 8 October 2010

Punched and folded baubles for an easy 3d effect


Yippee! My order was waiting for me when I got home last night and here's a pic of my new toys - ahem, new professional crafting tools I mean, heehee.


Now I missed out on a regional training event recently because I was away on holiday but I heard that they got to try the new ornament punch to make a 3d bauble on a card and I thought that I'd have a go. This card is really quite easy and ideal for a very elegant stamp-a-stack.


Recipe
Stamp sets: Delightful Decorations, Contempo Christmas (sentiment)
Cardstock: Marina Mist, Whisper White
Ink: Marina Mist
Punches: Ornament Extra-Large, Scallop Trim Border
Narrow Taffeta Ribbon: Marina Mist
Other: Basic Pearls

The card blank is an A6 portrait in Marina Mist. A mat of Whisper White was punched top and bottom with the Scallop Trim Border. The card front of Whisper White was stamped direct with the sentiment in Marina Mist (I used the clear mount so easy to place it correctly). Three of the centre snowflake baubles from the Delightful Decorations (a wood mount) set were stamped in Marina Mist on Whisper White card and punched out with the Ornament. Each of the baubles were scored and folded vertically down the centre and then half of one adhered to the other half of the next etc to make a 3d bauble that folds flat for easy posting. The Joy bauble was also stamped in Marina Mist on Whisper White card and punched out and some of the new Basic Pearls added to it. These pearls (and the rhinestones) are self-adhesive and you get 150 individual ones and 3 additional strips in each pack. Narrow taffeta ribbon was wrapped from the top of the card front to where each bauble would be. The card front was adhered direct to a Marina Mist mat, then the Scallop Trimmed mat and then popped up on dimensionals on the card blank. The two baubles were popped in place with dimensionals and topped off with a ribbon of the narrow taffeta ribbon adhered with a glue dot.

Here's a close up of the 3d bauble.


My MIL's coming over tomorrow and I just know she'll love this punch.

Have a great weekend.

Sara xx

Wednesday 6 October 2010

Limited supplies take 2 - vellum christmas gift bag


You may remember that one of my challenges over at ILWS is a limited supplies one and I've opted to repeat this challenge for today's project.

The challenge is that no card is allowed! You can use acetate, vellum, DSP, candles, tiles coasters ... in fact anything just as long as it's not cardstock.

My stamping uses two very popular sets at the moment that luckily have made it through to the new catty (and no wonder, I think we'd have had some major complaints if these had retired so soon).


Recipe
Stamp sets: Dasher, Serene Snowflakes
Cardstock: Cardstock Vellum
Ink: Versamark
Satin Ribbon: Whisper White
Other: Silver EP, White EP, Dazzling Diamonds, Pewter Jumbo Eyelets

I created the gift bag from cardstock vellum and cut and scored it in preparation (just gently scoring with the bone folder in the paper cutter groove, deep scoring will tear the vellum). I then decorated the gift bag before assembling. Dasher was stamped in Versamark and heat embossed with Silver EP and the trio of small snowflakes from the Serene Snowflakes set were stamped in Versamark and heat embossed with White EP. A 2-way glue pen and Dazzling Diamonds add a little bling to the bag (just visible in the pic). To assemble the bag I used SNAIL on the base and for the vertical join, which I kept to one of the bag corners so that it doesn't show too obviously. Pewter Jumbo Eyelets were used to add a Satin Ribbon handle.

My first full order should be arriving today (we had a more limited range to choose from for the demo pre-order) and so I'll get new punches to play with, DSP, bling, the new spritzer tool (so you you can expect some more distressing soon). Oh and a brand new stamp set and several new to me stamp sets (ie. ones that have carried through from the old catty that I hadn't gotten around to ordering). Guess what I'm up to this evening?

Edited 16:37 That'll teach me to read all the parcel tracking info fully next time - today's parcel is all my customer's Serene Snowflakes sets that they've been waiting for. Tomorrow's parcel is my new toys.

:-)

Sara xx


Tuesday 5 October 2010

Ornate flowers for the colour challenge take 2


This flower set, Ornate Flowers, is fast becoming a favourite of mine. It looks great in so many different colourways and using so many different techniques. For today I've used the colour challenge I set over at ILWS again ie. Basic Black, Whisper White and Real Red and used some heat embossing for a glossy effect on the embellishments. I've also used one of the new ribbons we have available, which is the narrow taffeta in black. Isn't it great to have so many varieties of ribbon and know that they'll match your project perfectly?


Recipe
Stamp sets: Ornate Flowers, Perfect Punches
Cardstock: Basic Black, Whisper White, Real Red
Ink: Real Red, Versamark
Punch: Scallop Oval
Narrow Grosgrain Ribbon: Real Red
Narrow Taffeta Ribbon: Basic Black
Other: Black EP

I stamped the flower spray from the Ornate Flowers set in Real Red ink down the right hand side of a layer of Whisper White card before adhering it to the front of an A6 portrait Basic Black card blank. Real Red Narrow Grosgrain Ribbon was wrapped centrally down a panel of Basic Black card and then Basic Black Narrow Taffeta Ribbon layered onto the Real Red. This panel was adhered to the left side of the card front. The block flower from the Ornate Flowers set and the Thank you sentiment from the Perfect Punches set were stamped in Versamark onto Real Red card and heat embossed with Black EP. The sentiment was punched out with the Scallop Oval and the flower was trimmed close to the frame. These were popped up on dimensionals over the layered ribbons. A dinky bow of the Narrow Taffeta Basic Black ribbon was added with a glue dot in between the flower block and the sentiment.

Thanks for stopping by.

Sara xx

Monday 4 October 2010

Pumpkin lollipop for a Halloween treat


Our next challenge for October over at In Love With Stamping is to create Halloween themed goodies. It could be a card, treat packaging or some form of home decoration.

My offering is a very quick and simple lollipop holder, ideal if you've got lots to make and a good one to get the children to help with too. There's no stamping needed.


Recipe
Cardstock: Pumpkin Pie
Ink: Basic Black Marker, Cajun Craze
Punch: Large Oval
Satin Ribbon: Old Olive
Non-SU: Lollipop

The main lollipop holder is 12cm x 3.5cm of Pumpkin Pie card, scored at 4.5cm and 7.5cm along the long edge. This is folded around the lollipop and secured with a glue dot on each side of the lollipop stick. Three Large Ovals were punched from Pumpkin Pie and a face hand drawn on the centre one with a Basic Black marker. Cajun Craze ink was sponged around all edges of the ovals. The ovals were adhered to each other with the centre face one on top and popped up on dimensionals onto the lollipop holder base. It was finished by tying Old Olive Satin ribbon around the lollipop stick and trimming.

Here's a side view so you can see the lollipop.


Thanks for stopping by.

Sara xx

Sunday 3 October 2010

Acetate pouch for bath salts


My second challenge for you all this month over at In Love With Stamping is a limited supplies challenge. No card is allowed! You can use acetate, vellum, DSP, candles, tile coasters ... in fact anything, just so long as it's not cardstock.

Here I've used acetate to create a pouch for bath salts to create a gift.


Recipe
Stamp set: Serene Snowflakes
Cardstock: Medium Window Sheet
Ink: White Stazon
Striped Grosgrain Ribbon: Basic Black
Other: Silver Elastic Cord

I used a template to cut the pouch from the Medium Window Sheet and then used White Stazon to stamp the small snowflake before adding sticky strip to the acetate fold and assembling the pouch. I added some more sticky strip to the inside of the Striped Grosgrain Ribbon before wrapping it around the pouch, so that it doesn't slide down. Silver Elastic Cord was used to tie the ribbon at the side.

As a Christmas gift I'll add coloured bath salts so that the snowflakes show up better, but I only had plain ones in the house to demo with - sorry.

Hope to see your creations in the ILWS gallery soon.

Sara xx

Saturday 2 October 2010

Baubles for a blue christmas

Wow! What a busy few days. I only just realised this afternoon, that yesterday was pay day. Completely slipped me by, lol.

... so perhaps I can afford to put in another order now? Heehee.

My lovely hostesses and I had a fab fun time last night at my special event for them, they seemed to like the gifts I'd made for them (I'll show you those soon - after I've posted them on to the hostesses that couldn't attend). Then this morning we had a great workshop - my hostess just squeezed in a Level 2 stamp set. A quiet afternoon though, so if you'd like to come along tomorrow afternoon and keep me company, it's Open House from 2pm-5pm. Just email me for directions.

Now I have another new set to show you that I used for the sketch challenge over at In Love With Stamping. Our challenge is this:


And this is my take on it:


Recipe
Stamp set: Contempo Christmas
Cardstock: Marina Mist, Bashful Blue, Pacific Point, Whisper White
Ink: Marina Mist
Satin Ribbon: Whisper White
Taffeta Ribbon: Whisper White
Narrow Taffeta Ribbon: Marina Mist
Other: Fine Cosmo Glitter

The two outer most baubles and the sentiment were stamped direct to the Bashful Blue card layer with Marina Mist ink. This layer was matted onto Pacific Point card. Whisper White Satin and Taffeta ribbons were added along the top before popping the layers up on dimensionals onto the Marina Mist A6 portrait card blank. For the centre bauble I stamped with Marina Mist ink onto Whisper White card and cut out (or punch out with new Extra Large Ornament). This bauble was decorated with the Light Blue glitter from the Fine Cosmo set and a dinky bow of the new narrow taffeta ribbon in Marina Mist, before popping up on dimensionals on the card front.

Both yesterday's and today's cards were made using clear-mount stamps. I find them so easy for positioning, but then I also like the solid feel of the wood mount stamps. I'm not sure which I like best - so glad that we now have the choice on so many sets.

Don't forget - just email me if you'd like to stop by tomorrow.

Sara xx

Friday 1 October 2010

An artistic etching for my first sample from the new catty


My first card from the new catty uses the very elegant Artistic Etchings set. This set will be great for travel type cards and scenes (I have a Paris trip that I'm now itching to scrapbook with this set) but also works beautifully for anniversaries and birthdays too.

The colours I've used are all ones that you'll be familiar with as they were to meet one of the challenges that I set this month over at In Love With Stamping. The colour challenge is to use Basic Black, Real Red and Whisper White.

Recipe
Stamp set: Artistic Etchings
Cardstock: Real Red, Whisper White, Basic Black
Ink: Basic Black, Craft Whisper White
Narrow Grosgrain Ribbon: Real Red

The Eiffel Tower was stamped in Basic Black ink onto Whisper White card and matted onto Real Red. I then used this layer to work out the positioning for the ornate circle and stamped this in Craft Whisper White ink onto the Basic Black layer. The ornate flourishes were stamped around the circle and along the edge of the layer in the same way. Either leave the Craft ink to dry or use your heat tool to set it so that it doesn't get smudged. Real Red ribbon was wrapped around the left side top and bottom corners and this layer was matted onto Whisper White card and then the Real Red A6 portrait blank. The focal image was popped up on dimensionals.

I'm set now for tonight's hostess event. Now to prep for tomorrow's workshop and Open House. It's all go ;-)

Sara xx

Launch day!!!

Yes 1 October is finally here and I can now share with you the new Stampin' Up! Idea Book and Catalogue 2010-2011!!


If you can't wait to dive in then just click here to open the online pages and then pop back to email me your order.

So where do I start? Well here's a quick tour of some of the many highlights:

  • choice of traditional wooden or new clear mount stamps - many of the stamp sets (though not all) now come in a choice of clear mount (look for the C symbol) or wood mount (look for the W symbol)
  • new colours - we now have four new sets of core colours that are permanent plus a set of In Colors that will stay with us for the next two years
  • new hostess sets - we have brand new stamp sets at all levels (plus a DSP paper pack of In Colors) for you to choose from when you hostess a qualifying workshop - email me to book yours now
  • new stamp sets throughout - goes without saying that we have some fantastic new stamps for all sorts of occasions from Christmas to weddings and everything in between
  • wider range of matching accessories - we now have more ribbons, brads, DSP and buttons that still co-ordinate perfectly with your new range of colour card and ink
  • new color kits - to add just the new colours to your existing colour products eg. markers, Watercolor Wonder Crayons and Pastels
  • new crafting products - some fantastic tools to help all aspects of your crafting eg. clear blocks (for the clear mount stamps), Color Coach, Spritzer Tool, Distressing Essentials, Crimper
  • more punches - we now have an even greater range of punches, all designed to work perfectly with our stamp sets
Well that's a quick cantor through but I'll be giving more details over the coming days of course.

Any questions then just drop me a line. Better still if you're close to the Barnsley/Sheffield area then why not pop by my Open House, 2pm-5pm Saturday 2nd and Sunday 3rd October and see the products for yourself. Combine it with a trip to Meadowhall for a complete shopping spree! Email me for directions.

I'll be back later with a sample but got to dash for now to put together packs for my exclusive Hostess event tonight.

See you later

Sara xx