Monday 31 May 2010

Darling Dots ladybirds for the MojoMonday challenge


I have the day off for the bank holiday today and so it's an excellent chance to play along with this week's MojoMonday challenge:


And I opted for the Round version today:


Recipe
Stamp set: Darling Dots (level 1 hostess set)
Cardstock: Real Red, Old Olive, Whisper White
Ink: Real Red, Basic Black
DSP: Pink Flamingo
Punches: 1" Circle, 1-1/4" Circle
Narrow Grosgrain Ribbon: Real Red
Non-SU: Die cut circles

The leaf from the Darling Dots was stamped onto the strip of Old Olive. The ladybirds were stamped, cut out and popped up on dimensionals. All the rest is matting and layering.

Don't forget you can get this Darling Dots set for free just by hosting a real or virtual workshop. Email me for further details or to book.

A fun sketch and fun to have time to play. Got to hit the books hard from tomorrow as my exams are next week!

Enjoy the rest of your long bank holiday weekend.
Sara xx

Saturday 29 May 2010

Summer Stamptacular

Want a full day of crafting with like minded people? Want lots of projects to have a go at with full demonstrations, all the materials prepared and printed instructions so that you can recreate them when you get home? A light lunch and refreshments thrown in? A chance to win some fabulous prizes? Don't want much do you, lol!

Well your fairy godmothers (aka Jan and I) are here to wave our magic wands and invite you to join us at our full day Summer Stamptacular event on Saturday 24 July at Tankersley Welfare Hall (just a short way off Junction 36 of the M1).

Here are the full details:


Summer Stamptacular!


10:00 - 15:30

Saturday 24 July

at Tankersley Welfare Hall

(Postcode S75 3AP for googlemaps and satnav)


£30

As this is our first event of this kind we have an amazing introductory offer:

Bring a friend and you both get 10% off, reducing the price to just £27 each!


Price includes:

Goodie bag

3 complete projects with full demonstration and printed instructions

All materials needed

Bonus project to complete on the day or take away

A light lunch (please advise of any dietary requirements)

Refreshments throughout the day

Prizes


... and more!


Booking Essential

Spaces are limited and will be allocated on receipt of payment. Bookings are

non-refundable but if after booking, you find cannot attend, we will send you

your goodie bag complete with all project materials.


To book please contact:

Sara Rayner

☎ 0775 1133886 ✉ sarastamper123@gmail.com

or

Jan Jones

☎ 07795 566727 ✉ jan66jones@btinternet.com


Or click here to use the Buy Now buttons for secure payment through Paypal.

Dazzling and spotlighted christmas cards in two different colourways


Here are the other two christmas cards that we made at the St Saviours craft group last Saturday. They only take a few minutes longer to make up than those I showed you on Thursday but you also need to allow a little extra "drying" time (or use a heat tool to set).


Recipe
Stamp sets: Silent Night, Serene Snowflakes, Occasional Greetings (sentiment)
Cardstock: Not Quite Navy, Whisper White
Ink: Craft Whisper White
Other: Dazzling Diamonds

A Not Quite Navy blank was stamped all around the edges with the trio of Serene Snowflakes in Craft Whisper White ink and set aside to dry. Next I stamped the church and sentiment with Craft Whisper White ink onto Not Quite Navy card cut just a little bigger all round than the church stamp. This ink is like a white Versamark and so needs to be left for about 10min to dry. I didn't leave mine long enough and so smudged it and had to cover up with some more snowflakes in top right hand corner. When the Whisper White ink is dry then draw with a 2-way glue pen anywhere you want the snow to appear (eg. church roof, trees) and add dazzling diamonds. Take care because if the Whisper White Craft ink isn't dry the diamonds will stick to it as well as the glue! The church was then added to a mat of Whisper White and popped up on dimensionals.


Recipe
Stamp sets: Silent Night, Serene Snowflakes, Occasional Greetings (sentiment)
Cardstock: Rich Razzleberry, Very Vanilla
Ink: Craft Whisper White
Other: Dazzling Diamonds

This card was made as above but swapping in Rich Razzleberry in place of Not Quite Navy and Very Vanilla in place of Whisper White cardstock.


Recipe
Stamp sets: Silent Night, Occasional Greetings (sentiment)
Cardstock: Not Quite Navy, Brocade Blue, Whisper White
Ink: Craft Whisper White, Not Quite Navy
Punches: 1-3/8" Circle, 1-1/4" Circle
Other: Silver Elastic Cord, Silver Brads

I stamped the church and sentiment with Craft Whisper White ink in the centre of a Not Quite Navy mat (allowing room around the image for the elastic cord). While the ink was drying, the church was stamped again in Not Quite Navy ink onto a scrap of Whisper White card and punched with the 1-1/4" Circle centred on the church door. This was matted onto Brocade Blue card punched with the 1-3/8" Circle. These circles were adhered to the full stamped church, lining up the roofline and path. Using the template from the mat pack for even placement I pierced holes in each corner of the stamped mat, pushed my elastic cord through from the front to the back of one of the holes and secured it behind. A brad was added to this first hole and then at each corner a brad added and the cord wrapped around. At the last corner the cord was pushed through the final hole and secured before the brad was added. The church layer was added to a Whisper White mat and then to the Not Quite Navy card blank.


Recipe
Stamp sets: Silent Night, Occasional Greetings (sentiment)
Cardstock: Rich Razzleberry, Perfect Plum, Pale Plum
Ink: Craft Whisper White, Rich Razzleberry
Punches: 1-3/8" Circle, 1-1/4" Circle
Other: Silver Elastic Cord, Silver Brads

Again made as the Not Quite Navy card above but swapping cardstock as follows:
Not Quite Navy = Rich Razzleberry
Brocade Blue = Perfect Plum
Whisper White = Pale Plum

And swapping ink as follows:
Not Quite Navy = Rich Razzleberry

Hope these ideas help to kick-start your own christmas cards.

Have a great bank holiday weekend.

Sara xx

Thursday 27 May 2010

Easy edged christmas cards in two different colourways


Here are a couple of the card designs that I demo'd to the St Saviour's group at the weekend. I prepared the Not Quite Navy samples beforehand and then made up the Rich Razzleberry versions on the day. I love this new colour and think I may be using a lot of it for my christmas cards this year.


Recipe
Stamp sets: Silent Night, Occasional Greetings (sentiment)
Cardstock: Not Quite Navy, Very Vanilla
Ink: Not Quite Navy
Taffeta Ribbon: Very Vanilla

A Very Vanilla A6 card front (14.9cm x 10.5cm piece) was stamped with the church in Not Quite Navy. I then cut the top third of an A4 sheet so I had a piece measuring 21cm x 10.5cm and scored at 14.8cm along the long edge to make an A6 wraparound. I tore the narrower side, using the stamped image to judge how much to tear off. The sentiment was then added above the church using the stamp-a-ma-jig for placement. Two pieces of ribbon were adhered behind the torn edge and tied at the front and trimmed. The torn edge was then adhered to the Vary Vanilla card front to hide the ribbon ends.


Recipe
Stamp sets: Silent Night, Tiny Tags, Occasional Greetings (sentiment)
Cardstock: Rich Razzleberry, Very Vanilla
Ink: Rich Razzleberry
Taffeta Ribbon: Very Vanilla
Punch: Medium Jewelry Tag
Other: Silver Elastic Cord

This version was made as for the Not Quite Navy card above but substituting Not Quite Navy with Rich Razzleberry. I also stamped and punched a couple of the Tiny Tag sentiments and tied them to the ribbon with the Silver Elastic Cord.


Recipe
Stamp sets: Silent Night, Serene Snowflakes, Occasional Greetings (sentiment)
Cardstock: Not Quite Navy, Very Vanilla
Ink: Not Quite Navy, Platinum Shimmer Paint
Punches: Eyelet Border, Scallop Oval, Large Oval

I cut the remainder of the coloured card (used for the torn edge version) in half lengthwise (to get 2 pieces measuring 19.2cm x 10.5cm) and scored one at 14.8cm along the long edge. This allows you to get 3 wraparounds (1 torn and 2 punched) from one A4 sheet. The narrower section was punched with the Eyelet Border and stamped with the trio of small snowflakes in Platinum shimmer paint. A Very Vanilla card front was stamped with the church in Not Quite Navy ink and adhered to the wrap. The sentiment was stamped in Not Quite Navy, punched and matted onto a scallop oval.


Recipe
Stamp sets: Silent Night, Serene Snowflakes, Occasional Greetings (sentiment)
Cardstock: Rich Razzleberry, Very Vanilla
Ink: Rich Razzleberry, Platinum Shimmer Paint
Punches: Eyelet Border, Scallop Oval, Large Oval

This version was made in exactly the same way as above just substituting the Not Quite Navy with Rich Razzleberry.

Great cards to stamp-a-stack in front of the TV over a couple of nights. You'll be ready for christmas in no time.

Sara xx

Tuesday 25 May 2010

Platinum and pink Vogue card


Apologies if you've had trouble finding this post. I accidentally published it before I'd finished writing it and then had to pull it back into a saved draft. Anyway enough of the techno-babble and on with the crafting.

Today's card is a non-distressed Vintage card that makes more of a feature of the Very Vintage Wheel:


I just love the little butterfly hidden in the design - you can see it up above the flower in this card:


Recipe
Stamp sets: Vintage Vogue, Very Vintage, Sincere Salutations (sentiment)
Cardstock: Rose Red, Regal Rose, Pretty in Pink
Ink: Rose Red, Regal Rose, Platinum Shimmer Paint
Punches: Eyelet Border, 1-3/4" Circle
Other: Pink Rhinestone Brad (Circle Fire)

I inked up the wheel using a sponge dauber and platinum shimmer paint and rolled across the card front. (I advise cleaning the shimmer paint off while it's still damp - it's much easier than when it's dried on). The sentiment was stamped in Rose Red onto a strip of Regal Rose and then framed with the Vintage Vogue frond stamped in Regal Rose. This was matted and layered onto a wider strip of Pretty in Pink card punched with the Eyelet Border. The small and large flowers were made by inking them first with Regal Rose, then daubing with Platinum shimmer paint around the edges. Once dry, cut them out, shape and layer them with a rhinestone brad through the centre. Finally pop the flowers up on a dimensional in the centre of a punched circle of Rose Red.

Here's a close up of the flower:


Thanks for stopping by.

Sara xx

Sunday 23 May 2010

A little Joseph's Coat for the SWU sketch challenge


Are you enjoying the heatwave? I love it when I don't have to be in work, though it did feel a bit strange yesterday to be making christmas cards and then having trouble trying to drive home because the steering wheel was baking hot from the sun, lol. (I'll show you the cards soon I promise).

Bess's socialisation class has been cancelled this week as the heat is too much for the dogs. I've taken advantage and had a bit more of a lie-in this morning (bliss) so sorry if I'm a bit late posting.

Today we have another challenge from Stamp With Us and this time it's a sketch:


I finally got around to opening my pack of Autumn Meadows papers from the Mini Catalogue to use for this card. I used the Teal paper in the bottom right hand corner:


... and combined some some light distressing with the Joseph's Coat technique that Monica prompted me to brush off and use following her fab video in the recent Stamp With Us online classes.


Recipe
Stamp sets: Medallion, Vintage Labels (sentiment)
Cardstock: Night of Navy, Taken with Teal, Tempting Turquoise, Whisper White
Ink: Night of Navy, Tempting Turquoise, Certainly Celery, Creamy Caramel, Versamark
DSP: Autumn Meadows
Punch: Boho Blossoms
Other: Clear EP, Gold Brads

A mix of the turquoise, celery and caramel were sponged onto Whisper White card, the Medallion stamped over the top with Versamark and heat embossed with Clear EP before sponging again with Night of Navy. The little blooms were made by dampening and crumpling layers of flowers using the largest of the Boho Blossoms, all secured with a Brad through the centre. The various matted layers were sponged around the edges with more Night of Navy ink.

Please pop along and see what the other members of the DT have created.

Right, off now to do my revision out in the sunshine.

Sara xx

Friday 21 May 2010

Bright polka dot set using printed window sheets


Back again and catching up on sleep. I never seem to sleep well when I'm working away (and yet I sleep so well if I'm away on holiday - guess it's my frame of mind). Still my visit to Cardiff gave me chance to meet up again with a crafting friend from the ILWS forum and have a great evening chatting crafting - thanks Dawn!

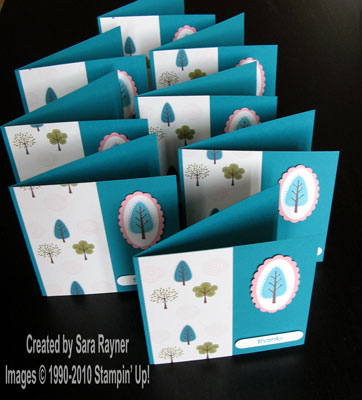
Today I have a matching set of cards that make a great gift set when packaged up. They're ideal to keep in for a last minute gift or to sell at craft fairs or school fetes. I've put mine in a clear plastic box that I got through a recent share but you could easily make a gift bag or a sized up mini pizza box to package them in.


All the cards use the printed window sheet from the Night & Day Specialty Paper pack and I got four cards from 1 sheet with a spare strip left over. The other papers in the pack are great for monochrome cards and items or they can be transformed by brayering coloured ink over as I did here.


The set started with this card that I blogged last month. Click here for the full details.


Recipe
Stamps: I {Heart} Hearts, Tiny Tags
Cardstock: Real Red
DSP: Night & Day Specialty
Ink: Basic Black, Versamark
Punches: Full Heart, Medium Jewelry Tag
Gingham Ribbon: Red
Other: Black EP, Linen Thread

The standard A6 card blank in Real Red was wrapped with the printed Window Sheet. Again, my wrap doesn't go all the way around, just about 1cm or so around the back, secured with Sticky Strip. Red gingham ribbon was tied around the card front and wrap and stamped sentiments from the Tiny Tags set (punched with the Medium Jewelry Tag) attached with twine. I stamped the Friend heart with Versamark on Real Red card, heat embossed with Black EP and punched it with the Full Heart before sticking to the front of the Window Sheet.


Recipe
Stamps: In the Stars, Tiny Tags
Cardstock: Tempting Turquoise, Basic Black
DSP: Night & Day Specialty
Ink: Basic Black, Versamark
Punches: Large Star, Medium Jewelry Tag
Other: Black EP, Black Brads (Vintage), Linen Thread

This time I stamped the Tiny Tags onto Tempting Turquoise card and again punched them out with the Medium Jewelry Tag. I matted Basic Black, Tempting Turquoise (cut slightly smaller on all edges) and the Window Sheet and secured with Black Brads in each corner (this secured the Window sheet without having any glue showing) also pinning my Tiny Tags into the top left hand corner. These layers were then adhered to the front of the Tempting Turquoise card blank. The Wish for You star was stamped with Versamark on Tempting Turquoise card, heat embossed with Black EP and punched with the Large Star before sticking to the front of the Window Sheet.


Recipe
Stamps: Oval All, Tiny Tags
Cardstock: Green Galore, Basic Black
DSP: Night & Day Specialty
Ink: Basic Black, Versamark
Punches: Large Oval, Medium Jewelry Tag
Other: Black EP, Black Brads (Vintage)

The Green card is made the same way was the Turquoise one but switching Tempting Turquoise for Green Galore in all cases and using the Just for You oval stamp with the Large Oval punch.

A simple, quick and effective way to use those window sheets I think.

I'm at St Saviour's at High Green again tomorrow so may see some of you there *waves*. Don't forget to bring your Silent Night stamp set if you want to join in making some Christmas cards.

Have a great weekend.

Sara xx

Wednesday 19 May 2010

A batch of thank you cards for my lovely customers


A quick card for you today. This one's a scheduled post as I'm hopefully on my way back home from Cardiff as you read this. I like to give my customers a thank you card with their order but with quite a few to make I need to keep them simple and quick. That also makes them a great design to follow if you're making a batch as a gift set.

This is the design I used last month:


Recipe
Stamp set: Trendy Trees
Cardstock: Taken with Teal, Pretty in Pink, Whisper White
Ink: Taken with Teal, Chocolate Chip
DSP: Sweet Pea
Punches: Scallop Oval, Large Oval, Word Window

The Sweet Pea paper stack has quite a few different sheets that match the Trendy Trees stamp set. I chose one of the smaller patterns to add to the front of the card. The Teal and Chocolate tree was lined up using the stamp-a-ma-jig. This was punched out with the Large Oval and matted onto a Pretty in Pink Scallop Oval before popping up on dimensionals. I selectively inked the "thanks" from the longer sentiment with the Teal marker and stamped it onto Whisper White before punching with the Word Window and popping on dimensionals also.

Here's one of the batches made up.


I also made a similar batch using Old Olive and Chocolate Chip for another bunch of customers.

Want to see this months? Then why not email me your order - ooh aren't I cheeky! ;-)

Thanks for stopping by.

Sara xx

Monday 17 May 2010

A set of cards and matching bag made at the recent SWU online class


I'm about to set off on my way to Cardiff again this afternoon for my revision course for the June audit exams so I'm not going to get chance to play along with Mojo Monday this week (boo!).

So instead I thought I'd share with you a set that I made recently as part of the Stamp With Us online classes. The classes are usually offered once a quarter and are great fun and great value so please look out for the next set.

This was just one of about 15 different projects, techniques and tutorials. I chose a different stamp set and a different colour combo to that used in the project sheet (which is the point of the classes - you swap stamps and colours to suit what you have available).


Recipe
Stamp sets: On a Pedestal, Paisley, Fun and Fast Notes (sentiment only)
Cardstock: Close to Cocoa, Melon Mambo, Tempting Turquoise, Whisper White
Ink: Close to Cocoa, Melon Mambo
DSP: Pink Flamingo
Punches: Scallop Edge, Square Scallop, Large Oval, Scallop Oval, Word Window, Scallop Circle, 1-3/8" Circle
Polka Dot Ribbon: Melon Mambo
Narrow Grosgrain Ribbon: Tempting Turquoise
Non-SU: Die-cut ovals

As we don't have any Melon Mambo DSP yet I made my own for the bag using the Paisley background stamp. I brayered the stamp with Melon Mambo ink to get a good even coverage over the large stamp.

Here are pix of the cards and bag individually:


Hope to see you at the next class.

Sara xx

Saturday 15 May 2010

Melon Mambo and black easel birthday card


Well I promised Melon Mambo and here it is. This is a card I made for Karin who runs the In Love With Stamping forum. It was her birthday on Wednesday so I think I'm safe to post this now.

I think all the Bold Brights work brilliantly teamed with Basic Black and although there won't be a Bold Brights category in the future I still think of this Melon Mambo as Bold and Bright and figured it would also work well with black. I opted for an easel card as that design always delivers a wow factor. Here it is closed:

Recipe
Stamp sets: True Friend, Sincere Salutations, Curvy Verses (inside)
Cardstock: Melon Mambo, Basic Black
Ink: Melon Mambo, Versamark
DSP: Night & Day
Punches: Two-step bird, Boho Blossoms
Polka Dot Ribbon: Melon Mambo
Other: Black Brad (Vintage), Black EP
Non-SU: Die cuts

I made my own Melon Mambo background paper by brayering a sheet of black and white Night & Day DSP with Melon Mambo ink. The flower was stamped with Versamark onto Melon Mambo card and heat embossed with black EP before cutting out and matting onto a black circle die cut. The sentiment on the front is similarly stamped with Versamark and heat embossed with black EP. The flower and leaves next to the sentiment were punched out, fastened with a brad and popped up on a dimensional. I used the polka dot ribbon to create a stopper bar for the easel card to prop up against.


And here's the side view showing the easel arrangement better:


I used another die cut on the inside stamped with a Curvy Verse:


If you'd like to order your own Soft Suede, Rich Razzleberry or Melon Mambo card, ink or ribbons then please email me.

Hope you have a great weekend.

Sara xx

Thursday 13 May 2010

Razzleberry card box and co-ordinating gift bag


Yesterday I showed you the card I made for my SIL for her birthday (scroll down to see). Today it's the box that I made to hold the card and the gift bag to hold the silver bangle we bought her.


Recipe (Card Box)
Stamp sets: Vintage Vogue, Tiny Tags
Cardstock: Rich Razzleberry, Very Vanilla
Ink: Rich Razzleberry, Old Olive
DSP: Cottage Wall
Other: Pretties Kit (Half-back Pearls)

The box was adapted from the Mini Pizza Box over at Splitcoaststampers and sized up to hold the card.


It fits nice and snug.


Recipe
Stamp set: Tiny Tags
Cardstock: Rich Razzleberry, Very Vanilla
Ink: Rich Razzleberry, Old Olive
DSP: Cottage Wall
Punches: Eyelet Border, Round Tab, Medium Jewelry Tag
Satin Ribbon: Old Olive
Other: Jumbo Brass Eyelets, Twine

This box in a bag was also adapted/resized from a Splitcoaststampers tutorial.

Hope to bring you some inspiration in the Melon Mambo next.

Sara


Wednesday 12 May 2010

Sculpted Razzleberry Vogue roses for my SIL's birthday


Saturday was my SIL's birthday and so I was looking for something a little special to use in the design of her card.

Marlene over at Time to Craft recently posted a fantastic tutorial for making a rose using the large Vintage Vogue flower, that I thought would fit the bill perfectly. This set is great for so many different looks, from vintage distressed to elegant modern.

I teamed the lush new Rich Razzleberry with Very Vanilla and just a hint of Old Olive for a sophisticated looking colour combo:


Recipe
Stamp sets: Vintage Vogue, Oval All
Cardstock: Rich Razzleberry, Very Vanilla, Old Olive
Ink: Rich Razzleberry
Polka Dot Ribbon: Rich Razzleberry
Punches: Two-step bird, Scallop Oval, Large Oval
Other: Pretties Kit (Half-back Pearl)

After making the three roses according to Marlene's instructions I used the two-step bird punch for the leaves. The polka dot ribbons were wrapped around the Vanilla layer and secured at the back. The sentiment was stamped in Rich Razzleberry ink, matted and layered and topped off with a vanilla half-back pearl.

Here's a close up of the roses:


These flowers are too deep to fit in an envelope and possibly a little fragile even for the padded envelopes designed to be used with the treat cups (unless you enclose the roses in a treat cup - now that's another idea) and so I made a simple card box to keep them safe. Please pop back tomorrow and I'll share the box and co-ordinating gift bag.

Sara xx

Monday 10 May 2010

A Mojo butterfly in Soft Suede and Mustard

I love today's sketch over at Mojo Monday - such a great excuse to cut into my brand new Soft Suede polka dot ribbon!

Here's the sketch:


And here's my card:


Recipe
Stamp set: Flight of the Butterfly
Cardstock: Soft Suede, More Mustard, Very Vanilla, Cardstock Vellum
Ink: Versamark
DSP: Bella Bleu
Punch: Butterfly
Polka Dot Ribbon: Soft Suede
Narrow Grosgrain Ribbon: Very Vanilla
Other: Gold EP, Gold brads, Gold Elastic Cord

The base of the butterfly wings was punched from More Mustard. I then stamped the spotted butterfly onto Vellum and heat embossed with Gold EP before punching out for the top wings. These were adhered with a rolled glue dot and tied around with Gold Elastic Cord for the antennae. Using the stamp-a-ma-jig I stamped the sentiment around the corner of the square with a Versamarker and heat embossed with Gold EP. (The embossing is better picked up by the light in the top photo). The ribbons were trimmed and secured at the top with a Gold brad and then secured at the bottom with a glue dot behind the ribbon tail. Everything else is matting and layering.

I'm just loving the new colours. More of them to come over the next few days!

Sara xx