Showing posts with label I {Heart} Hearts. Show all posts

Saturday, 16 July 2011

Some sweet hearts for my sweethearts birthday


Hope you're having a good weekend.

Today is my hubby's birthday, I won't say how old, heehee. We had planned to go out to Bakewell with his Mum and Dad for the day but unfortunately that got rained off. Never mind, we've had a good day anyway and I've got a few treats in store for him later this week.

For now, here's the card I made for him. Lovehearts are currently his favourite sweets and so I decided to design his card around them:


Recipe
Stamp sets: Sweetheart, I {Heart} Hearts, Party This Way
Cardstock: Riding Hood Red, Basic Grey, Whisper White
Ink: Basic Grey, More Mustard, Riding Hood Red
Punches: Full Heart, Heart to Heart, Modern Label, Word Window, Heart Small, Round Tab
Embossing Folder: Square Lattice
Tools: Big Shot, Stamp-a-ma-jig

The card base is an A6 landscape of Riding Hood Red. An aperture was punched in the lower right corner using the Full Heart punch. This was used to mark in pencil where the heart needed to be placed on the Whisper White and Basic Grey mat layers. The heart frame from the Sweetheart set was stamped in Basic Grey ink around the Whisper White pencilled heart using the Stamp-a-ma-jig for placement. Various large hearts were stamped in More Mustard and Basic Grey inks direct to the Whisper White layer. The trio of hearts were also stamped out separately in both More Mustard and Basic Grey inks onto Whisper White card and punched out with the Heart to Heart punch. These were adhered direct to the Whisper White layer and any overhang was trimmed flush to the edge of the card. The Whisper White layer was then run through the Square Lattice embossing folder and the pencilled hearts were punched from both the Whisper White and Basic Grey layers before adhering them together with the Treat Cup sandwiched between. A Round Tab punched from Riding Hood Red card was adhered around a small panel of matching card. This was used to work out the placement of Sticky Strip on the reverse of the layers before adhering them to the card front so that the tabbed card can be used to access the sweets:


The birthday sentiment was stamped in More Mustard ink onto Whisper White card and punched out with the Word Window. This was then adhered direct to a Modern Label punched from Basic Grey card and then popped up on dimensionals on the card front. Finally the small heart was stamped in Riding Hood Red ink onto Whisper White card and punched out with the Small Heart and popped up on a sliver of dimensional overlapping the sentiment.

And here's the inside:


Recipe (inside)
Stamp sets: I {Heart} Hearts, Something Sweet (sentiments)
Cardstock: Whisper White
Ink: Basic Grey, Riding Hood Red

Enjoy the rest of your weekend.

Sara xx

Wednesday, 2 March 2011

ILWS March colour challenge


As always we have a new set of challenges for you this month over at In Love With Stamping and our colour challenge is to use:

Baja Breeze, Pear Pizzazz, Crumb Cake, Rose Red, Whisper White


Recipe
Stamp set: Sweetheart, I {Heart} Hearts
Cardstock: Crumb Cake, Baja Breeze, Pear Pizzazz, Whisper White
Ink: Crumb Cake, Baja Breeze, Pear Pizzazz, Rose Red
Punches: Full Heart, 1-3/8" Circle, 1-1/4" Circle, Scallop Trim

The card blank is a 5" square of Crumb Cake. Using Rose Red ink the spotty heart was stamped onto a square of Whisper White card. The leaves were stamped with Pear Pizzazz and positioned with the stamp-a-ma-jig. Strips of Pear Pizzazz card were punched with the Scallop Trim Border and adhered to the right and left sides of the image. Using the rock 'n' roll technique and a combination of Crumb Cake and Rose Red inks, the Friend heart was stamped onto a scrap of Whisper White, punched with the Full Heart and popped up on dimensionals. A square of Crumb Cake was adhered direct to a square of Baja Breeze then popped up on dimensionals on the card front. The main image was popped up on more dimensionals in the centre. Using Baja Breeze ink the sentiment was stamped onto a scrap of Whisper White card, punched with a 1-1/4" Circle, matted onto a 1-3/8" Circle of Baja Breeze and popped up on dimensionals in the lower right corner.

Please pop back tomorrow for another challenge card.

Sara xx

Wednesday, 9 February 2011

Valentine card for my DH - ssh, don't tell him ...


Don't worry, DH has been warned away from my blog for a week or so anyway, so there's not much danger of him seeing this beforehand, lol.

I made this card to match the little door hanger gift that I made for him here.


Recipe
Stamp set: Love You Much
Textured Cardstock: Real Red
Plain Cardstock: Early Espresso, Crumb Cake
Ink: Versamark
Markers: Early Espresso
Punches: Scallop Edge, Heart to Heart, 3/4" Circle
3mm Taffeta Ribbon: Real Red
Other: Gold EP

The card blank is an A6 landscape of textured Real Red card. A panel of Crumb Cake was stamped with the Love You Much sentiment in the centre using Versamark and heat embossed with Gold EP. The letters were coloured in with an Early Espresso marker. Using the 3/4" Circle punch the centre of the "O" was punched out. The Heart to Heart punch was used to the right of the sentiment and then the panel flipped over and punched again to get the mirror image punch (take care not to punch too close to your sentiment). The panel was positioned over the base card (without adhering at this stage) and the placement of the aperture pencilled through to the textures card. The aperture was punched out with the 3/4" Circle, poistioning it as far up the card as the punch will allow. A border of Early Espresso card was punched with the Scallop Edge and adhered behind the top of the main panel. A thin strip of Early Espresso card was adhered behind the bottom of the panel. 3mm Real Red Ribbon was tied around the top border. The panel was popped up on dimensionals on the front of the card with the apertures lined up.

Here's a close up of the aperture:


And then on the inside you see the full picture:


Recipe (Inside)
Stamp set: Love You Much, I {Heart} Hearts, Seasonal Wishes (sentiment, retired)
Plain Cardstock: Very Vanilla
Ink: Real Red
Markers: Early Espresso, Real Red, Crumb Cake
Other: Blender Pen

For the inside the aperture was again marked in pencil onto the Very Vanilla card layer and then the Stamp-a-ma-jig was used to position the birds in the right place. Early Espresso and Real Red markers were used direct to stamp and then the birds were coloured in using a blender pen and Crumb Cake ink. The hearts and the sentiment were stamped in Real Red ink.

Thanks for stopping by.

Sara xxx

Saturday, 18 December 2010

A Sapphire Wedding Anniversary card for my Mum and Dad


Sorry that I've not posted as regularly as usual the last few days. I'm rushing trying to get everything made and out to friends and family before christmas/the snow hits again and while I've been very busy crafting, I'm holding back from posting it all, so as not to spoil any surprises.

I feel pretty safe posting this one now though. Today is my Mum and Dad's Sapphire Wedding Anniversary. We're off out tonight with Mum and Dad and my brother and SIL, for a meal to celebrate, just as long as the snow holds off a bit longer. I somehow doubt that Mum will have time to check my blog before we go, lol.


Recipe
Stamp set: I {Heart} Hearts
Cardstock: Shimmery White, Marina Mist
Ink: Marina Mist
Punches: Full Heart, Heart to Heart, Small Heart
Other: Fine Cosmo Glitter
Non- SU: Computer, Die cuts

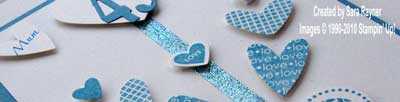
I kept the design simple because the cardstock has a lustrous sheen that I wanted to focus on (though the camera doesn't really pick it up too well). The card base is a portrait A5 blank of Shimmery White, with a mat of Marina Mist card on top of it. A strip of Sticky Strip was added down the centre of a mat of Shimmery White and a mix of the Turquoise and Light Blue glitters adhered to it. The large hearts were stamped in Marina Mist onto the Shimmery White cardstock (using the stamp-a-ma-jig for alignment) and cut out by hand. The medium and small hearts were stamped and punched. I typed the Mum and Dad sentiments on the computer, printed them onto the Shimmery White card (it takes the print very well) and punched them out. The "45" was die cut from Marina Mist card and adhered to a Full Heart punched from Shimmery White cardstock. All the hearts were popped up on dimensionals on the card front which was adhered direct to the Marina Mist layer.

Enjoy the rest of your weekend.

Sara xx

Sunday, 12 December 2010

Scrapbooking Mini Blog Hop


Hi, welcome to our Convention Mini Blog Hop and a big welcome to any of you who may have hopped here from FrenchieJo. This is a very mini hop I promise you. No matter how busy you may be on this Sunday on the run up to Christmas, I think you'll have time to go round the blogs involved lol, it's only three - Joanne's (my SU upline), Jan's (my SU downline) and mine (they go round in a circle so it doesn't matter where you start and finish).

We had such a fabulous time at Convention that while we were there and having our piccie taken (a rare occurrence certainly for me and Jan), we agreed to create a scrapbook page each. There was no conferring, no planning of colours, just that we'd all use a similar pic of the three of us on the Convention main stage and see how differently they turned out.

Here's my take:


Recipe
Stamp sets: Love What you Do (limited edition), I {Heart} Hearts, Monogram Sweet Alphabet
Cardstock: Certainly Celery, Perfect Plum, Old Olive, Whisper White
Ink: Old Olive, Real Red, SU Markers
DSP: Subtles Patterns Stack
Punches: Scallop Trim Corner, Scallop Trim Border, Full Heart, Small Heart
Other: Clear Mount Block

Who says a scrapbook page has to be square? That's what I love about scrapbooking - anything goes, and I decided to use an A4 page here. I matted the photo on some Old Olive and Perfect Plum card and adhered it direct to the upper right corner of an A4 sheet of Certainly Celery card. I then stamped the word "Convention" around it using a technique that we learned while we were there - rolling a clear mount block (no stamp, just the block) in Old Olive ink and "stamping" it out. The letters were then stamped in the middle of each square, also with Old Olive and the year was journalled in with a Marker. Another frame was added using the text DSP in Perfect Plum, matted onto a Scallop Trim border of more Perfect Plum card. While at Convention we had a chance to buy an exclusive stamp called Love What You Do, which mirrors the sentiment in the background of the photo. I used SU Markers direct to stamp for stamping it onto Whisper White card before matting it onto Perfect Plum card and adding it to the frame. The Friends and Love sentiments were stamped in Real Red ink onto Whisper White card before punching out with the respective Heart punches and popping up on dimensionals.

A sweet little reminder of our fun time at Convention together.

I'll pass you on now to Jan, who'll share her page which includes a lovely pocket full of Convention goodies.

Enjoy the rest of your weekend.

Sara xx

Saturday, 12 June 2010

My birthday cards from others

Well Thursday was my birthday and the day started with an exam :( but after that I went out for a champagne afternoon tea with my Mum :)

I don't feel like the exams went too well (how come they never seem to include questions on the areas of the syllabus that I revised best?) but then I never do and so all I can do is hope that I did enough to get a pass so that I can move on to the next ones. The results will be out in late August.

My mojo upped and left straight after the bloghop last week. I actually made a card for the MojoMonday challenge but I'm not happy with it and still not sure whether to post it or not.

For now here are the handcrafted cards that I received for my birthday from others.

First up this is what my patient hubby (he's suffered through all my exam stressing bless him) created all on his own:


He used Taken with Teal because he knows it's my favourite, teamed it with Creamy Caramel and used the I {Heart} Hearts set.

This one's from my MIL. She doesn't believe her stamping is good enough to put on cards and yet she managed some great stamping at the Tart and Tangy class last weekend.


And finally this one's from my downline Jan:


She's used Forest Friends and Oval All (for the sentiment) and her brayering is absolutely fantastic. She's running a class on brayering next weekend if you'd like to book.

That's all for now. Have a great weekend.

Sara xx

Friday, 21 May 2010

Bright polka dot set using printed window sheets


Back again and catching up on sleep. I never seem to sleep well when I'm working away (and yet I sleep so well if I'm away on holiday - guess it's my frame of mind). Still my visit to Cardiff gave me chance to meet up again with a crafting friend from the ILWS forum and have a great evening chatting crafting - thanks Dawn!

Today I have a matching set of cards that make a great gift set when packaged up. They're ideal to keep in for a last minute gift or to sell at craft fairs or school fetes. I've put mine in a clear plastic box that I got through a recent share but you could easily make a gift bag or a sized up mini pizza box to package them in.


All the cards use the printed window sheet from the Night & Day Specialty Paper pack and I got four cards from 1 sheet with a spare strip left over. The other papers in the pack are great for monochrome cards and items or they can be transformed by brayering coloured ink over as I did here.


The set started with this card that I blogged last month. Click here for the full details.


Recipe
Stamps: I {Heart} Hearts, Tiny Tags
Cardstock: Real Red
DSP: Night & Day Specialty
Ink: Basic Black, Versamark
Punches: Full Heart, Medium Jewelry Tag
Gingham Ribbon: Red
Other: Black EP, Linen Thread

The standard A6 card blank in Real Red was wrapped with the printed Window Sheet. Again, my wrap doesn't go all the way around, just about 1cm or so around the back, secured with Sticky Strip. Red gingham ribbon was tied around the card front and wrap and stamped sentiments from the Tiny Tags set (punched with the Medium Jewelry Tag) attached with twine. I stamped the Friend heart with Versamark on Real Red card, heat embossed with Black EP and punched it with the Full Heart before sticking to the front of the Window Sheet.


Recipe
Stamps: In the Stars, Tiny Tags
Cardstock: Tempting Turquoise, Basic Black
DSP: Night & Day Specialty
Ink: Basic Black, Versamark
Punches: Large Star, Medium Jewelry Tag
Other: Black EP, Black Brads (Vintage), Linen Thread

This time I stamped the Tiny Tags onto Tempting Turquoise card and again punched them out with the Medium Jewelry Tag. I matted Basic Black, Tempting Turquoise (cut slightly smaller on all edges) and the Window Sheet and secured with Black Brads in each corner (this secured the Window sheet without having any glue showing) also pinning my Tiny Tags into the top left hand corner. These layers were then adhered to the front of the Tempting Turquoise card blank. The Wish for You star was stamped with Versamark on Tempting Turquoise card, heat embossed with Black EP and punched with the Large Star before sticking to the front of the Window Sheet.


Recipe
Stamps: Oval All, Tiny Tags
Cardstock: Green Galore, Basic Black
DSP: Night & Day Specialty
Ink: Basic Black, Versamark
Punches: Large Oval, Medium Jewelry Tag
Other: Black EP, Black Brads (Vintage)

The Green card is made the same way was the Turquoise one but switching Tempting Turquoise for Green Galore in all cases and using the Just for You oval stamp with the Large Oval punch.

A simple, quick and effective way to use those window sheets I think.

I'm at St Saviour's at High Green again tomorrow so may see some of you there *waves*. Don't forget to bring your Silent Night stamp set if you want to join in making some Christmas cards.

Have a great weekend.

Sara xx

Wednesday, 7 April 2010

April colour challenge at ILWS - take 2 plus a couple of dinky baskets


Another card for the colour challenge at In Love With Stamping today and I also realised that I didn't show you the Easter baskets that my MIL and I made on Good Friday when MIL and FIL came to visit. The baskets first:

This one's my MIL's.


I've demonstrated and taught this little basket to so many people in the last month or so that I didn't realise I hadn't shown my MIL, lol and she loves to make bags and boxes, much more so than cards. She loved how easy this design is - more time for creating the flowers.

And here's my version with a little sponging around the edges of the flowers and leaves.


And next on to the colour challenge card. The colour challenge is to use Pixie Pink, Pink Passion and Pretty in Pink (with Whisper White or Very Vanilla if you like). I used one of the new sets out of the Mini:

Not just for Valentines, this set is great for punching out. The Full Heart, Small Heart and Heart to Heart punches all work with this set. Or you can just cut them out if you prefer. Here I did a bit of both.


Recipe
Stamp set: I {Heart} Hearts
Cardstock: Pink Passion (textured), Pixie Pink (textured), Whisper White
Ink: Pixie Pink, Pink Passion
Punches: Full Heart, Corner Rounder
Other: Rhinestone Brad

A Pink Passion (textured) 4" x 4" square card was used as the base and all corners rounded with the punch. The Friend heart was inked with Pixie Pink and then the edges with Pink Passion before stamping onto Whisper White card. This was then punched out with the Full Heart punch. The lacy heart was stamped three times with Pixie Pink ink on Whisper White card. These hearts were then cut by hand as they don't quite fit the Full Heart punch (I still used it though to make the cutting out easier. A medium clear Rhinestone Brad was pushed through the centre of a 3-3/4" square Pixie Pink (textured) corner rounded layer before adhering it to the Pink Passion blank (so that the split pins don't show through. The hearts were then popped up on dimensionals around the brad.

Please just drop me a line if you need the recipes for the baskets.

Sara xx

Monday, 5 April 2010

A card for the Mojo Monday challenge


A quick second post today as I'm entering the Mojo Monday challenge. This is this week's sketch:


And my card:


Recipe
Stamp set: I {Heart} Hearts, Happy Moments (sentiment)
Cardstock: Basic Black, Whisper White
DSP: Night & Day Specialty
Ink: Real Red
Wide Grosgrain Ribbon: Real Red
Other: Silver Brads, Platinum Shimmer Paint
Non-SU: Die-cuts

I used Platinum shimmer paint to edge the scallop oval layer for a neutral contrast against the black and white. The sentiments were placed against the heart using a stamp-a-ma-jig for placement.

Thanks for stopping by.

Sara xx

April colour challenge at In Love With Stamping and a thank you to everyone who came to my Open Day


Hope that you're all enjoying the Easter holidays. I'm looking forward to a lazy day today but as I didn't have time to post yesterday, today's is a bumper catch up.

Saturday was fab! Thank you to all the ladies that came along. We had a great mix of people fairly new to crafting and more experienced crafters but everyone managed their make and take bookmark without too many difficulties. I demonstrated a couple of chalking techniques in two different colourways, so that those who'd dropped in later didn't miss out. I also showed how the punches are great to make a quick card and how easy it is to make a matching set (great for a gift) by switching the colours. We also had a look at the different effects you can get with the shimmer paints. There was a whole lot more discussed and tips shared around the group (I just love it when crafters get together). Everyone got a free gift and free postage with their orders ... and we had cake too! Here's some of what we made on the day:


And Laetitia made me this lovely card:


And Jill brought me these gorgeous daffodils (that Bess then tried to eat, lucky she only got one):


Thank you all for such a fun day.

That was followed by the Cup Challenge over at In Love With Stamping. Wow was that fun and frantic. I thought I'd have an easy night of it as I was on the organising committee and charged with setting one of the challenges, commenting on cards and cheering everyone along. Well ... after the first half hour, I couldn't keep up. Everyone was posting great cards and such a lot of them, I just couldn't type fast enough, lol.

Yesterday was Bess's socialisation class and she was just in a mood (perhaps the excitement of the Saturday had just been too much for her). Strangely many of the other dogs in the class also seemed in a bit of a mood, there was far more barking than usual and a few more scuffles too. We decided they were miffed that they hadn't got Easter Eggs!

On now to another card. This one was for the colour challenge at In Love With Stamping. This month we are to use the colour combo of Pixie Pink, Pink Passion and Pretty in Pink (though it is OK to add Whisper White or Very Vanilla). This is my take on a card in the new Mini catalogue (page 6).


Recipe
Stamp Set: I {Heart} Hearts
Cardstock: Pixie Pink, Pink Passion, Pretty in Pink, Whisper White
Ink: Pink Passion
Punches: Scallop Edge, Small Heart
Gingham Ribbon: Light Pink

I started with a Pixie Pink 4" x 4" square card as my base. A square of Pink Passion card was punched along one edge with the Scallop Edge punch. I snipped out one of the scallops to make a straight edge for the ribbon to wrap against. After tying a small bow in the gingham ribbon I wrapped it around and secured on the back with Sticky Strip. A small square of Pretty in Pink card was added above the ribbon. Using the dinky heart from the I {Heart} Hearts set I stamped with Pink Passion ink on Whisper White card and punched with the new Small Heart punch. I punched another 8 hearts from Pink Passion card and popped them all up on dimensionals that had been cut in half. The whole topper was then raised on dimensionals centred on the card base.

Don't forget, you have until 10pm tonight if you want to take advantage of my special offer of free postage on orders over £45, just email me with your order.

Enjoy the rest of your bank holiday.

Sara xx

Sunday, 28 March 2010

Take a stroll through our bloghop to get a look at the new products


Hello and welcome to our Stampin' Up! bloghop.

If you're already on your journey then you'll have joined me from Zoe. Didn't you just love what she's done, I know I did. (If you haven't been there yet, then don't worry the link at the end of the post will pass you you to the next person in the loop, and then the next and the next until you get round to Zoe and eventually back to me. Then you'll know you've been around the full bloghop - though we have another 2 loops if you've got the stamina!)

My first card uses the new sweet treat cups and can be packaged to send through the post in a specially designed padded envelope (that was the answer to Wednesday's pop quiz, lol, did you spot what they were?).

I took my inspiration from the very clever Becky over at Inking Idaho and adapted her design.


Recipe
Stamp set: Something Sweet, Happy Moments (sentiment inside)
Cardstock: Almost Amethyst, Elegant Eggplant, Whisper White
Ink: Almost Amethyst, Elegant Eggplant
Punches: 1-3/4" Circle, Round Tab, Scallop Oval, Large Oval, 1/2" Circle
Narrow Grosgrain Ribbon: Elegant Eggplant
Other: White Eyelet, Silver Brad
Non-SU: Small chocolate beans

This is a narrow card (15cm x 7.5cm) so that you can pull the ribboned tab up and release the chocolate out of the back of the card without having to pull the card to pieces. I used my stamp-a-ma-jig to make sure that all the parts of the gumball machine lined up properly.


Although ideal for sweets, these treat cups can be filled with all sorts of fun and sentimental items. I'll be showing you more ideas over the next few weeks or so.

This second card is really quick and easy.


Recipe
Stamp set: I {Heart} Hearts, Whimsical Words
Cardstock: Kraft, Real Red, Whisper White
Ink: Real Red
Punches: Heart to Heart, Small Heart

I punched the hearts trio in the bottom corner of the card. Using the new trio of hearts in the I {Heart} Hearts set I stamped it in Real Red, punched it and used the aperture to place the hearts against the back of the card. I stamped the dinky heart from the set and used the new Small Heart punch. I've always loved our SU punches as they're so great for cardstock but these new punches are even better as they now fold flat for easier storage - brilliant! The sentiment is from one of our recent Sale-a-bration sets.


If you're new to my blog and you like what you've seen, then please take a moment to become a follower (see lower down the right hand side column) or bookmark me so that you can find me again in the future.

Like what you've seen and want to place an order? As a special offer to celebrate the launch of the Mini Catalogue, I'm offering free postage on all orders over £45 placed with me by 10pm Easter Monday (5 April). Email me to place your order. If you're in the Sheffield/Barnsley area you can also drop into my Open Day on Saturday 3 April, any time 1pm-4pm for demos, make and takes, refreshments and more. Email me for directions.

Thanks for visiting and now I'll pass you on to Linda who has more amazing creations in store.

See you again soon I hope.

Sara xx