Showing posts with label Circle Circus. Show all posts

Thursday, 6 January 2011

A scrapbook page with hidden journalling


Here is my second bite at the cherry for making a scrapbook page for the In Love With Stamping challenge.


Recipe
Stamp set: Circle Circus
Cardstock: Marina Mist, Crumb Cake, Real Red
Ink: Marina Mist, Early Espresso, Versamark
Punches: Corner Rounder, 1-3/4" Circle, 1-3/8" Circle, 1-1/4" Circle, Scallop Edge, 1/4" Circle (retired)
3mm Taffeta Ribbon: Marina Mist
Other: Silver EP, Silver Brads

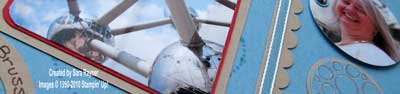
The base page is a 6" x 6" of Marina Mist card. Using Marina Mist ink the outline Circle from Circle Circus was stamped randomly on the left side of the page. The main photo was matted onto Real Red and then Crumb Cake card, with the corners of all layers punched with the Corner Rounder. A thin strip of Crumb Cake card was punched with the Scallop Edge Border, then wrapped with Marina Mist taffeta ribbon. The bubble circle was stamped with Versamark, heat embossed with Silver EP, then punched with the 1-1/4" Circle. This was matted onto a 1-3/8" Circle of Marina Mist and adhered direct to the centre of the right side of the page. Photos of DH and I were punched with the 1-3/4" Circle and secured to the page with Silver brads. I used Marina Mist 1/4" Circles (retired) between brad and photo and between photo and page as a protector to help with the swivel action. The outline Circle was stamped again with Marina Mist ink this time onto Crumb Cake card and punched out with the 1-3/8" Circle and adhered underneath the photos for journalling. Circle punches were used to punch segments of Crumb Cake card and adhered below the main photo for journalling the place and year.

Admission - the journalling was originally done direct to the page but had to be redone on the Crumb Cake layers because I added the wrong year - doh!

The photos of DH and I swivel aside to reveal the journalling:


DH and I both love photography but hate having our photo taken. We did take a handful of photos of us more than usual in 2010 but I think I need to up the number even more in 2011, after all it makes the scrapbook pages that much more personal (and it may be the incentive I need to lose weight, lol).

Sara xx


Tuesday, 4 January 2011

A tricky sketch challenge


Back to the daily grindstone today for me :-(

It's so good to get back home in the evening and create :-)

Our sketch challenge over at In Love With Stamping this month is this:


I stayed as close to the design elements as I could and used the colour scheme from the DSP I chose, to create this:


Recipe
Stamp sets: Circle Circus, Cottage Garden, Sincere Salutations (sentiment)
Cardstock: Peach Parfait, Pear Pizzazz, Whisper White
Ink: Peach Parfait, Poppy Parade, Versamark
DSP: Sunny Garden
Punches: Scallop Circle, Two-step Bird
Other: White EP, Crimper

The card blank is an A6 landscape in Peach Parfait, matted with a layer of Pear Pizzazz. Using two patterns from the Sunny Garden pack of paper, that create almost a positive and negative, I adhered them direct to the Pear Pizzazz layer. The sentiment was stamped in the lower right corner with Versamark and then heat embossed with White EP. A strip of Pear Pizzazz was put through the Crimper and then adhered over the join in the papers. The large scallop circle from Circle Circus was stamped in Peach Parfait ink on Whisper White card and punched with the Scallop Circle. Another Scallop Circle was punched from Peach Parfait card and they were adhered together, offsetting the petals centrally. Using the Two-step Bird, the leaves were punched from Pear Pizzazz card and adhered behind the Circles. These were then popped up on dimensionals in the middle of the card. The solid flower from the Cottage Garden set was stamped in Poppy Parade on Whisper White card, then cut out and shaped before popping up on another dimensional.

Just need another couple of thank yous and I think I'll be done.

Sara xx

Tuesday, 27 July 2010

More pix from our Stamptacular

Jan's got her pix from our Summer Stamptacular up on her blog now. Please pop on over to see the lovely little altered notebooks she made for all the attendees.

Here are pix from her afternoon project - a scrapbook in a box:


Closed


And opened out

Isn't it sweet! I didn't get time to make it on the day but I've got the instructions and materials and I'm going to put it together for my Mum for her birthday next month.

Back in a jiffy.

Sara xx

Tuesday, 6 July 2010

July technique challenge at In Love With Stamping - take 2


Well, I spoke too soon. The broadband connection is once again grinding to a halt and dropping out, despite the fix last week. I'm not able to do much blog-surfing at the moment and I'm back to using coffee-houses for their wifi. I think I must be jinxed. My usual lunchtime haunt is also have problems with their broadband, so I'm having to walk to the next nearest, which is another 10min of my lunchtime gone :-(

Thankfully I can at least check my emails with my iphone. It's only an Edge connection at home but better than nothing.

Enough of my sob stories now and back to the crafting. For my second take at the technique challenge I set over at ILWS I created an origami box to match the card I made here.


Recipe
Stamp set: Circle Circus
Textured Cardstock: Cameo Coral
Plain Cardstock: Whisper White
Ink: Cameo Coral, Summer Sun
DSP: Pink Flamingo
Punches: Scallop Circle, 1-1/4" Circle, 1" Circle
Other: Halfback Pearls (Pretties Kit), Medium Window Sheet

The box was made following the instructions here but using an 8" x 8" piece of DSP to create a box that would just fit 4 chocs in it. For the lid I used a 4" x 4" piece of Medium Window sheet and scored it at 1/2" on all sides. I snipped along one of the short score lines at each corner to create a tab, folded in and adhered with sticky strip. Four 1-1/4" Circles were punched from Textured Cameo Coral card and scored into quarters. Each Circle was snipped from the outside edge to the centre along just one of the score lines. Sticky Strip was added to each quarter, one was folded on top of another to create a pyramid and then one was stuck to each corner of the lid. See here for a more visual explanation. Halfback pearls were added to each decorated corner. Different size circles were stamped in Summer Sun and Cameo Coral onto Whisper White card and punched with appropriate size punches. They were then stacked with dimensionals in between, added to the centre of the lid and topped with a large vanilla halfback pearl adhered with a glue dot.


And here it is with the card:


Please email me if you'd like to order the Pretties Share. As I mentioned, I am getting my emails OK, so there won't be any delay in getting them out to you :-)

Sara xx

Friday, 2 July 2010

Paper folding for the ILWS challenge


Yay - I think I've finally got my home broadband back, just in time for the weekend. It started to grind to a halt last Sunday and then wouldn't work at all for the last few days but the engineer's been out and I think it's been fixed. Thank goodness. I've spent the last week extending my lunch breaks and going straight to Meadowhall after work just to be able to hop onto the free wifi offered by certain shops. I'm so wired from all the caffeine, it's no wonder I've not been sleeping properly, lol. Fingers crossed it will be smooth sailing again from now.

Anyhow, my second challenge for In Love With Stamping this month is a technique challenge - this could be anything from simple paper pleating through to origami. As long as there are three or more folded edges, it counts!

I went with this fan fold which then ended up as a set of circles:


Recipe
Stamp set: Circle Circus
Textured Cardstock: Cameo Coral, Creamy Caramel
Plain Cardstock: Whisper White
Ink: Cameo Coral, Summer Sun
DSP: Pink Flamingo
Punches: Scallop Circle, 1-3/4" Circle, 1-1/4" Circle, 1" Circle, Large Oval, Corner Rounder
Other: Cream Half-back Pearls (Pretties Kit)

I started with 5" square card blank in Cameo Coral textured cardstock and matted Creamy Caramel textured cardstock direct to it. Following Karin's Folded Medallion Flower Tutorial here and I created my large flower with Pink Flamingo DSP cut to 6cm x 8cm. Four "fans" created the full circle. I stuck them together using tape and then added them to the card front using glue dots. A large vanilla halfback pearl finished this largest circle. Next I stamped and punched the various Circles and arranged a layout before punching out segments so that they fit together. As I don't have a punch that really fits my fan-fold circle I used the Large Oval to trim my punched shapes. The Summer Sun circles were adhered flat to the card front and then I added the Cameo Coral circles popped up on dimensionals. To create a further theme to the Cameo Coral circles, I added smaller vanilla halfback pearls to them with glue dots.

Am I tempting you to join my Summer Share yet? Details are at the top of the page.

Have a great weekend.

Sara xx


Wednesday, 3 February 2010

February inspiration challenge at In Love With Stamping


Our inspiration challenge over at In Love With Stamping this month is this image of recycled silk cushions:


The top left cushion reminded me of the distressed button flowers I've seen on my many travels around blogland. I decided to push beyond my comfort zone and add them to the mix (I don't tend to do shabby or distressed).


Recipe
Stamp sets: Sincere Salutations (sentiment), Circle Circus, Seeing Spots, Circle of Friendship, Whimsy
Cardstock: Real Red, Only Orange, Yoyo Yellow, Tempting Turquoise, Whisper White
DSP: Pink Flamingo
Ink: Versamark, Only Orange, Real Red, Tempting Turquoise
Punches: Scallop Edge, 1-3/4" Circle, 1-3/8" Circle, 1-1/4" Circle, 1" Circle, 3/4" Circle
Designer Buttons: Playground
Other: Cutter Kit

I used Versamark ink and various stamps (as listed in the recipe) to watermark the yellow, orange and red layers. The button flowers were made by punching varying sizes of circle from Tempting Turquoise card and Pink Flamingo DSP, then distressing the edges with the distressing tool on the Cutter Kit. These were layered up (off centre) and a button added on top using a glue dot. The sentiment was made by stamping Birthday Wishes, then masking it and stamping the largest Circle Circus over the top. This was punched out with the 1-3/4" Circle punch, the edges distressed and sponged gently with Real Red ink. The scallop layer behind it uses the Scallop Edge punch, snipped and curved.

I'm still not taken with distressing. Maybe bright colours and distressing just don't work together or maybe I'm missing an important step. If you know where I'm going wrong then please leave me a comment to point me in the right direction.

Hope to see your own entries to the challenge in the ILWS Gallery.

Sara xx

Wednesday, 30 December 2009

A hand picked bunch of In My Garden thank you cards


I got a nice little bunch of thank you cards going on my production line yesterday using the In My Garden, level 1 hostess set. One of my new years resolution is to make a lot more duplicate cards. That way I'll have more ready for the craft fairs that JJ and I go along to and more sets to give as gifts to my hostesses.

I've already got this resolution underway by colouring 4 of each of these flowers. There's a full set here for you to see and I'll finish assembling the other 9 today.


Recipe (for all)
Stamp sets: In My Garden, Circle Circus, Fresh Cuts
Cardstock: Basic Black, Bold Brights (to fit flower), Whisper White
Ink: Stazon Black, Bold Brights (to match cardstock), Markers (to colour flowers)
Gingham Ribbon: Black
Punches: 1-3/4" Circle, 1-3/8" Circle, 1-1/4" Circle, Word Window, Corner Rounder


Recipe (Snowdrop version)
Cardstock: Green Galore
Ink: Green Galore
Markers: Glorious Green, Green Galore, Gable Green


Recipe (Poppy version)
Cardstock: Orchid Opulence
Ink: Orchid Opulence
Markers: Glorious Green, Green Galore, Orchid Opulence, Lovely Lilac


Recipe (Rose version)
Cardstock: Pink Passion
Ink: Pink Passion
Markers: Glorious Green, Green Galore, Pink Passion, Pixie Pink

I also resolve to start making my christmas cards much earlier this year. It was last minute crafting for christmas this year because I'd sold all my cards at the craft fair - don't want to get caught out like that again.

Are you making any New Years resolutions?

Sara xx

Saturday, 10 October 2009

Recipe for sneak peek 5 Circle Circus


Back home again now and still not a minute to spare because I'm busy washing and cleaning, lol. Oh I'm looking forward to a break. But I don't want to let you down so here's another full recipe for a sneak peek I shared with you earlier.

I love this new stamp set because when combined with the punches you have the perfect recipe for quick and easy but visually appealing cards.


The new catty also has a new 1-3/4" Circle punch to fit the large flower circle (the turquoise one in the pic above). Bright and bold suits this set I think.


Recipe
Stamp sets: Circle Circus, Oval All
Cardstock: Basic Black, Taken with Teal, Only Orange
Ink: Versamark
Punches: 1-1/4" Circle, 1/2" Circle
Other: Black EP, Hodgepodge

This card uses the reverse spotlighting technique from over at Splitcoaststampers.

Have a great weekend.

Sara xx