Showing posts with label Tiny Tags. Show all posts

Monday, 11 April 2011

Anniversary roses for a wonderful couple


I couldn't believe the mistake I made last week. It was Jan's wedding anniversary. A biggie - she and Ian have been married for 25 years! And they're such a lovely couple - so good together and so supportive of one another. I hadn't forgotten their anniversary, in fact I especially made a card for them when I was creating samples using the new goodies ...

... and then I forgot to post it! Doh!

But she should finally have got it by now and so I'll share it with you.


Recipe
Stamp sets: Tiny Tags, Baby Blossoms
Cardstock: Blushing Bride, Rich Razzleberry, Shimmery White
Ink: Blushing Bride, Rich Razzleberry
Punches: 1-3/4" x 7/8" Oval, 1-3/8" x 5/8" Oval
Embossing Folder: Manhattan Flower
Other: Basic Pearls

Blushing Bride card was run through the Manhattan Flower embossing folder and then the roses cut out close (about 1mm margin) to the outside embossed line and cut square. These were matted onto Shimmery White card (bought while on offer last month - snap up those bargains when you can), then Rich Razzleberry card and finally the card blank of Blushing Bride. The Mr & Mrs sentiment from the Tiny Tags set was stamped with Rich Razzleberry ink onto a scrap of Shimmery White card. Using Blushing Bride ink the largest rose (still very dinky) from the Baby Blossoms set was stamped alongside the sentiment before punching with the 1-3/8" x 5/8" Oval. This was matted onto a 1-3/4" x 7/8" Oval of Blushing Bride card and adhered to the top right of the card front. Finally two teeny Basic Pearls were used to finish the sentiment.

I'm so sorry I was late with your card Jan. I know that you and Ian had a very moving renewal of vows as part of a very special and wonderful anniversary and I wish you continued happiness together.

Sara xx

Thursday, 3 February 2011

Using fabric for a more tricky challenge


One of our challenges this month over at In Love With Stamping is to:

use fabric - not ribbon or flowers, but real fabric in some way

On the down side I found this quite a tough challenge as the techniques I wanted to use would have worked better with ribbon and so I had to rethink how to tackle this one. On the up side I had to go hunting for material and found plenty of stash to use with my new sewing machine just as soon as I cam find some spare time :-)

This is what I came up with:


Recipe
Stamp sets: Vintage Vogue, Tiny Tags
Cardstock: Old Olive, Tempting Turquoise, Night of Navy
Ink: Old Olive
Punch: Butterfly, Jewelry Tag
Other: Flower Brads (Brights)
Non-SU: Fabric

The card blank is an A6 landscape of Old Olive. Fabric was wrapped tightly over a panel of scrap card and secured behind with Sticky Strip. This fabric layer was matted onto Tempting Turquoise card and then Night of Navy. The sentiment and the tag shape were stamped onto Old Olive card with Old Olive ink and punched out with the Jewelry Tag. Two more tags were punched out of Night of Navy Card. A slightly larger panel of Old Olive card had butterfly apertures punched out and was stamped with the foliage spray stamp from Vintage Vogue in Old Olive ink. This was placed over the other layers and secured with the Tempting Turquoise flower brads, with the tags added to the bottom left brad.

The aperture and fabric combination give a great textured feel to the card:


Can't wait to see what you make of this challenge.

Sara xx

Friday, 3 December 2010

Some little rays of christmas cheer


Yay! I've made it home. Set off from Plymouth this morning and it was cold but clear, then it's got whiter and whiter and then the snow deeper and deeper, the nearer I got to home. DH picked me up at Meadowhall and now I'm warm and cosy again and really don't care too much if I get stuck now. At least I'd be stuck in the right place - with DH and Bess.

Thanks to everyone for your kind comments on yesterday's video. I feel encouraged to make more of them in the future so watch this space.

For today, I have another card. Our sketch challenge this month over at In Love With Stamping is this:


I squared the design off a little to create this:


Recipe
Stamp sets: Medallion, Perfect Punches, Tiny Tags
Cardstock: Basic Black, Real Red
Ink: Versamark
Punches: 1-3/4" Circle, 1-3/8" Circle, Jewelry Tag
Satin Ribbon: Real Red
3mm Taffeta Ribbon: Basic Black
Other: Silver EP, Black EP, Silver Brad

The card blank is a 5" square of Basic Black. The Medallion was stamped with Versamark on Basic Black card and then heat embossed with Silver EP. It's easier to stamp onto a bigger square of Black and then trim it to position the Medallion exactly where you want it. This square was cut diagonally into three sections and adhered direct to a square of Real Red card. Sticky Strip was laid across the top left corner and Real Red Satin Ribbon ruffled across the Sticky Strip. The Merry sentiment from the Tiny Tags stamp set was stamped in Versamark onto Real Red card, heat embossed with Black EP then punched out with the Jewelry Tag. This was secured to some 3mm Basic Black Taffeta Ribbon with a Silver Brad and then wrapped over the ruffled ribbon. These layers were adhered direct to the card blank. The Joy at Christmas sentiment from the Perfect Punches stamp set was stamped in Versamark on Real Red card and heat embossed with Black EP. The centre of the sentiment was punched out with the 1-3/8" Circle. This was popped up on dimensionals on Basic Black card punched with the 1-3/4" Circle and then popped on more dimensionals in the centre of the Medallion.

This is for a female friend whose favourite colour combo is black, red and silver but I think it would work equally well as a man's christmas card.

Look forward to seeing your take on these challenges in the ILWS gallery.

Have a safe and warm weekend.

Sara xx

Wednesday, 10 November 2010

Card candy swaps


Warning! Today's post is pic heavy.

I just lurve card candy, they're like regular crafting, squeezed into a concentrate, lol. And if I could only bear to part with them they make great presents for crafting friends too!

I took part in one of the ILWS organised swaps at Convention and made 10 lots of this candy:


Recipe

Stamp set: Serene Snowflakes, Four the Holidays (sentiment set)

Cardstock: Baja Breeze, Not Quite Navy, Whisper White, Medium Window Sheet, Vellum Paper

Ink: Not Quite Navy, Stazon White, Baja Breeze, Versamark

DSP: Elegant Soiree

Punches: Scallop Trim Border, Ornament, Butterfly, Scallop Square, 1-3/4” Circle, 1-3/8” Circle, 1” Circle, Star, Tag, Small Tag

Narrow Grosgrain Ribbon: Whisper White

Other: Silver Elastic Cord, Basic Rhinestones, Clear Rhinestone Brads, Dazzling Diamonds, Silver EP, White EP, Silver Brads, Large Silver Brad (Hodge Podge)


And these are all the lovely swaps that I got in return from the super talented ladies in my group (Group 3) (and I got to keep one of my own if you're wondering what happened to the 10th - it's not going spare, heehee).


From Emma using Cottage Garden


From Margaret using For Everything


From Michelle using Artisitic Etchings


From Kirsteen using Tiny Tags


From Rachel using Vintage Vogue


From Val using Growing Green


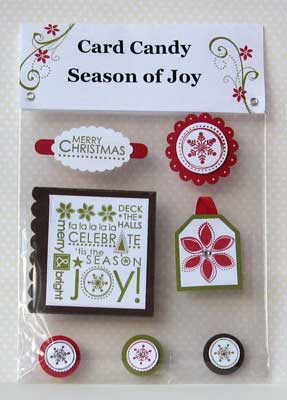
From Marisa using Season of Joy


From Jo using Cottage Garden


From Nicci using Contempo Christmas


And because Joanne and Jan (my upline and downline, together with me at Convention) were so jealous of my candy we've decide to have a little candy swap of our own so please pop back soon to see what we create for that.

Want your own card candy? Book a workshop with me and you and your friends can have a go at making your own. Just email me to find out how.

See you soon.

Sara xx

Sunday, 8 August 2010

Birthday, wedding or anniversary card in Kraft, Vanilla and Gold


It was my friend's birthday last Friday and this is the card that I made for her (she should have received it by now so I think I'm safe to show it). As I was preparing the pix for this blogpost though, I started thinking that it would work equally well as a wedding or anniversary card. What do you think?


Recipe
Stamp set: Tiny Tags
Cardstock: Kraft, Very Vanilla
Ink: Versamark
DSP: Bridesmaid
Punches: 5-Petal Flower, Medium Jewelry Tag, Boho Blossoms
Other: Gold EP, Gold Elastic Cord, Cream Halfback Pearl (Pretties Kit)

The card blank is Kraft (soon to be renamed Crumb Cake) and this was matted with a layer of Very Vanilla and another layer of Kraft. I punched two 5-Petal Flowers from the Bridesmaid DSP and pencilled around one of them to work out where to stamp the larger flower spray from the Tiny Tags stamp set. This was stamped three times in Versamark and heat embossed with Gold EP. The pencil marks were erased and the flower added using glue dots, with a medium sized Kraft Boho Blossom and a halfback pearl to finish the centre. The heart and the love sentiment from the same stamp set were stamped in Versamark onto Very Vanilla card, heat embossed with Gold EP and punched out with the Medium Jewelry Tag. They were then threaded onto some Gold Elastic Cord. A strip of Bridesmaid DSP was strengthened with scrap card (to prevent the cord from buckling it), wrapped with the gold cord (secured in place on the reverse with Sticky Strip) and popped up on dimensionals. The tags were popped up on half dimensionals and arranged in place.

Here's a close up to show the gold embossing:


The Tiny Tags set is one of the two-step Stampin' sets that we have on offer this month and is reduced from £18.95 to £15.16 (offer valid 1-31 August 2010). Please email me if you'd like to order.

Enjoy the rest of your weekend.

Sara xx

Wednesday, 4 August 2010

August colour challenge at ILWS - take 2


Yesterday I shared my first sample for the colour challenge this month over at ILWS which uses:
  • Basic Gray
  • So Saffron
  • Certainly Celery
  • Whisper White
Today I have a different card using the same colour combo ... and I just couldn't resist using my Vintage Vogue set, I knew it would look great in these colours:


Recipe
Stamp sets: Vintage Vogue, Very Vintage, Tiny Tags
Textured Cardstock: Basic Gray
Plain Cardstock: So Saffron, Whisper White
Ink: So Saffron, Basic Gray, Certainly Celery
Punches: Eyelet Border, Medium Jewelry Tag, 1/4" Circle
Brads: Certainly Celery (Soft Subtles), So Saffron (Rich Regals)

Throughout, I stamped the Basic Gray ink off once each time to get a softer shade of grey. First I used the Very Vintage wheel to stamp the background in Basic Gray onto So Saffron card. I stamped the butterfly area of the image again onto a scrap of So Saffron and cut it out to use later. The edges of the background were punched with the Eyelet Border and then this layer was adhered direct to a layer of Textured Basic Gray card. The Tiny Tags were stamped, punched and added to the corners with Certainly Celery Brads. For the flowers I used the rock and roll technique. I inked the stamp up first with So Saffron and the rolled the edges of the stamp in Basic Gray and stamped onto Whisper White card. The leaves were simply stamped with Certainly Celery ink. Each flower was cut out with a narrow margin, shaped and in the centre a 1/4" Circle of punched Textured Basic Gray card added with a So Saffron brad. These were popped up on dimensionals. The leaves were also cut out with a narrow margin, shaped a little at the end and added on glue dots. Finally a rolled up glue dot was added to the spine of the butterfly and lined up over the one on the background.

Thanks for stopping by.

Sara xx

Monday, 5 July 2010

July colour combo challenge at In Love With Stamping


This is my second take on the colour challenge I set over at ILWS which was to use Lovely Lilac, Almost Amethyst and Chocolate Chip (with optional Whisper White or Very Vanilla).


Recipe
Stamp sets: En Francais, Tiny Tags
Cardstock: Almost Amethyst, Chocolate Chip, Lovely Lilac, Whisper White
Ink: Lovely Lilac
Punches: Boho Blossoms, Medium Jewelry Tag
Narrow Grosgrain Ribbon: Chocolate Chip
Other: Large Flower, Halfback Pearls (Pretties Kit)

My card blank is a 4-1/2" square in Almost Amethyst. This was matted with Chocolate Chip, popped up on dimensionals. A 4" square of Almost Amethyst was wrapped with two parallel strands of Chocolate Chip grosgrain ribbon, interwoven at the corner. Using Lovely Lilac ink, I stamped En Francais onto the largest flower from the Pretties Kit. The largest flower from the Boho Blossoms punch was added in Lovely Lilac card for the centre, topped off with a large white halfback pearl. This was adhered into the empty frame created by the ribbon. Finally, the tag shape and the sentiment were stamped onto Whisper White card (using the stamp-a-ma-jig to get the positioning right) and punched out with the Medium Jewelry Tag. A small white halfback pearl was added with a glue dot and the tag popped up on half a dimensional onto a Lovely Lilac tag also popped up. This mat was popped up on dimensionals onto the card front.

I love the touch of elegance that the Pretties Kit gives, don't you?

Sara xx

Tuesday, 1 June 2010

A bookmark card for the June ILWS inspiration challenge


It's a new month (how can we be halfway through the year already) and so we have a new set of challenges over at In Love With Stamping. This month we have:
  • Inspiration Piece
  • Colour Combo
  • Sketch
  • Technique
and you can play along at any time.

Over the next six days I'll take you through each of my DT samples.

Now I noticed from my Current Stamp Set listing in the right hand side menu that some of my stamps haven't been used very often and so I set myself an extra challenge this month to dust off those overlooked stamps and include them in my samples. And I'm so glad that I did. They're all great stamps but I've got into a rut recently of reaching for my favourites (did anyone say Vintage Vogue *blushes*). Do you have overlooked stamps too? Which ones are they? If they're SU and I have them, then I'll try to include them in my posts later this month.

So, first up - our inspiration piece:


Although it's a fancy tag from a pair of jeans it reminded me of bookmark and so it inspired me to make a bookmark card. I also tried to use a similar colour scheme and pattern and came up with this:


Recipe
Stamp sets: Bella Toile, Oval All, Tiny Tags
Cardstock: Sahara Sand, Lavender Lace
Ink: Basic Gray, Lavender Lace, Basic Black
Punches: Large Oval, Scallop Oval, Scallop Edge
Taffeta Ribbon: Whisper White
Other: Antique Brass Jumbo Eyelet, Cutter Kit

I started with an A6 Sahara Sand card blank and trimmed 3.5cm from the right hand side of the card front. Using a brayer to get even coverage, the Bella Toile background was inked with Basic Gray, stamped off once (onto coloured card which I put aside to use elsewhere) and then stamped onto the closed card so that it covers the card front and the exposed card back. With the perforating tool of the cutter kit I created a perforated line along the back of the card for the bookmark. A scallop edge strip of Lavender Lace was added up against the perforated line. The Just For You sentiment was stamped in Basic Gray on Sahara Sand card and punched with the large Oval. It was popped up on dimensionals onto a Scallop Oval of Lavender Lace. These ovals were also popped up on dimensionals and added to the front of the card. An Antique Brass Jumbo Eyelet was set at the top centre of the bookmark. Whisper White taffeta ribbon was coloured with a Lavender Lace marker and tied through the Jumbo Eyelet. The bookmark was finished by stamping the damask type image from the Tiny Tags in Basic Black at the bottom centre of the bookmark.

Once the recipient is finished with the card they just bend and tear off along the perforation and they have a bookmark.

Please don't forget to leave me a comment if you have any dusty SU stamps (or just want to comment generally of course - I appreciate them all).

Sara xx

Thursday, 27 May 2010

Easy edged christmas cards in two different colourways


Here are a couple of the card designs that I demo'd to the St Saviour's group at the weekend. I prepared the Not Quite Navy samples beforehand and then made up the Rich Razzleberry versions on the day. I love this new colour and think I may be using a lot of it for my christmas cards this year.


Recipe
Stamp sets: Silent Night, Occasional Greetings (sentiment)
Cardstock: Not Quite Navy, Very Vanilla
Ink: Not Quite Navy
Taffeta Ribbon: Very Vanilla

A Very Vanilla A6 card front (14.9cm x 10.5cm piece) was stamped with the church in Not Quite Navy. I then cut the top third of an A4 sheet so I had a piece measuring 21cm x 10.5cm and scored at 14.8cm along the long edge to make an A6 wraparound. I tore the narrower side, using the stamped image to judge how much to tear off. The sentiment was then added above the church using the stamp-a-ma-jig for placement. Two pieces of ribbon were adhered behind the torn edge and tied at the front and trimmed. The torn edge was then adhered to the Vary Vanilla card front to hide the ribbon ends.


Recipe
Stamp sets: Silent Night, Tiny Tags, Occasional Greetings (sentiment)
Cardstock: Rich Razzleberry, Very Vanilla
Ink: Rich Razzleberry
Taffeta Ribbon: Very Vanilla
Punch: Medium Jewelry Tag
Other: Silver Elastic Cord

This version was made as for the Not Quite Navy card above but substituting Not Quite Navy with Rich Razzleberry. I also stamped and punched a couple of the Tiny Tag sentiments and tied them to the ribbon with the Silver Elastic Cord.


Recipe
Stamp sets: Silent Night, Serene Snowflakes, Occasional Greetings (sentiment)
Cardstock: Not Quite Navy, Very Vanilla
Ink: Not Quite Navy, Platinum Shimmer Paint
Punches: Eyelet Border, Scallop Oval, Large Oval

I cut the remainder of the coloured card (used for the torn edge version) in half lengthwise (to get 2 pieces measuring 19.2cm x 10.5cm) and scored one at 14.8cm along the long edge. This allows you to get 3 wraparounds (1 torn and 2 punched) from one A4 sheet. The narrower section was punched with the Eyelet Border and stamped with the trio of small snowflakes in Platinum shimmer paint. A Very Vanilla card front was stamped with the church in Not Quite Navy ink and adhered to the wrap. The sentiment was stamped in Not Quite Navy, punched and matted onto a scallop oval.


Recipe
Stamp sets: Silent Night, Serene Snowflakes, Occasional Greetings (sentiment)
Cardstock: Rich Razzleberry, Very Vanilla
Ink: Rich Razzleberry, Platinum Shimmer Paint
Punches: Eyelet Border, Scallop Oval, Large Oval

This version was made in exactly the same way as above just substituting the Not Quite Navy with Rich Razzleberry.

Great cards to stamp-a-stack in front of the TV over a couple of nights. You'll be ready for christmas in no time.

Sara xx

Friday, 21 May 2010

Bright polka dot set using printed window sheets


Back again and catching up on sleep. I never seem to sleep well when I'm working away (and yet I sleep so well if I'm away on holiday - guess it's my frame of mind). Still my visit to Cardiff gave me chance to meet up again with a crafting friend from the ILWS forum and have a great evening chatting crafting - thanks Dawn!

Today I have a matching set of cards that make a great gift set when packaged up. They're ideal to keep in for a last minute gift or to sell at craft fairs or school fetes. I've put mine in a clear plastic box that I got through a recent share but you could easily make a gift bag or a sized up mini pizza box to package them in.


All the cards use the printed window sheet from the Night & Day Specialty Paper pack and I got four cards from 1 sheet with a spare strip left over. The other papers in the pack are great for monochrome cards and items or they can be transformed by brayering coloured ink over as I did here.


The set started with this card that I blogged last month. Click here for the full details.


Recipe
Stamps: I {Heart} Hearts, Tiny Tags
Cardstock: Real Red
DSP: Night & Day Specialty
Ink: Basic Black, Versamark
Punches: Full Heart, Medium Jewelry Tag
Gingham Ribbon: Red
Other: Black EP, Linen Thread

The standard A6 card blank in Real Red was wrapped with the printed Window Sheet. Again, my wrap doesn't go all the way around, just about 1cm or so around the back, secured with Sticky Strip. Red gingham ribbon was tied around the card front and wrap and stamped sentiments from the Tiny Tags set (punched with the Medium Jewelry Tag) attached with twine. I stamped the Friend heart with Versamark on Real Red card, heat embossed with Black EP and punched it with the Full Heart before sticking to the front of the Window Sheet.


Recipe
Stamps: In the Stars, Tiny Tags
Cardstock: Tempting Turquoise, Basic Black
DSP: Night & Day Specialty
Ink: Basic Black, Versamark
Punches: Large Star, Medium Jewelry Tag
Other: Black EP, Black Brads (Vintage), Linen Thread

This time I stamped the Tiny Tags onto Tempting Turquoise card and again punched them out with the Medium Jewelry Tag. I matted Basic Black, Tempting Turquoise (cut slightly smaller on all edges) and the Window Sheet and secured with Black Brads in each corner (this secured the Window sheet without having any glue showing) also pinning my Tiny Tags into the top left hand corner. These layers were then adhered to the front of the Tempting Turquoise card blank. The Wish for You star was stamped with Versamark on Tempting Turquoise card, heat embossed with Black EP and punched with the Large Star before sticking to the front of the Window Sheet.


Recipe
Stamps: Oval All, Tiny Tags
Cardstock: Green Galore, Basic Black
DSP: Night & Day Specialty
Ink: Basic Black, Versamark
Punches: Large Oval, Medium Jewelry Tag
Other: Black EP, Black Brads (Vintage)

The Green card is made the same way was the Turquoise one but switching Tempting Turquoise for Green Galore in all cases and using the Just for You oval stamp with the Large Oval punch.

A simple, quick and effective way to use those window sheets I think.

I'm at St Saviour's at High Green again tomorrow so may see some of you there *waves*. Don't forget to bring your Silent Night stamp set if you want to join in making some Christmas cards.

Have a great weekend.

Sara xx

Thursday, 13 May 2010

Razzleberry card box and co-ordinating gift bag


Yesterday I showed you the card I made for my SIL for her birthday (scroll down to see). Today it's the box that I made to hold the card and the gift bag to hold the silver bangle we bought her.


Recipe (Card Box)
Stamp sets: Vintage Vogue, Tiny Tags
Cardstock: Rich Razzleberry, Very Vanilla
Ink: Rich Razzleberry, Old Olive
DSP: Cottage Wall
Other: Pretties Kit (Half-back Pearls)

The box was adapted from the Mini Pizza Box over at Splitcoaststampers and sized up to hold the card.


It fits nice and snug.


Recipe
Stamp set: Tiny Tags
Cardstock: Rich Razzleberry, Very Vanilla
Ink: Rich Razzleberry, Old Olive
DSP: Cottage Wall
Punches: Eyelet Border, Round Tab, Medium Jewelry Tag
Satin Ribbon: Old Olive
Other: Jumbo Brass Eyelets, Twine

This box in a bag was also adapted/resized from a Splitcoaststampers tutorial.

Hope to bring you some inspiration in the Melon Mambo next.

Sara


Thursday, 15 April 2010

A bright card just to say Hi


Phew! Just one more day then I'm heading home. Looking forward to getting back to DH and Bess ... and sleep! I never sleep too well when I'm working away and all the studying means that my brain's still buzzing when my head hits the pillow. Let's just hope that it's still buzzing when the exam paper is put in front of me in June :-)

The card I have for you today is a quick one and an excellent way to use the Yoyo Yellow that many of us have difficulty with (probably why it's going in the Autumn).


Recipe
Stamps: Say it with Scallops, Tiny Tags
Cardstock: Yoyo Yellow
DSP: Night & Day Specialty
Ink: Basic Black, Versamark
Punches: Scallop Square, Medium Jewelry Tag
Gingham Ribbon: Black
Other: Black EP, Linen Thread

A standard A6 card blank in Yoyo Yellow was wrapped with the printed Window Sheet from the Night & Day Specialty paper. I'm canny with the good stuff so my wrap doesn't go all the way around, just about 1cm or so around the back, secured with Sticky Strip. Black gingham ribbon was tied around the card front and wrap and stamped sentiments (Hello and Hand crafted) from the Tiny Tags set attached with twine. I stamped the Hi scallop square with Versamark on Yoyo Yellow card, heat embossed with Black EP and punched it with the square scallop before sticking to the front of the Window Sheet.

Hmm - starting to think I may miss this colour now ...

Sara xx

Wednesday, 14 April 2010

An easel card for a new arrival


Hello from Cardiff. My course is very intense again and this has been my first chance to get on the internet since I got here. On Monday night I was lucky enough to meet up with a friend from the In Love With Stamping forum (Hi Dawn *waves*) and had a lovely evening nattering about craft. Last night and tonight it's back to the books as our tutors give us a test every morning - grrr.

On Monday morning I received news that our friend's baby boy had arrived. (Not so little) James was 9lb 4oz and Mum and baby are doing well. Luckily I'd planned ahead and left DH with this card to send from us:


Recipe:
Stamps: All for Friends (Level 2 hostess), Tiny Tags, Curvy Verses (sentiment inside)
Cardstock: Sage Shadow, Ballet Blue, Whisper White
Ink: Ballet Blue, Sage Shadow, Black Stazon, SU Watercolour Wonder Crayons
DSP: Sweet Pea Paper Stack
Punches: Scallop Oval, Large Oval, Medium Jewelry Tag
Other: Buttons (Soft Subtles), Linen Thread


I started with a 5" card blank in Sage Shadow which I folded for an easel card and matted with Ballet Blue and one of the new Sweet Pea papers that I cut to show the birds on the wire, to mirror the baby washing on the line. The romper suit was stamped three times with black stazon and painted with watercolours using my aquapainter. I then "hung" them with twine (just stuck to the back between the dimensionals) threaded through the buttons which were adhered with mini glue dots. I also used the new Tiny Tags and matching punch for the extra sentiment attached to the washing line:


Off now to revise for tomorrow. Hope your evening is more relaxed than mine.

Sara xx