Monday, 3 January 2011

A bright and bold thank you card


Our colour challenge this month at In Love With Stamping is:

Melon Mambo, Daffodil Delight, Chocolate Chip and Pumpkin Pie

Zingy!

With such a mix of colours I'd usually tone them down a little but as I need a thank you card for my MIL and FIL and MIL loves bright colours I decided to go full on.


Recipe
Stamp set: Pocket Silhouettes
Cardstock: Melon Mambo, Daffodil Delight, Pumpkin Pie, Chocolate Chip, Whisper White
Ink: Melon Mambo, Daffodil Delight, Pumpkin Pie, Chocolate Chip
Punches: 1-3/8" Square, 1-1/4" Square, Word Window, Scallop Edge Border
Other: Filigree Brad

The card blank is an A6 landscape of Melon Mambo. A panel of Chocolate Chip was cut to the same depth as the 1-3/8" Square, turned as a diamond, and was then matted with narrow strips of Pumpkin Pie card top and bottom. A Scallop Edge Border was punched from Daffodil Delight and adhered behind the bottom mat of Pumpkin Pie. These layers were adhered direct to the card front and the waste trim from the Scallop Edge Border was adhered above the top layer of Pumpkin Pie. The flowers were stamped separately in Melon, Daffodil and Pumpkin on Whisper White card and punched with the 1-1/4" Square, positioning the image as a diamond rather than a square. Each was matted onto corresponding card punched with the 1-3/8" Square. They were then popped up on dimensionals on the Chocolate Chip layer. The sentiment was stamped in Chocolate Chip ink on Whisper White card, punched out with the Word Window and adhered direct to the card front. A filigree brad was added to the edge of the sentiment.

Hope to see your own concoctions made with this colour combo in the ILWS gallery.

Sara xx

Sunday, 2 January 2011

Scrapbooking in the new year with pix from the last


Another of our challenges this month over at In Love With Stamping is:

a scrapbook page!

and I'm so glad that this was set as a challenge as I finally got around to downloading my photos from my holidays earlier in the year. Better still, I've actually printed off some pix and scrapped them.


Recipe
Stamp set: Just Believe
Cardstock: Cajun Craze, Peach Parfait, Early Espresso
Ink: Cajun Craze
DSP: In-Color Paper Pack (hostess level 1)
Punches: Curly Label, Boho Blossoms
Other: Neutrals Brads (Early Espresso)

The base page is a 6" x 6" of Cajun Craze card. For the borders, top and bottom, I trimmed the same pattern of Peach Parfait paper from the In Color hostess pack, matted them on a thin strip of Early Espresso card and adhered them direct to the page. Each of the photos was matted with Peach Parfait card and also matted direct. For the top label I used my computer to printed the place and year onto Very Vanilla card and then stamped over the top of it with the square type label from the Just Believe set in Cajun Craze ink. This was cut out leaving a small margin all around. For the bottom label I used my stamp-a-ma-jig and Cajun Craze marker to rearrange the sentiment, colouring the needed lines of the sentiment direct to stamp, positioning, stamping, repeating (and cleaning well between each stamping). This sentiment was punched out with the Curly Label. The smallest Boho Blossom was punched twice from Peach Parfait card, snipped between each petal and shaped, then secured with a brad to each sentiment label. The labels were then popped up on dimensionals.

Now is a great time to do your scrapbooking, whether it's the seasonal photos you've taken over the holiday period, or a reminder of the warmer and sunnier times from last summer. If you're in the South Yorkshire area, then come along and join my crop on Saturday 15 January (details here) or why not book a workshop with me (just email to book a date) and earn your free hostess sets at the same time.

Sara xx

Saturday, 1 January 2011

Happy New Year - let's start it with a challenge


A very Happy New Year to you!

(And sorry for shouting if you're feeling a little fragile this morning, lol.)

It's not only a new year but a new month and of course that means a fresh set of stamping challenges. One of our new challenges this month over at In Love With Stamping is:

to use wax - this could be a candle, waxed crayon or even embossing powder

I decided to use a waxed crayon for a technique that we saw demonstrated at convention with this exact same stamp set. We were lucky enough to get a sneak preview of all the Sale-a-bration sets and were given this particular one free, to take away with us!

Don't forget that you can also get your own set, also free, with any order of £45 or more from the latest Idea Book and Catalogue. Just email me to place your order.


Recipe
Stamp Set: Sweet Summer
Cardstock: Wild Wasabi, Garden Green, Whisper White
Ink: Wild Wasabi, So Saffron, Perfect Plum, Stazon Black
Punch: Eyelet Border
3mm Taffeta Ribbon: Whisper White
Non-SU: White wax crayon

The card blank is a 5" square of Wild Wasabi, matted with another square of Garden Green. I randomly stamped the leafy stems onto a square of Whisper White card with Black Stazon. The flower and butterfly were also stamped with the Black Stazon on scraps of Whisper White card. Using a white wax crayon, I then roughly traced the stems and coloured the leaves, flowers and butterfly with it. The large square was then brayered with Wild Wasabi ink. The ink is resisted wherever the wax crayon was applied. So Saffron Ink was brayered over the flowers and Perfect Plum over the butterfly, then all were cut out, leaving a small margin around each image. A narrow strip of Garden Green card was punched with the Eyelet Border and matted onto the lower portion of the main image. This was then wrapped with Whisper White narrow taffeta ribbon and adhered direct to the card front. A bow of matching taffeta ribbon was adhered with a glue dot. The cut out flowers and butterfly were popped up on dimensionals.

Have a great start to 2011!

Sara xx

Thursday, 30 December 2010

Yes Sale-a-bration is here!


Finally! I can share with you the fabulous sets that we have for this year's Sale-a-bration. And they're all stunners. I've got one of them already and I'm spending my christmas pennies and putting my order in today, to get the other three!

Get your FREE stamp sets by doing any of the following:

Spend
You'll get a free Sale-A-Bration stamp set when you spend £45 on Stampin' Up! goodies with me (before shipping and handling). There's no limit - for every £45 you spend, you choose another FREE set!

Hostess
You'll get a(nother) free Sale-A-Bration stamp set when you host a workshop of at least £300 (before handling and shipping) - in addition to all of the regular hostess benefits!

Join
Join my team during Sale-A-Bration and you can choose any stamp set—a value of up to £44.95—from our current Idea Book and Catalogue! This is in addition to the other benefits you get by joining me. You can join (for just £119, getting over £230 of products) and either run a business or be simply a hobby demo, getting discount on your own purchases. See here for more details.

And here are the Sale-a-bration sets:

Bliss - is beautiful and will work alone or with so many other sets eg. Vintage Vogue, Cottage Garden, Style Beautiful, Broadsheet Alphabet.


So Happy for You - you can never have too many sentiments and the dinky motifs will make great accents or backgrounds.


Sweet Summer - great for colouring in and building your own scenes.


Punch Bunch (my favourite, I think) - they'll work perfectly with our punches. Watch out for the Owl punch, coming soon in our Mini catalogue!


Email me to order, book a workshop or find out more about joining my team.

Sara xx

Tuesday, 28 December 2010

A sunny thank you for the Mojo Monday challenge


I hope that you're still enjoying the extended holidays. Now that Christmas is over and done, I'm in need of some thank you cards and decided to use the sketch inspiration over at MojoMonday as my starting point:


I opted for the square design and chose some sunny colours to add a bit of brightness to all this grey weather.


Recipe
Stamp set: Simply Said
Cardstock: Peach Parfait, Daffodil Delight
Ink: Daffodil Delight, Peach Parfait, Poppy Parade, Versamark, Signo White Gel Pen
DSP: Sunny Garden
Punch: Full Heart, Corner Rounder
Other: White EP

The card blank is a 5" square of Peach Parfait. Squares of Sunny Garden DSP had the outside corners rounded and were adhered direct. The flower spray from the Simply Said stamp set were stamped twice, side by side, in Versamark onto Peach Parfait card, heat embossed with White EP and then the flowers filled with the white gel pen. This layer was then matted direct to Daffodil Delight card and then popped up on dimensionals in the centre. The solid heart was stamped with Daffodil Delight onto Daffodil Delight card. Using the stamp-a-ma-jig I then stamped the words heart around it using Peach Parfait ink. The thank you sentiment was stamped over the top of both with Poppy Parade ink and then the heart punched out and popped up on dimensionals.

Think I'm going to need a few more thank you cards over the next few days. I've had such lovely presents and a hand-made thank you card shows how much they're appreciated.

Thanks for stopping by.

Sara xx
Sunday, 26 December 2010

Merry Christmas everyone


A Very Merry Christmas to everyonel!

I hope that you're having a wonderful christmas and have a few restful days planned to recover from it all, before we start again at new year.

My Mum and Dad came round for Christmas lunch yesterday. DH had planned when everything needed to go in the oven but I still managed to slightly burn the yorkshire puddings and the gravy was a bit late to the table. No-one complained though, lol.

Poor Dad had made this fabulous Christmas cake and we were all too stuffed to eat it. Never mind, I've got a large portion of it to taste over the next few days.


Today's card is the one I made for DH and I just managed to get it made before he opened his pressies yesterday morning. The DSP I've used is unfortunately retired now. This is the paper that made me so impatient to get my hands on the Baja Breeze cardstock. I just love it and I held onto a few sheets for special cards like this one.


Recipe
Stamp sets: Winter Post, Season of Joy (sentiment)
Cardstock: Baja Breeze, Very Vanilla
Ink: Baja Breeze, Soft Suede
DSP: Ski Slope (retired)
Punches: Scallop Oval, Large Oval, 1-3/4" Circle
Other: Sweet Treat Cups, Fine Cosmo Glitter, Medium Window Sheet

I followed Elaine's wonderful instructions here for creating the snowglobe portion of the card though I did fill it with more water than she recommends (and I did make this the night before to make sure there was enough time for the Crystal Effects to dry fully). The design of the card helps provide a bit of balance as the front is quite heavy. I stamped the main image using Baja Breeze and Soft Suede markers direct to stamp and then stamping onto Very Vanilla card. The 1-3/4" Circle was punched as far in from the top edge of the Ski Slope card front layer as it would go and then this was used to position the main image correctly. The snow globe was adhered behind the DSP and then the layers were added to the card front. More Ski Slope paper was added to the wings of the card. Finally the sentiment was stamped, punched and matted and then popped up on dimensionals under the image.

Here's a close up of the snowglobe.


Off now to get the food ready for MIL and FIL coming round.

Have a great Boxing Day.

Sara xx

Thursday, 23 December 2010

A red and gold gap card with baubles and a special inner


I hope that my MIL and FIL don't have time to read this before they come over on Boxing Day. I always make special cards for our parents, larger and more involved than my regular christmas cards, but what with working away and the weather, I've only just got these finished today (hoping to make DH's card tonight/tomorrow, lol, just call me Mrs Last Minute).

I've been meaning to have a go at a gap card ever since I saw AuroraDawn's fantabulous version last year and I have to say that I'm really pleased with how they've turned out.


Recipe
Stamp sets: Baroque Motifs, So Swirly, Occasional Greetings (sentiment)
Cardstock: Cherry Cobbler, Crumb Cake, Very Vanilla
Ink: Cherry Cobbler, Versamark, Stampin' Pastels
Punch: Ornament
Other: Gold EP, Gold Brads

The card blank is an A5 portrait of Cherry Cobbler card. A panel a bit thinner (about 6-8mm) than the width of the ornament punch was removed from front right of the card. A panel of Cherry Cobbler was stamped with the So Swirly wheel in Versamark and heat embossed with Gold EP. This was matted direct to Crumb Cake card and then to the left of the card front. The circular motif and the large swirl of the Baroque Motifs set were stamped twice onto Very Vanilla card with Cherry Cobbler ink and punched out with the Ornament. Using Versamark, the sentiment was stamped onto Very Vanilla card and heat embossed with Gold EP before also being punched out with the Ornament. All the baubles were chalked around the edges with Cherry Cobbler. The edges of the baubles were adhered direct across the gap in the card. Gold brads were added to the centres of the circular motifs.


Recipe (insert)
Stamp sets: So Swirly
Cardstock: Crumb Cake, Very Vanilla
Ink: Versamark
Non-SU: Printed Verse on computer

An insert of Crumb Cake card was stamped with the So Swirly wheel in Versamark for a subtle effect to show through the gap. The verse was printed onto Very Vanilla card, trimmed and adhered to the left of the insert so that it would not show through the gap when the card is closed.


Recipe (reverse)
Stamp sets: Baroque Motifs
Cardstock: Cherry Cobbler, Very Vanilla
Ink: Cherry Cobbler, Stampin' Pastels
Punch: Ornament, 1-1/4" Circle, 1" Circle

The ornaments were inked, chalked and punched as for the card front and adhered directly on the reverse of the originals. Three 1-1/4" Circles of Cherry Cobbler were punched and adhered direct to the centre three ornaments. A 1" Circle photo was punched of Bess, DH and me and matted to the centres.

Just two more sleeps to go heehee.

Sara xx


Wednesday, 22 December 2010

Little gifts for my Stampers 6 group


I've now been able to deliver the last of the orders to my Stampers 6 group and so I can now share the little gifts I made for each of them, with you.

Along with their order this month everyone got a little packet of christmas decorations and a dinky christmas cracker (can't tell you what's in that though just in case they've resisted and not opened it yet, lol).


Recipe
Stamp set: Sparkly and Bright
Cardstock: Cherry Cobbler, Very Vanilla, Crumb Cake, Old Olive, Early Espresso
Ink: Cherry Cobbler, Old Olive, Early Espresso
1/4" Grosgrain Ribbon: Very Vanilla
Punches: Scallop Trim, Scallop Circle, 1-3/8" Circle, 1-1/4" Circle
Other: Medium Cellophane Bags
Non-SU: Stapler

The images were stamped onto Very Vanilla card with the appropriate ink and punched out with the 1-1/4" Circle. They were then matted onto a matching 1-3/8" card Circle then a Scallop Circle of Crumb Cake cardstock. A loop of Very Vanilla grosgrain ribbon was added to the decorated front and a plain Crumb Cake Scallop Circle back and an Elizabeth Shaw mint was sandwiched between the two. The topper for the bag was made by folding over a piece of Cherry Cobbler card and stapling it in place. This was then decorated by stamping Very Vanilla card with the sentiment and the two images, punching along the bottom with the Scallop Trim then adhering it direct to the Cherry Cobbler layer, covering the staples.


Recipe
Stamp set: Sparkly and Bright
Cardstock: Cherry Cobbler, Old Olive, Very Vanilla
Ink: Cherry Cobbler
DSP: Jolly Holiday
Punches: Scallop Oval, Large Oval, 1/2" Circle
Other: Gold Elastic Cord

This is the same cracker that I made here but using Cherry Cobbler and Very Vanilla instead of Real Red and Whisper White and finished at either end with some Gold Elastic Cord.

Hope you're keeping warm.

Sara xx

Monday, 20 December 2010

A batch of xmas cards with a bit of bling


We had a fantastic meal out with my parents for their anniversary on Saturday night. The restaurant had a real fire that was so cosy in contrast to the biting cold outside. And the food, the food was heaven. I was so glad we were able to make it even though the journey was a little risky. Little bruv did a great job driving the minibus.

Anyway, on with the crafting. I hope that I'm not spoiling the surprise for anyone with my post today. All my Christmas cards are on their way, but I guess with the weather conditions, there's no guarantee that they've arrived on time. I used two different designs for my batches of cards this year (in addition to the individual cards I've made throughout the year). This is one of them. I think I made around three dozen or so of these in total.


This is styled on an earlier card you can see here.


Recipe
Stamp set: Contempo Christmas, Serene Snowflakes
Cardstock: Cherry Cobbler, Naturals Ivory, Crumb Cake
Ink: Cherry Cobbler, Soft Suede, Versamark, Champagne Mist Shimmer Paint
Punch: Ornament
Other: Heat & Stick Powder, Fine Galaxy Glitter
Tools: Heat Tool, Crimper

The card is made in a similar way to the earlier version but the crimped square was sprayed with a shimmer mist that was made by mixing the Champagne Mist Shimmer Paint with rubbing alcohol in a spray bottle. For the side panels, the small single snowflake from Serene Snowflakes was stamped in Soft Suede onto the Naturals Ivory and the trio of snowflakes was stamped direct with undiluted Shimmer Paint.


For the inside, a mat of Naturals Ivory was stamped with the snowflake again in Soft Suede and with the sentiment from the Contempo Christmas in Cherry Cobbler.

Thanks for stopping by.

Sara xx

Saturday, 18 December 2010

A Sapphire Wedding Anniversary card for my Mum and Dad


Sorry that I've not posted as regularly as usual the last few days. I'm rushing trying to get everything made and out to friends and family before christmas/the snow hits again and while I've been very busy crafting, I'm holding back from posting it all, so as not to spoil any surprises.

I feel pretty safe posting this one now though. Today is my Mum and Dad's Sapphire Wedding Anniversary. We're off out tonight with Mum and Dad and my brother and SIL, for a meal to celebrate, just as long as the snow holds off a bit longer. I somehow doubt that Mum will have time to check my blog before we go, lol.


Recipe
Stamp set: I {Heart} Hearts
Cardstock: Shimmery White, Marina Mist
Ink: Marina Mist
Punches: Full Heart, Heart to Heart, Small Heart
Other: Fine Cosmo Glitter
Non- SU: Computer, Die cuts

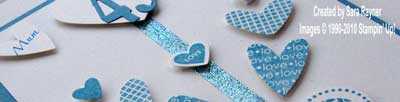
I kept the design simple because the cardstock has a lustrous sheen that I wanted to focus on (though the camera doesn't really pick it up too well). The card base is a portrait A5 blank of Shimmery White, with a mat of Marina Mist card on top of it. A strip of Sticky Strip was added down the centre of a mat of Shimmery White and a mix of the Turquoise and Light Blue glitters adhered to it. The large hearts were stamped in Marina Mist onto the Shimmery White cardstock (using the stamp-a-ma-jig for alignment) and cut out by hand. The medium and small hearts were stamped and punched. I typed the Mum and Dad sentiments on the computer, printed them onto the Shimmery White card (it takes the print very well) and punched them out. The "45" was die cut from Marina Mist card and adhered to a Full Heart punched from Shimmery White cardstock. All the hearts were popped up on dimensionals on the card front which was adhered direct to the Marina Mist layer.

Enjoy the rest of your weekend.

Sara xx